background image

The glider is considered a sidewalk bike. As such, it does not meet the full requirements of a bicycle (height, 
reflectors, and brakes) and therefore should never be ridden on a road, street, or anywhere where cars may be 
traveling.  It is designed for small kids to be ridden on sidewalks only and always under adult supervision. 

This bike was designed for kids.  It should not be ridden by an adult.  The maximum weight limit is 100 lbs (36 kg). 

A child 

MUST 

wear a helmet while operating this glider or any bicycle. 

EZee Gliders have limited braking power (rear brake only), and depend on good coordination of the rider.  Avoid 
riding on inclines like a sloped driveway and near drop offs like a curb or near a swimming pool. 

Before riding fast or in more difficult conditions, learn the function and performance of all the mechanisms of your 
glider by riding at slower speeds in a flat, empty area. Practice at slow speeds first by walking along while seated 
on the bike. 

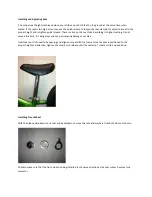
Make sure your Glider fits your child properly. 

Make sure there is adequate clearance between your child and the bike frame. 
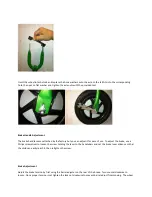
Operation 

The EZee Glider works by allowing children to learn at their own pace while feeling safe that they are not going to 
fall.  The bike was designed with a low-center of gravity and slack head angle for better control and balance. 

Some children learn very quickly while others may take longer. This depends on age, ability, and other factors.  The 
EZee Glider will help them achieve the goal of riding a bike as quickly as possible, while providing then with a fun 
toy that they will continue to enjoy long after they have learned to ride. 

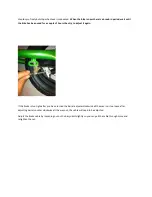
Start using the Glider by sitting on the bike and pushing your feet. The action should be just like walking, one foot 
in front of the other and pushing off with each foot.  Once you become familiar with the way it works, you can 
start walking faster, giving yourself increasingly harder pushes with your feet, until you start to glide along. Once 
you start gliding, you can place your feet on the foot pegs. 

For examples of gliding techniques please visit our website: 

WWW.GLIDEBIKES.COM

, and click on Video Clips Link. 

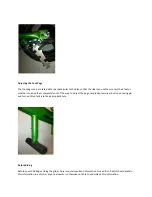
Because the EZee Glider is so effective, it is better to let the child learn at their own pace. We recommend not 
holding or pushing the child on the bike before they learn to balance because it prevents the learning process from 
happening. 

Warning 

An EZee Glider rider may not be visible to others, which can cause a collision resulting in a severe injury. Failure to 
avoid all automobile paths will increase your chances of being involved in an accident. 

Know and obey all local bicycle riding laws. 

Frames or parts under high stress may fatigue prematurely, causing them to fail and increasing the risk to the rider. 
The following riding practices increase the risk of injury to you and the risk of damage to your glider: 

Hopping or jumping on your glider 

Summary of Contents for Glider

Page 1: ...eeded for Assembly Wrench included Philips Screwdriver not included Assembly Instructions Your Glider comes partially assembled The only things that you need to do are install the front wheel install and adjust the handlebars and put in the seat Installing and Adjusting the Handle bar 1 Remove the plastic cover on the end of the handlebar stem by first removing the Velcro cover on top of the handl...

Page 2: ...rame 3 Tighten 12 mm bolt with provided wrench on top of stem until front wheel and handlebars won t twist 4 To adjust the angle of the handlebars for smaller riders simply loosen 13 mm nut on front of the handle bars and rotate the handles to the desired angle and retighten Loosen screw on brake handle attachment to adjust accordingly ...

Page 3: ...ting Do not exceed this limit it is dangerous and can permanently damage your bike Insert seat post into seat tube opening and align your seat with the frame Once the seat is positioned to the proper height and direction tighten the silver quick release until the seat won t rotate or slide up and down Installing Front Wheel With the bike upside down on its seat and handlebars remove the nuts and w...

Page 4: ...ou can adjust it for ease of use To adjust the brake use a Philips screwdriver to loosen the screw holding the lever to the handlebars and set the brake lever distance so that the child can easily reach it then retighten the screw Brake Adjustment Adjust the brake tension by first using the barrel adjuster on the rear of the brake Turn counterclockwise to loosen Once proper tension is set tighten ...

Page 5: ...s then try to adjust it again If the brake is too tight after you have turned the barrel adjuster clockwise all the way in or too loose after adjusting barrel counter clockwise all the way out the cable will need to be adjusted Adjust the brake cable by loosening nut on the banjo bolt slightly so you can pull the cable through more and retighten the nut ...

Page 6: ...ompletely out of the way To adjust the pegs simply depress silver button on spring pin and turn until tab falls into the appropriate hole Before Riding Before your child begins riding the glider here is some important information to read first Adults should explain this information to a child or anyone else who is otherwise not able to understand this information ...

Page 7: ...quickly while others may take longer This depends on age ability and other factors The EZee Glider will help them achieve the goal of riding a bike as quickly as possible while providing then with a fun toy that they will continue to enjoy long after they have learned to ride Start using the Glider by sitting on the bike and pushing your feet The action should be just like walking one foot in fron...

Page 8: ...age Check seat for proper installation A bicycle that does not work properly can cause you to lose control and fall Inspect the entire bicycle thoroughly before every ride and do not ride it until any problems have been corrected Carefully inspect your glider for the following signs of fatigue Dents Cracks Deformation If any part shows signs of damage replace the part before riding the glider If y...

Reviews: