Serial Communication, cont’d
USP 405 • Serial Communication
3-10
2.
Under
System selection
, choose the System 7SC. This selection creates the
correctly sized labels for the USP’s buttons. The button label editing area
changes to reflect the number and arrangement of buttons on the device.
3.
Using normal Windows controls, you can create and print labels that can
be cut out and placed in the label windows on the front panel of the USP.
For information about using the program, you can access a help file by clicking
on the Help menu on the main screen and choosing
Show Help
.
You can also see an example of a completed Extron Button-Label Generator
window by clicking on the Help menu on the main screen, choosing
Show Help
,
and clicking the Load Demo button.
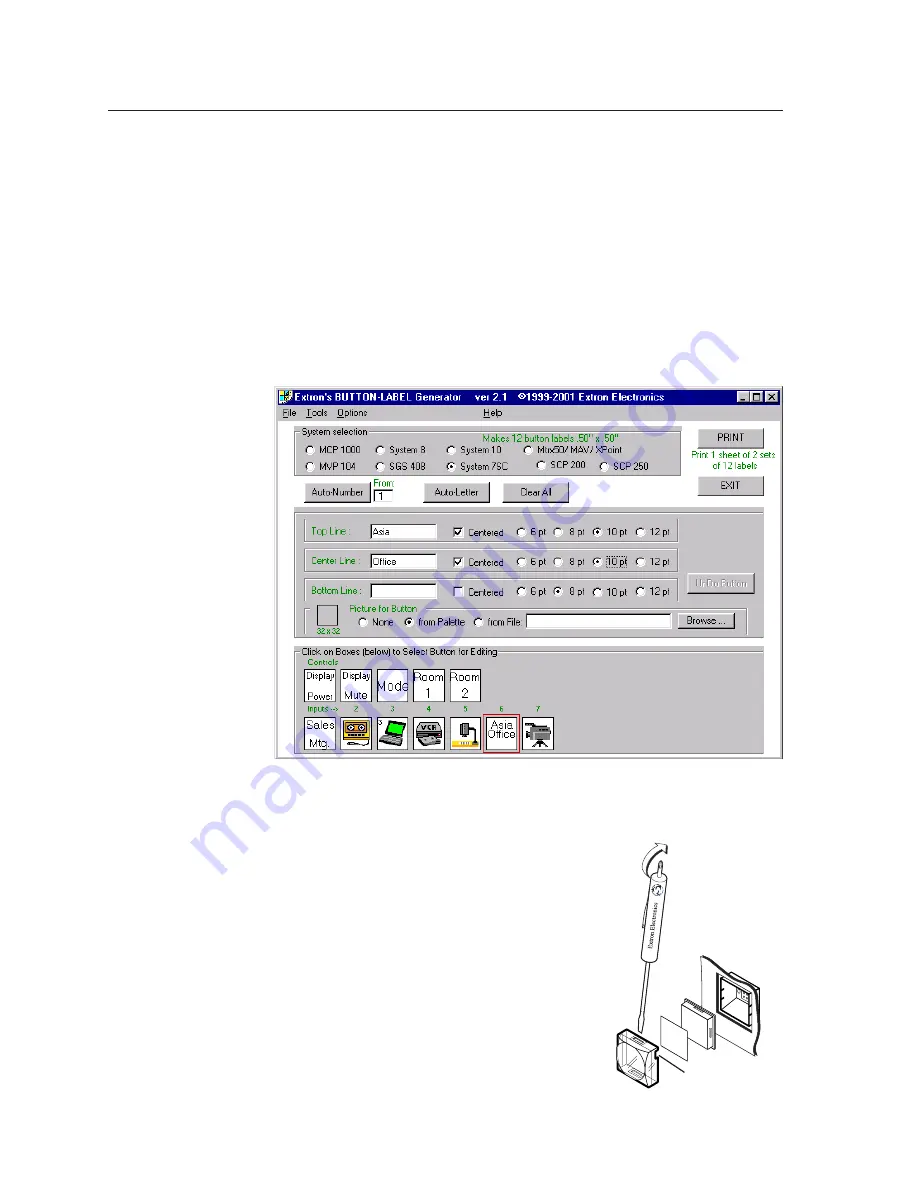
The following picture shows the Button-Label Generator screen.
Button label screen
Installing labels in the USP 405’s buttons
Use the following procedure to install new labels in
the USP 405’s front panel buttons.
1.
Make new labels by using the Button-Label
Generator software (see the previous page).
Print them and cut them out.
2.
Remove a button from the USP by grasping the
button firmly and pulling it away from the
front panel.
3.
Use a tweeker to gently lever the button cap off
of the white backing plate.
4.
Insert a button label into the cap and gently but
firmly press the cap onto the white backing
plate.
5.
Press the button into place in the front panel.
TEXT
Separate two
piece button here
Use notch to
remove button
im Vertrieb von
CAMBOARD Electronics
www.camboard.de
Tel. 07131 911201
Fax 07131 911203


