6
Cable Cubby 1252 MS • Installation Guide (Continued)
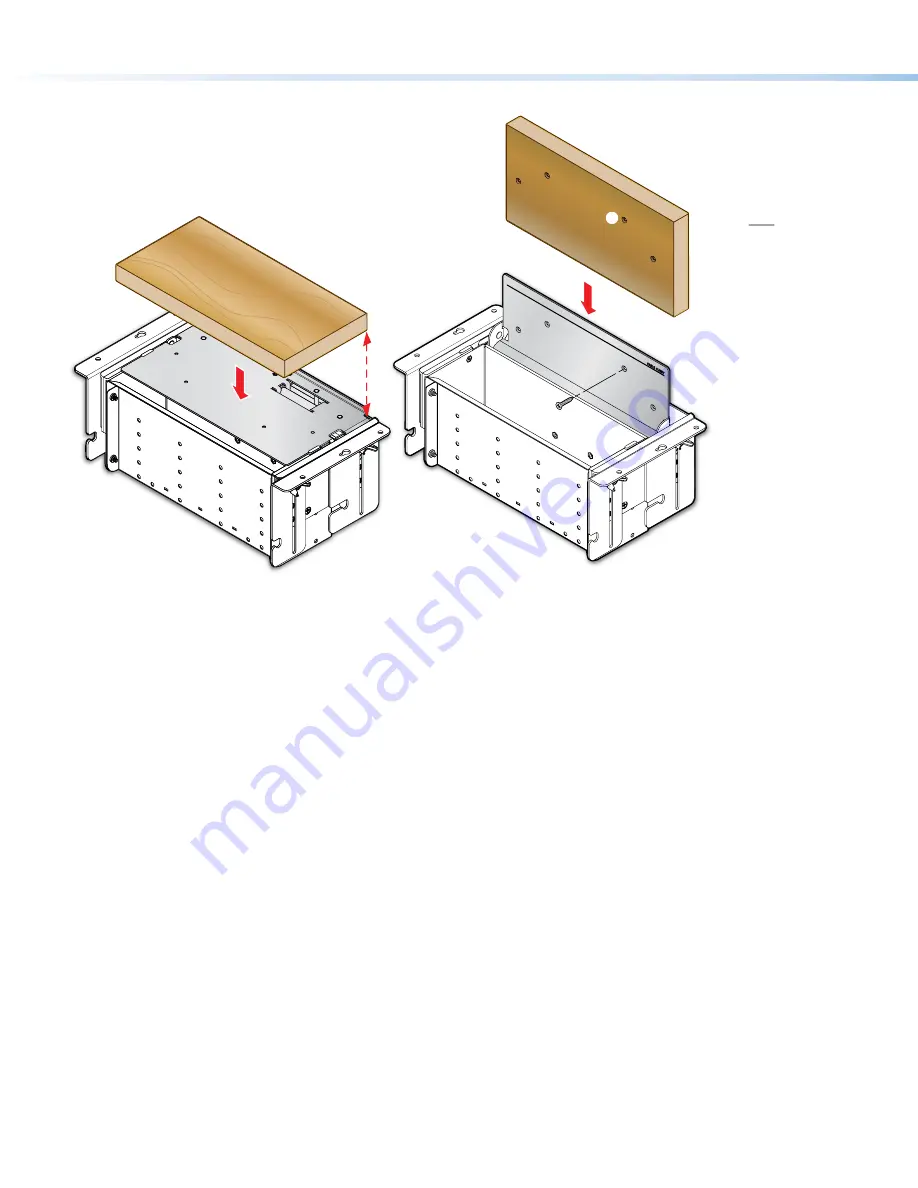
Step 3 — Mount the lid onto the Cable Cubby
If using screws,
perform
2
and
3
.
If NOT using screws,
perform
4
.
Option 2a: Mount lid
insert with screw
Mark and drill four
1/16-inch pilot holes.
Secure the lid onto the
Cable Cubby using #4
flat head wood
screws.
— OR —
Option 2b: Mount the
fabricated lid without
screws
Secure the lid onto the
Cable Cubby using the
proper adhesive.
2
3
4
Align the lid to the Cable
Cubby. The back edge of
the lid lines up with the back
edge of the lid mechanism.
1
1
4
O
i
O
f
s
2
3
4
mechanism.
Extr
on
Extr
on
2
3
Mounting the Cable Cubby in the Table
1.
See the dimension on
on page 3 for the mounting hole locations
OR
have an assistant hold the Cable Cubby against
the underside of the mounting surface.
2.
Install the screws in the two center pre-drilled mounting holes on each side, leaving 1/8 inch (4 mm) of the screw head
exposed.
3.
Use the two center slotted mounting holes on the mounting bracket to hang the Cable Cubby on the two installed screws.
4.
Snug the two screws just so that the Cable Cubby can still be moved on its slotted holes.
5.
Adjust the Cable Cubby position and alignment.
6.
Tighten the center mounting screws while maintaining the position and alignment of the Cable Cubby.
7.
Install the remaining mounting screws and secure the Cable Cubby to the table.


