4
68-2951-01 Rev. A
7 21
© 2021 Extron — All rights re
All trademarks mentioned are the property of their respective owners.
Worldwide Headquarters:
Extron USA West, 1025 E. Ball Road, Anaheim, CA 92805, 800.633.9876
For information on safety guidelines, regulatory compliances, EMI/EMF compatibility, accessibility, and related topics, see the
Safety and Regulatory Compliance Guide
on the Extron website.
Annotation Graphics Overview
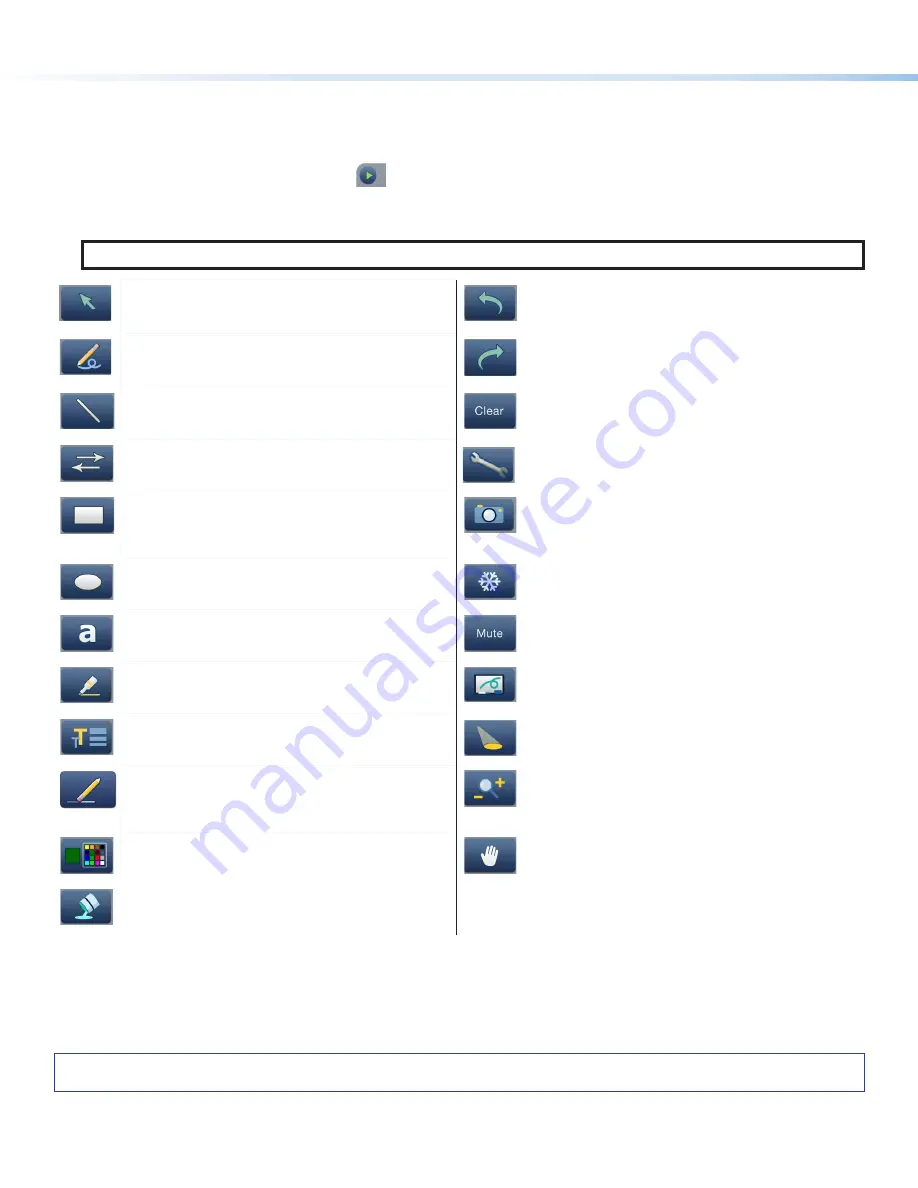
The Annotator 401 output includes a graphical toolbar, which is used for annotation. The toolbar slides in from the right side, and
can be accessed through a touch screen, or by using a compatible mouse attached to a USB port.
To open the toolbar, click on the green arrow
at the top right of the screen. The menu bar slides into view and, when
enabled, the toolbar stays visible down the right side of the display and allows for selection of various tools and controls.
To close the toolbar, click on the arrow again or allow it to time-out.
NOTE:
By default, the toolbar closes after 10 seconds of inactivity. This duration can be modified using SIS commands.
Pointer —
This changes the cursor to an extra large
arrow of the currently selected color.
Undo —
This undoes the last 15 completed annotations
or a Clear action.
Freehand —
This allows freehand drawing on the
display.
Redo —
If selected while using the
Undo
function, it
recreates the last undone annotation.
Line —
This creates a straight line between two points.
Clear —
This clears the screen of all unsaved
annotations. This action can be undone with the Undo
function.
Arrow —
This creates a straight line with an arrowhead.
Tools —
This opens a secondary palette with advanced
tools: Capture, Freeze, Mute, Whiteboard, Spotlight,
Zoom, and Pan.
Rectangle —
This creates a rectangle with edges
parallel to the raster.
Capture —
This takes a snapshot image of the current
program output, including annotations. Captured images
can be saved to the unit, PC, USB flash drive, or network
drive.
Ellipse —
This creates an ellipse between the primary
and the opposite corner.
Freeze —
This freezes the live video. Re-select to
unfreeze the video.
Text —
This creates on-screen text at any point
selected. Press the <Enter> key to commit the text to
the screen.
Mute —
This mutes the video input and displays a black
screen. Annotations and menus are still visible. Re-select
to unmute.
Highlighter —
This creates a semi-transparent line
allowing the video to show through.
Whiteboard —
This creates a white screen for
annotations. Re-select to disable the whiteboard.
Size Select —
This adjusts size of the annotation tool,
such as text size, after selecting the Text tool.
Spotlight —
This creates a no-fill ellipse to focus on a
specific area of the screen, while the brightness of the
outer area is greatly reduced.
Eraser —
This erases any (unsaved) annotations on the
screen. The size is defined by the size tool.
Zoom —
This zooms in on a specific area of the screen.
Using the cursor, create a rectangle at that area. Create
a rectangle of less than 100 pixels to reset zoom to
default.
Color —
This allows up to 16 colors to be selected for
any drawing function (fill or outline), text, or pointer.
Pan —
Select this while an image is zoomed in, to
move the focus to a new area. Place the cursor on a
zoomed image and drag to the new area.
Fill —
Select this when selecting rectangle or ellipse,
to draw a solid shape filled with the selected color.


