


RH520 V2.9 3/07
10
Display Modes
STANDARD VIEW
The Standard View is the display state of the RH520 when it is turned on. Refer to the
diagram in the display description section of this manual for a representation of the
Standard View. To reach the Standard View at any time, press the
VIEW
button. Note that
the display automatically reverts to the Standard View five (5) minutes after the last button
press.
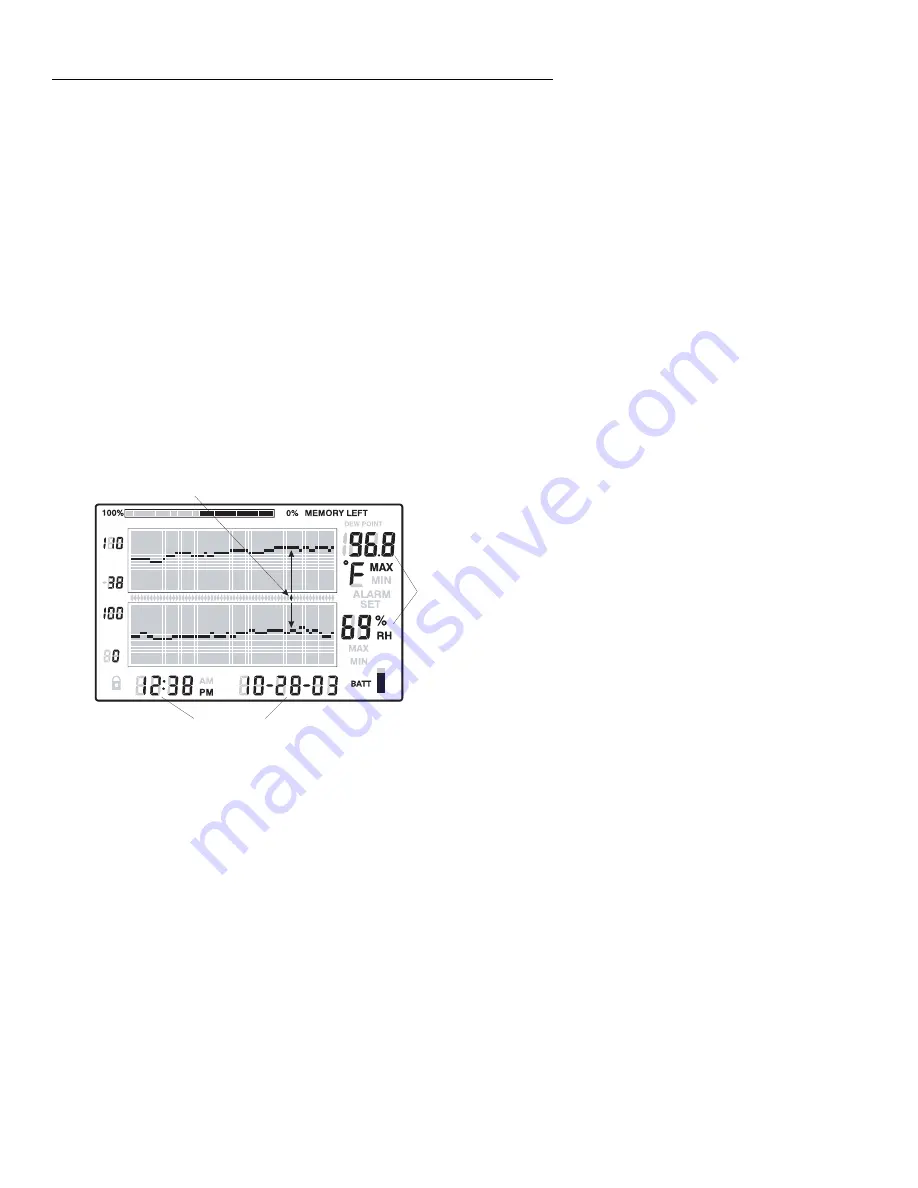
CURSOR
The CURSOR location is indicated by a small diamond located between the two graphs.
See diagram. There is one diamond for each horizontal pixel in the graph (64 positions).
The date, time, and measurements for the data point selected by the cursor are shown in
the Time/Date and numerical measurement display fields.
Each press of the
RIGHT ARROW
button will move the cursor to the right. When the
cursor reaches the right side limit, the graph will move to the left. Holding the button
down will speed the scrolling rate. When the cursor reaches the oldest (last) reading, it
will stop.
Each press of the
LEFT ARROW
button will move the cursor to the left. When the
cursor reaches the left side limit, the graph will move to the right. Holding the button
down will speed the scrolling rate. When the cursor reaches the newest (latest)
reading, it will stop.
Each press of the
UP ARROW
button will shift the graph to the next set of 64 values; to
the left of the ones currently displayed (the cursor will not move).
Each press of the
DOWN ARROW
button will shift the graph to the next set of 64
values; to the right of the one displayed (the cursor will not move).
Cursor
Position
Time and Date of readings
at current cursor position
Measurements
at current
cursor position


