Maintenance
Release the Cushion for Rear
Access
Service Interval: As required
The cushion can be released for rear access to the
machine for maintenance or adjustment.
1. Lower the platform.
2. Remove the hairpin on each side of the cushion.
3. Push the plastic slides to the inside.
4. Remove the cushion and lower it to the platform.
5. Perform any maintenance or adjustment on the
machine.
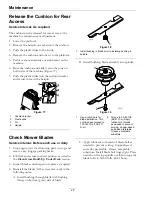
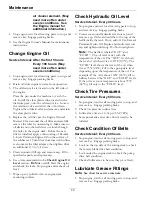
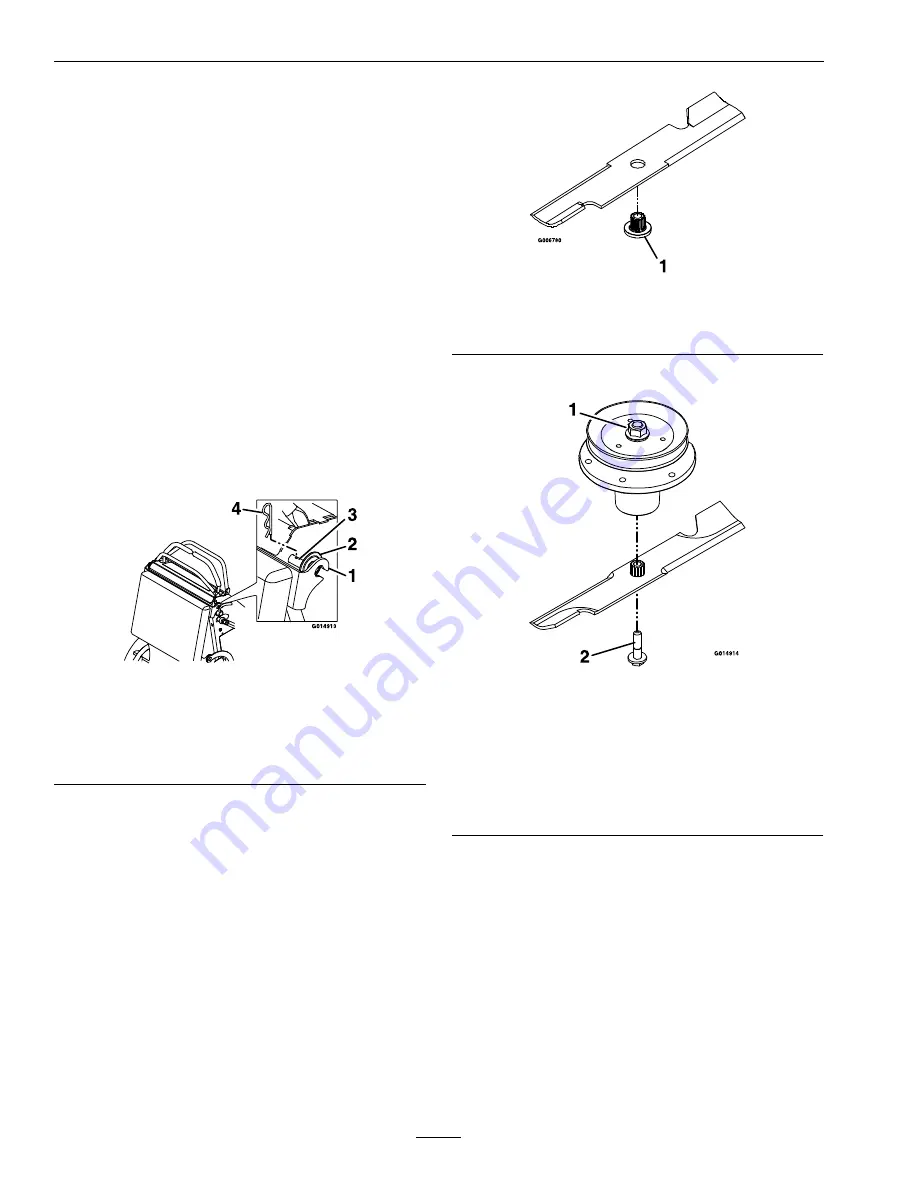
6. Raise the cushion and slide it onto the pins on
both sides of the machine (Figure 17).
7. Push the plastic slides into the cushion bracket
and secure them with a hairpin.
Figure 17
1.
Cushion bracket
2.
Plastic slide
3.
Pin
4.
Hairpin
Check Mower Blades
Service Interval: Before each use or daily
1. Stop engine, wait for all moving parts to stop, and
remove key. Engage parking brake.
2. Lift deck and secure in raised position as stated in
the
Clean Grass Build-Up Under Deck
section.
3. Inspect blades and sharpen or replace as required.
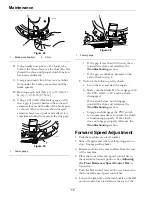
4. Reinstall the blades (if they were removed) in the
following order:
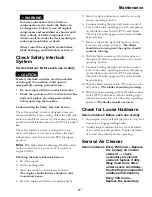
A. Install bushing through blade with bushing
flange on bottom (grass) side of blade.
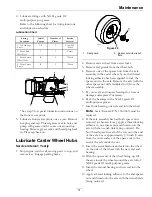
Figure 18
1.
Install bushing in blade prior to installing bushing in
spindle.
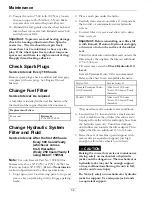
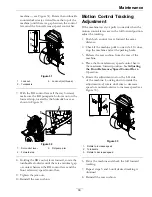
B. Install bushing/blade assembly into spindle.
Figure 19
1.
Use wrench here for
blade installation. This
nut has been torqued to
130-160 ft-lb (176–217
N-m)
2.
Torque to 50-60 ft-lb
(68-81 N-m) Apply
lubricant to threads
as needed to prevent
seizing. Copper-based
anti-seize preferable.
Grease acceptable
substitute.
C. Apply lubricant to threads of blade bolt as
needed to prevent seizing. Copper-based
anti-seize preferable. Grease acceptable
substitute. Install blade bolt finger tight. Place
wrench on the top spindle nut then torque the
blade bolts to 50-60 ft-lb (68-81 N-m).
28

