


4. Installing or Replacing a Print Cartridge
FREEStyler uses 1 ,2,3 or 4 ‘UV-Block’ Black Ink Cartridges arranged in an offset formation:
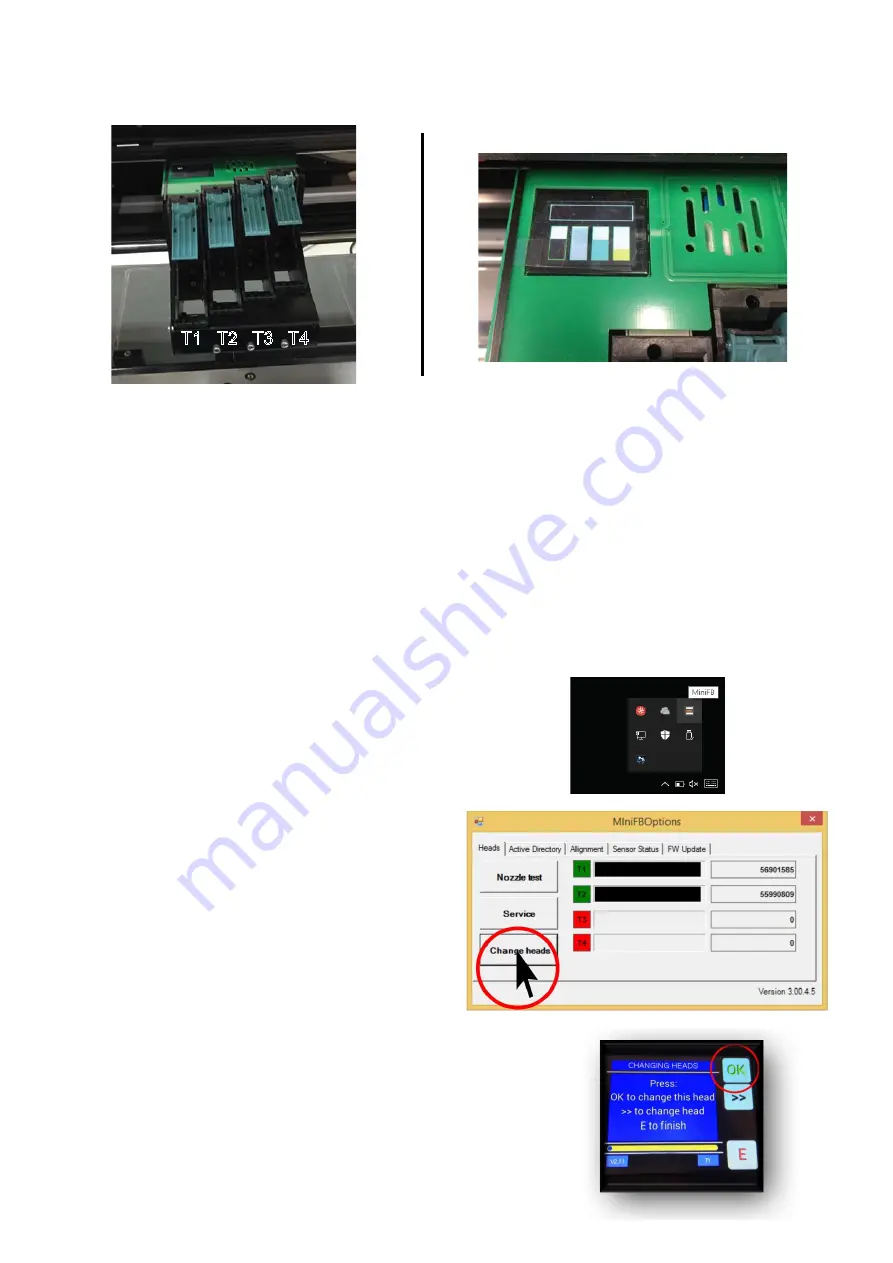
These are labelled T1, T2, T3 & T4 from the left to right. You will find the current bank displayed
(T-?) on the control panel on the front right side of the FREEStyler. Make sure to place cartridge in
the correct bank before checking cartridge “in” or “out”.
Upon the initial startup the FREEStyler will give you the opportunity to install new cartridges.
If print cartridges are already installed select ‘E’ on the LED touch screen on the front of the
FREEStyler.
An exclamation point (!) will appear warning when cartridges are low and need to be replaced.
You can also install (or remove) a cartridge by launching the
MiniFB (FREEStyler) Print Utility...
This can be found on the bottom right of the Windows Screen
where the hidden icons reside:
Click on the Exile icon and select ‘Heads’
Then select ‘Change Heads’.
This will move the print carriage in position to
change the print cartridges out.
Note: Make sure you are on the correct bank before replacing
any cartridge. ie: T1, T2 etc. In this example T1 is selected:
Use the >> button to select different cartridges:
Pres ‘OK’ once you have the correct cartridge position selected:
Colour Banks KMCY
(DTG Mode)
T1 T2 T3 T4


