36
SERVICING
excel HE -
Installation and Servicing
51 REPLACEMENT OF COMPONENTS
GENERAL
When replacing ANY component
1.
Isolate the electricity supply.
2.
Turn off the gas supply.
3.
Remove the boiler front panel. Refer to Frame 38.
After replacing ANY component check operation of the boiler,
including gas soundness, gas rate and combustion test.
IMPORTANT.
When work is complete, the sealing panel, if removed, must
be correctly refitted - ensuring that a good seal is made.
Notes.
1.
In order to assist fault finding, the control panel has an
LED diagnostic display.
The key to boiler fault conditions
is shown in Frame 79.
2.
In order to replace components in Frames 68-78 it is
necessary to drain the boiler. Refer to Frame 67.
THE BOILER MUST NOT BE OPERATED WITHOUT THE SEALING PANEL FITTED
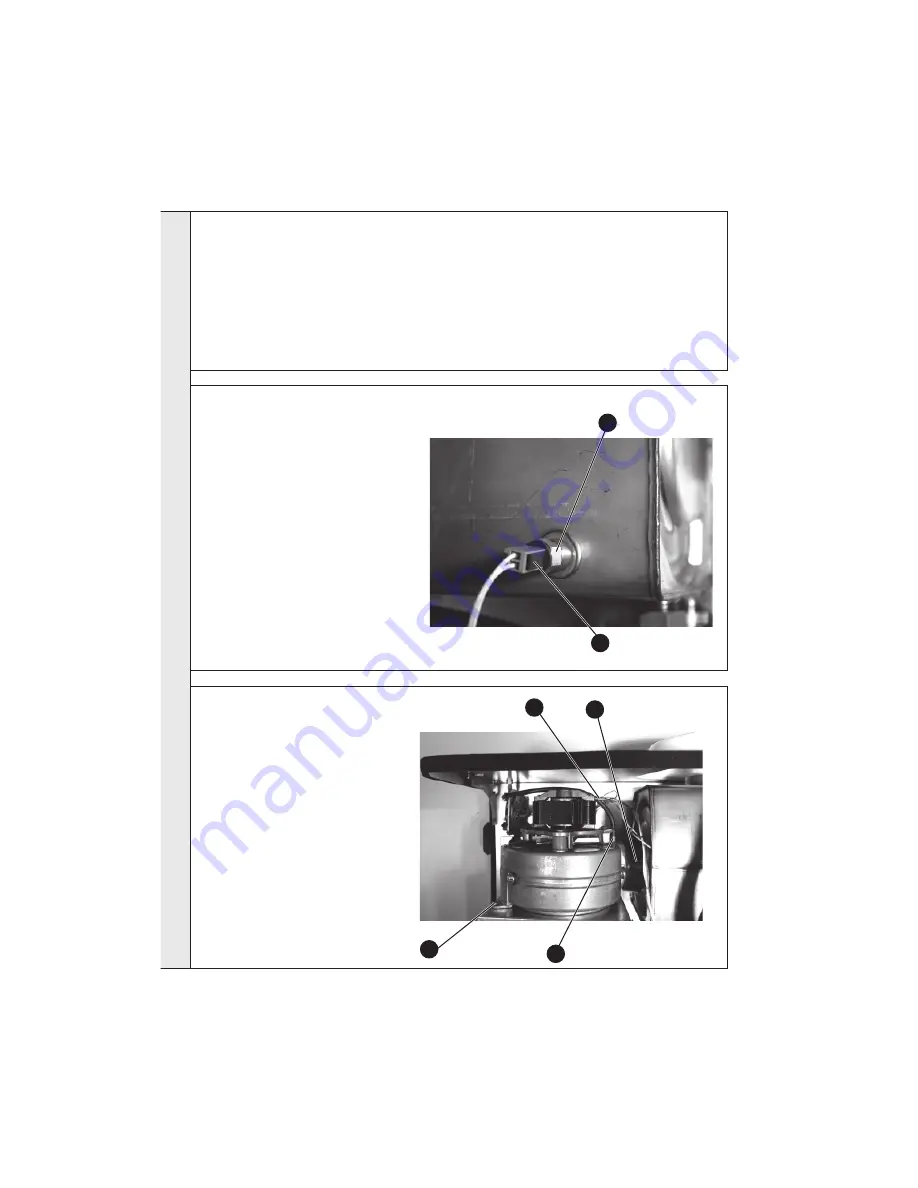
52 CONDENSATE BLOCKAGE THERMISTOR REPLACEMENT
1.
Refer to Frame 51.
2.
Remove the boiler front, side and sealing
panels. Refer to Frame 44 and 45.
3.
Carefully pull off the green electrical
connection.
4.
Unscrew the condensate blockage
thermistor.
5.
Fit new condensate blockage thermistor
complete with new washer.
6.
Re-assemble in reverse order.
7.
Check the operation of the boiler. Refer to
Frame 50 and 51.
53 FAN AND FAN SUPPRESSOR REPLACEMENT
FAN
1.
Refer to Frame 51.
2.
Remove the boiler front, side and sealing
panels. Refer to Frame 44 and 45.
3.
Remove the fan mounting fixing screw.
4.
Pull fan from the recuperator sealing gasket.
5.
Disconnect electrical leads from the fan.
6.
Pull plastic sensing pipe from venturi
connection.
7.
Reconnect the fan electrical connections and
fit the new fan in reverse order ensuring the
plastic venturi pipe is replaced.
8.
Re-assemble the boiler in reverse order.
9.
Check the operation of the boiler. Refer to
Frame 50 and 51.
Fan Suppressor
1.
As 1-5 above.
2.
Pull off fan suppressor.
SER
VI
C
I
N
G
4
3
5,7
6,7
3
4


