


1-3 Installation
1-3a CONNECTING THE PRINTER
ä
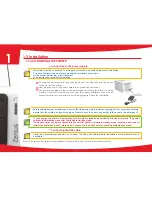
Connection to the power supply
The printer must be connected to a properly protected and earthed electrical installation.
FI: Laite on liitettävä suojamaadoitus koskettimilla varustettuun pistorasiaan.
NO: Apparatet må tilkoples jordet stikkontakt.
SE: Apparaten skall anslutas till jordat uttag.
Ê
Connect the power cable to the power supply unit, then plug the power supply unit
connector into the printer.
Ë
Next, plug the end of the power cable into an earthed power socket.
Ì
The printer is powered on: the control panel lights up showing the printer is working
properly. If the control panel does not light, then either installation has not been
carried out correctly or the printer is not working properly. Check the installation.
Before attempting any maintenance, ensure that the power cable is always unplugged. For your personal safety,
ensure that the cable and power supply unit remain easy to access, especially in the event of an emergency.
To save energy, the printer will automatically switch itself to standby mode after 10 minutes of inactivity. The printer
switches to hibernation mode after 30 minutes in standby mode.
The standby times can be configured in the Evolis Print Center. In standard standby mode, sending a print request
restarts the printer and quickly pressing (for 1 second) on the button exits the printer from hibernation mode
.
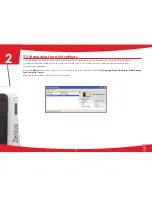
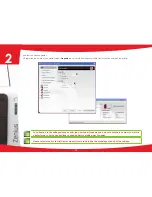
ä
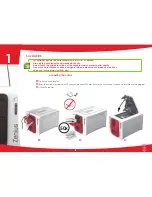
Connecting the USB cable
Under no circumstances should you connect the USB data cable before installation of the printer driver is
complete.
Refer to the section on printer driver installation for further details, and follow the instructions carefully.
7
1


