Chapter 3 Installation
- 24 -
JNB-1406
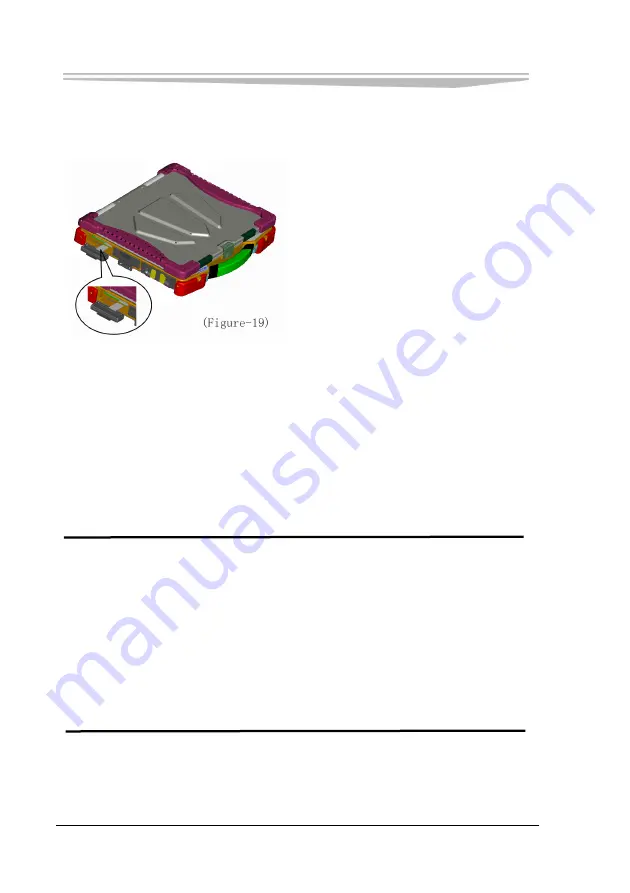
Install the USIM/UIM Card
1. Insert the USIM or UIM card into
the card slot with the metal contact
side facing down and the gap inward,
as shown in Figure-19.
2. After that, power on the computer.
Users may use the hot key “Fn+F2”
on keyboard to enable the 3G module
and operate the user software
provided by the mobile network
operator. You may use the WWAN
after it prompts successful
registration.
Before inserting or removing the USIM or UIM card, please power off the computer
and disconnect the adapter first; otherwise, the 3G module will be damaged or unable
to operate normally. The correct operation is as follows: Insert the USIM or UIM
card into the card slot with the metal contact side facing down and the gap inward;
push inward until it clicks, which indicates that the card has been installed properly.
When removing the card, gently push the USIM or UIM card forward until it clicks
to pop out, and then take out the USIM or UIM card.
Summary of Contents for LNB-1406
Page 1: ...JNB 1406 中性 加固笔记本 Rugged Notebook Version C01 ...
Page 14: ...第二章 使用说明 8 JNB 1406 产品外观图 ...
Page 16: ...第二章 使用说明 10 JNB 1406 1 指纹识别 可选 2 硬盘驱动器 3 触摸板 4 键盘 5 发光二极管指示灯 6 携带把手 1 内存插槽模块 2 扬声器 ...
Page 34: ...第三章 安装说明 28 JNB 1406 图 21 3 点击对话框中的 添加 选项 出现图 22 对话框 图 22 ...
Page 42: ...第三章 安装说明 36 JNB 1406 图36 点击 下一步 出现 图37 界面 图37 点击 我接受 按钮 出现 图38 界面 ...
Page 47: ...第三章 安装说明 JNB 1406 41 图 46 进入如 图 47 所示画面 点击 我接受许可证协议中的条款 A 并点击 下一步 图 47 ...
Page 48: ...第三章 安装说明 42 JNB 1406 出现如 图 48 所示界面 点击 下一步 图 48 进入 图 49 所示画面 点击 安装 图 49 将出现如 图 50 画面 ...
Page 49: ...第三章 安装说明 JNB 1406 43 图 50 之后进入 图 51 画面 点击 完成 图 51 系统将提示如 图 52 所示画面 点击 是 重新启动系统 ...
Page 74: ......
Page 88: ...Chapter 2 Instructions 8 JNB 1406 Product Appearance ...
Page 119: ...Chapter 3 Installation JNB 1406 39 Figure 41 Click Next Figure 42 ...


