Part 5:
Using the EggBot Pro
A
B
C
5.1 Making your first plot
5.2 Preparing artwork for the EggBot
Within Inkscape, it is convenient to start with a document that
is 800 pixels tall by 3200 pixels wide. The width corresponds
to one full turn of the egg motor, and 800 pixels tall is the
approximate travel of the pen motor. (See end note 4.) A tem-
plate of this size is available as part of the EggBot example set.
An EggBot is designed to draws paths – continuous lines – not
bitmap images, and not solid filled regions. Certain object types
are automatically treated as paths, for example circles and
rectangles. Other types of objects that are made of lines – like
outlined text – may need to be converted to paths (Path menu
> Object to path) before plotting.
To use multiple colors of pens, use layers within your Inkscape
drawing. If you give each layer a name that starts with a num-
ber, for example, 1-red, or 2-black, then the Layers tab can plot
one layer at a time, so that you may change the pen between
layers. The “Smiley face tutorial” in the online documentation
walks through this process.
There are many methods for creating filled solid areas that will
print well. Use the “Hatch fill” extension (under the Eggbot
Contributed extension menu), or see the extended notes on
creating filled regions in our online documentation.
One other interesting method is to use StippleGen software
to create EggBot-printable stipple drawings from photographs:
http://wiki.evilmadscientist.com/StippleGen
To make a plot, you should begin with an object in the
EggBot, a pen in the holder, and the machine in the
“pen up” configuration. (For your very first, you may
want to leave the pen out on the first try, just to watch
and make sure that everything looks good.)
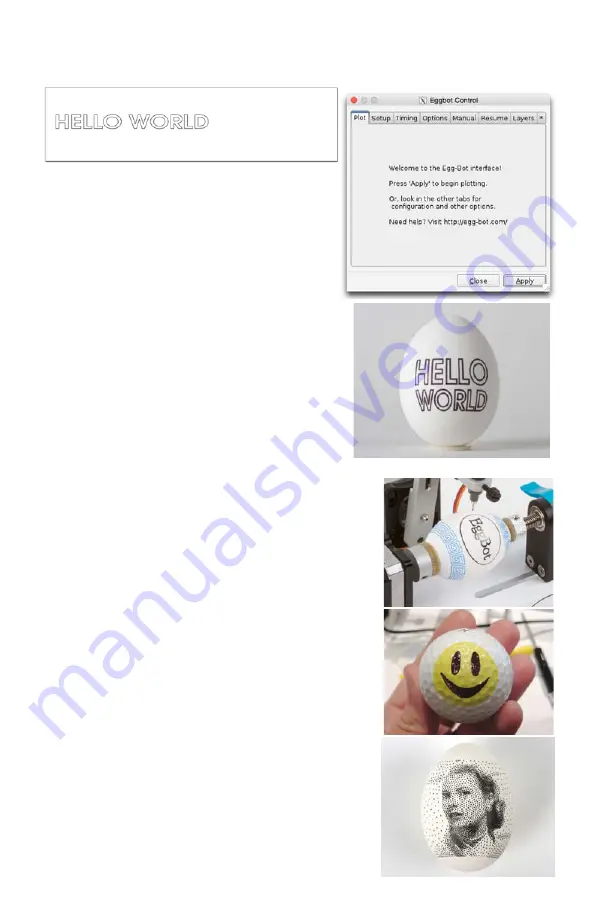
Next, you’ll need some example artwork. From the set
of EggBot example files, open up the “Hello World”
(helloworld.svg) example (
A
). Or, use a different file or
start from scratch; see the next section.
Raise the pen arm upright, such that the pen points
at the middle of the object. From the Plot (first) tab
of Eggbot Control (
B
), press “Apply,” and the EggBot
should print the entire drawing (
C
). It may be helpful
to “bleed” some ink out of the tip onto a piece of pa-
per before you begin plotting. That can prevent a blank
spot when it starts.


