


3.
See the instructions below.
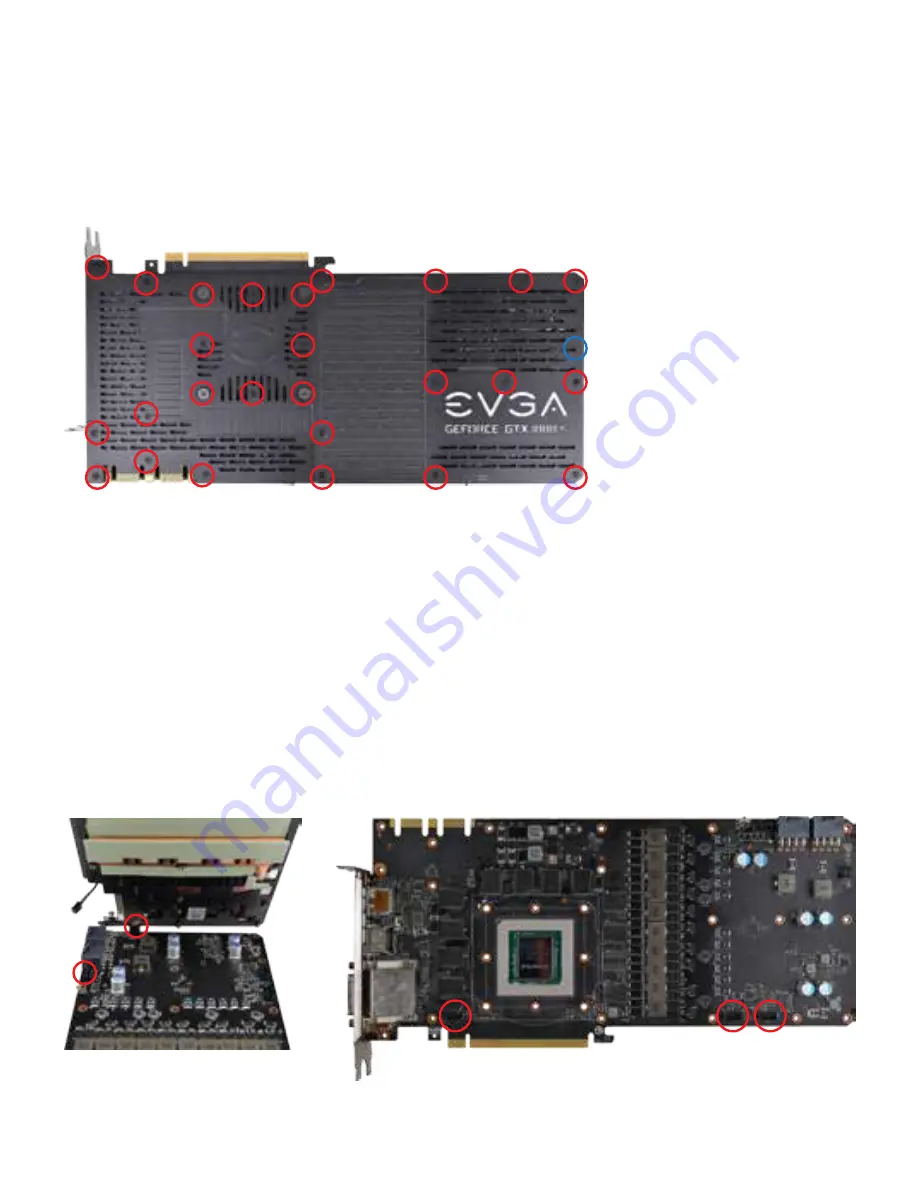
1. Remove the 4 spring screws and 22 backplate screws circled in the picture below, using a Phillips #1
screwdriver. Remove the backplate and set aside; the backplate will be used again. When removing the
“Left” backplate (on the right side below), please be careful when disconnecting the LED connector on
the PCB, located in the blue-circled area below. See Step 6(b) for more details. If any thermal pads stick
to the back of the PCB, see pages 5 and 6 to replace the thermal pads correctly on the backplate.
Carefully set aside the screws, as these screws will not be used again.
2. Remove heatsink and fan, while carefully disconnecting fan and LED connectors.
(a) Carefully remove the original heatsink and fan. You may need to gently twist the thermal module to
loosen up the heatsink from the thermal pads and GPU thermal grease. Once loose, gently lift the
side of the heatsink to expose the fan and LED wires/headers.
Depending on your card model, you may have up to 3x fan headers and 2x LED header.
(b) Please be careful when removing the fan and LED headers; the wires can snap if pulled too hard.
The safest way to remove the connectors is with a small flat-head screwdriver, tweezers, or fingernails
to raise the edge of the headers a little at a time. It is recommended to remove the LED header (left
photo) before removing any fan headers (right photo).
After removing the headers, set aside the heatsink/fan; it will no longer be needed for this Kit.
Summary of Contents for GTX 1080 Ti FTW3 HYBRID
Page 1: ...Installation Guide...
Page 3: ...10 11 12 14 13 5 6 7 8 9 1 3 2 4 2...
Page 12: ...E009 00 000167...


