MViP-II
IP Based Multi-Image Display & Monitoring Solution
Revision 1.2
Page - 5
3.
GETTING STARTED
3.1.
SETTING UP THE MVIP-II HARDWARE
Instructions
:
1. Cable up the MVIP-II before powering on the unit
•
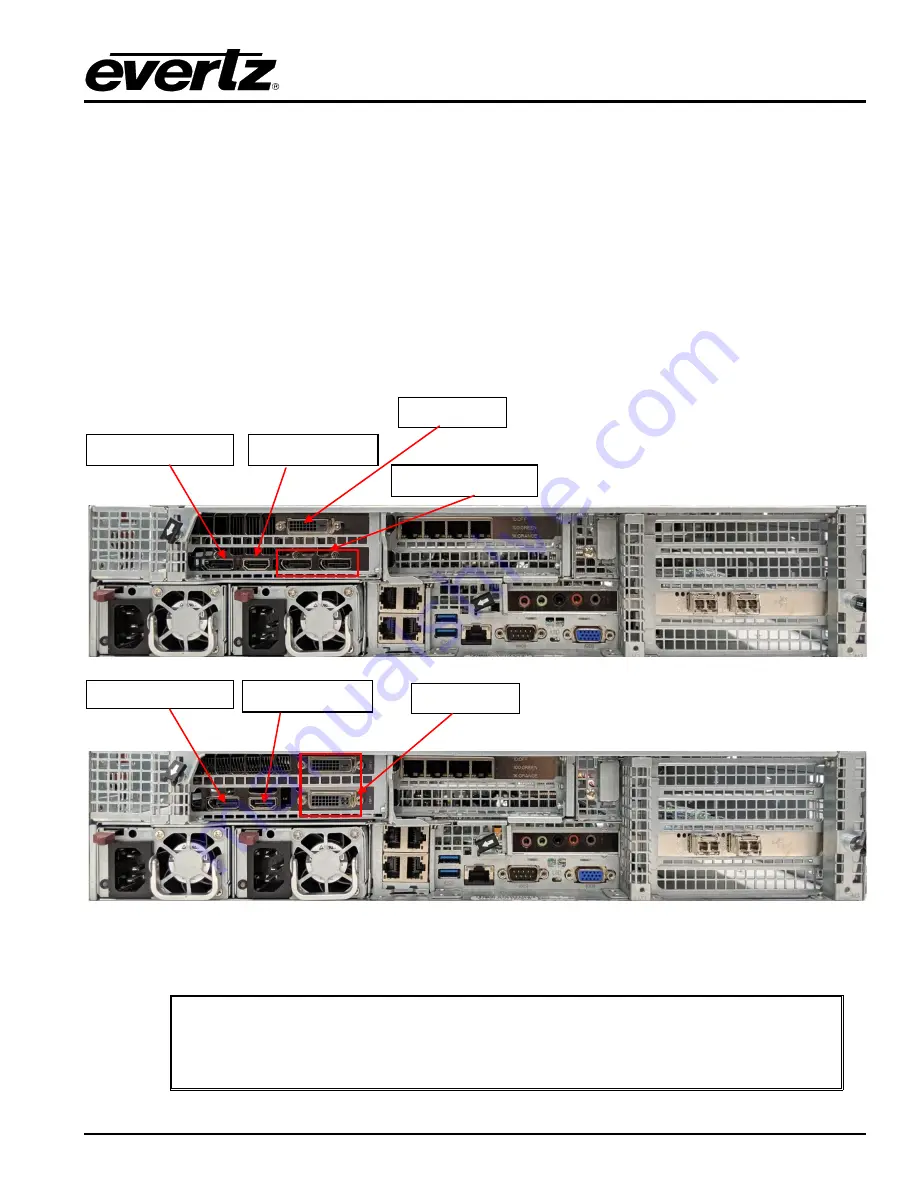
Plug in DVI to display port video cable (included in packaging) to the top DVI port, ensure cable is
connected to monitor. An optional second screen can be connected to HDMI port.
•
Plug in Keyboard and Mouse.
•
Plug in network cable for the CONTROL network (left-hand Ethernet port).
•
Plug in network cables to the DATA ports. Up to 3 network connections can be made.
Figure
3-1 : Rear Connections for DVI Port, Display Port, HDMI Port and Ethernet Ports
3-1 top rear panel covers the products which were purchase by customers
before 2019.
Users who have bought a unit after 2019 should refer to bottom rear panel which is
shown in Figure
DISPLAY PORT
HDMI PORT
DVI PORT
0 1
2 3
4 5 6 7
8
9
ETHERNET
DISPLAY PORT
HDMI PORT
DISPLAY PORT
DVI PORT


