GENERAL
When installing, operating and maintaining your stove respect basic standards of fire safely.
Read these instructions carefully before commencing the installation. We are not
responsible for any fault arising through incorrect installations. Save these instructions for
future reference.
All local regulations, including those referring to national and European
Standards need to be complied with when installing the appliance.
PRE-INSTALLATION ASSEMBLY
1.
After removing the stove from the packaging, open the fire door and remove all
contents from inside.
2.
Lay stove onto back on pallet.
3.
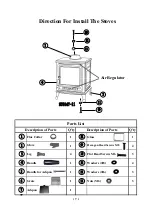
Fit legs with set screws and washers supplied. Care should be taken to level the stove
using the adjusting screws in the feet.
4.
Remove the stove from the pallet and position it in the final installation position (See
Location and clearance to Combustibles Section).
Warning! When assembling the appliance, care should be taken to avoid the possibility of
personal injury.
Any unauthorized modification of the appliance is prohibited.
CHIMNEY
The chimney must be fitted in accordance with current Building Regulations.
FLUE DRAUGHT
When the stove is in the initial
period, it can be adversely affected by down draught caused
by nearby hills, adjacent tall buildings or trees. Therefore not allowing flue gases to be
completely drawn off. To overcome this, open the slide regulator of primary air to allow
more air into stove, so the available fuel burns down faster, and the chimney draught is
increased. Never allow a build up of ash in the ashpan, as this will cause the grate to burn
out prematurely.
CHIMNEY CONNECTION
The stove is ready for installation and it has to be connected to an existing chimney with a
flue pipe. This flue pipe has to be short, straight and as horizontal as possible when
connected on rear outlet (maximum protrusion from rear is 150mm). If a top flue
connection is required, a minimum of 500mm is recommended when connecting to a
register plate or flue liner. It is essential that all connections are sealed and made airtight.
Both the chimney and flue pipe must be accessible for cleaning and if ANY parts of the
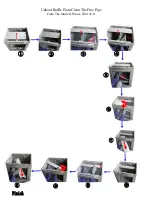
chimney can’t be reached through the stove (with baffle plate removed), a cleaning access
door in the flue pipe or chimney must be fitted in a suitable position to enable this to be
done.
2

