Technology Made Easy ...
Instruction Manual
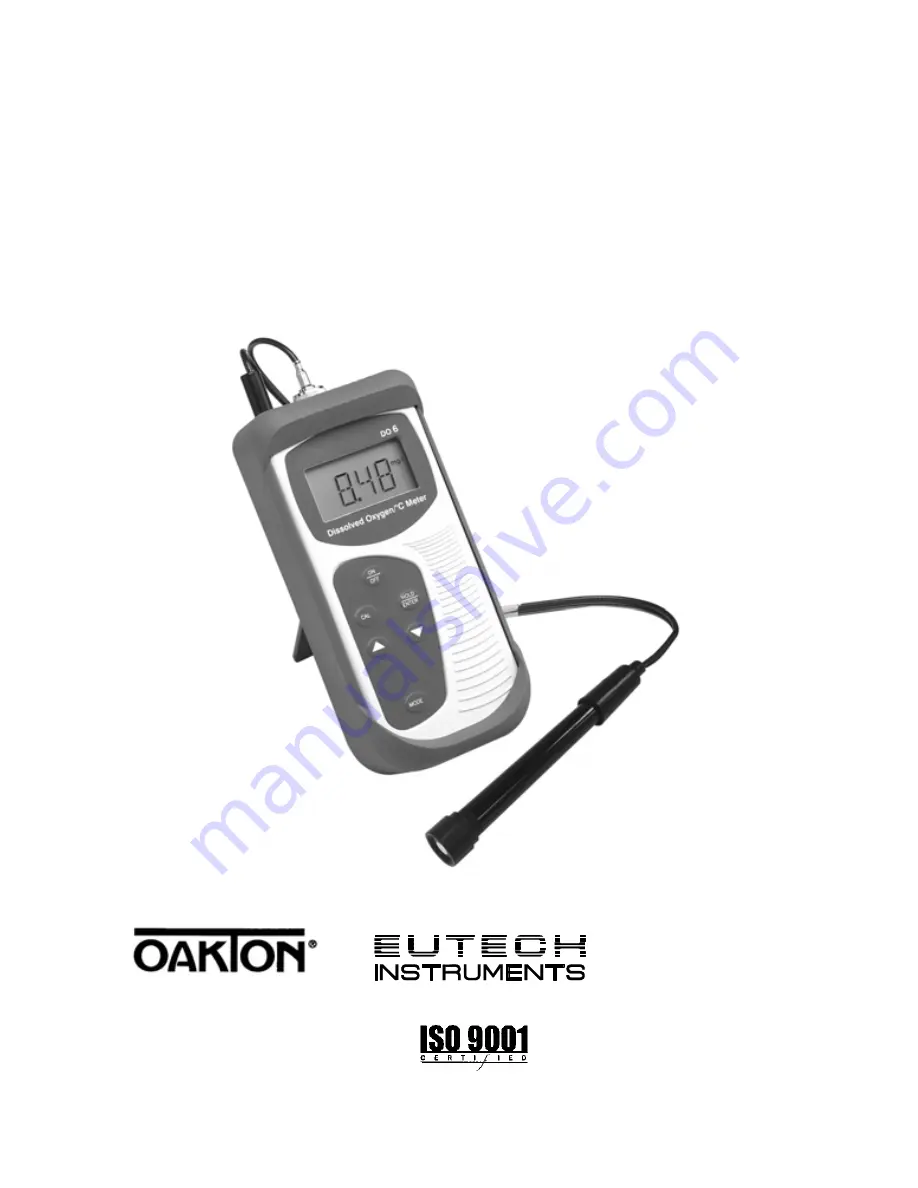
DO 6
Economy Hand-held Dissolved Oxygen Meter
68X243622 Rev 0 01/04
Page 1: ...Technology Made Easy Instruction Manual DO 6 Economy Hand held Dissolved Oxygen Meter 68X243622 Rev 0 01 04...
Page 2: ...olved Oxygen palm top meters please do not hesitate to contact the nearest Eutech Instruments Oakton Instruments authorized Distributor Eutech Instruments Oakton Instruments will not accept any respon...
Page 3: ...SATURATION CONCENTRATION MG L PPM AND TEMPERATURE T 11 4 CALIBRATION 12 4 1 IMPORTANT INFORMATION ON METER CALIBRATION 12 4 2 PREPARING THE METER FOR CALIBRATION 13 4 3 TEMPERATURE CALIBRATION 15 4 4...
Page 4: ...ture Compensation 36 7 2 2 Selection of mg L or ppm mode 38 7 3 CAL 2 CALIBRATION DATA 39 7 3 1 Viewing the Saturation calibration data 39 7 3 2 Viewing the mg L ppm Concentration calibration data 39...
Page 5: ...MBRANED CAP 54 8 4 ELECTROLYTE SOLUTION 55 9 TROUBLE SHOOTING GUIDE 56 10 ERROR MESSAGES 57 11 FACTORY DEFAULT SETTINGS 58 12 SPECIFICATIONS 60 13 ACCESSORIES 62 14 ADDITIONAL INFORMATION 63 14 1 DISS...
Page 6: ...oncentration mode Temperature measurement is also available in degrees Celsius The meter ensures accurate measurement of the Dissolved Oxygen values through its temperature barometric pressure and sal...
Page 7: ...measurement mode in degrees Celsius T Other annunciators include A when the ATC function is activated CAL when meter is in calibration mode and battery diagram for low battery condition See Figure 1...
Page 8: ...the SETUP menu Sets the calibration values during the Concentration and Temperature calibration Scrolls through each SETUP and its sub group menu Set offset adjustments and configuration settings MOD...
Page 9: ...ely out of boot Ensure that the cables of Dissolved Oxygen electrode or temperature probe are not connected 2 To insert meter into rubber boot slide in from the top of meter before pushing the bottom...
Page 10: ...own in Figure 3 To open the battery compartment first remove protective rubber boot stand then 1 Push in the direction of arrow and lift up the cover 2 Note the polarity of battery before inserting in...
Page 11: ...ement A low battery annunciator in the LCD alerts you when battery power is running low See Figure 4 Replace with the same type as recommended by the manufacturer Figure 4 Low Battery Condition Cautio...
Page 12: ...e s detachable cap Re conditioning of your probe is made easy with the introduction of this specially designed detachable pre membraned cap This light weight probe 93X233912 35642 50 has a built in te...
Page 13: ...ure range for use is within 0 to 50 C Always ensure that the probe s membrane is protected against any scratches or dents The whole pre membraned cap has to be replaced if the membrane is damaged It i...
Page 14: ...connector in counter clockwise direction until it unlocks and slide the connector off the socket 3 Plug the phono jack of temperature sensor into the phono socket of the meter as shown in Figure belo...
Page 15: ...ts will light up for 1 5 seconds 2 The display will then momentarily show the meter s identification DO 6 with the annunciators for percentage saturation mode and concentration mode 3 The display cont...
Page 16: ...the measurement mode of percentage saturation measurement concentration measurement or temperature measurement The customized annunciator shall indicate the selection of the measurement mode mg l A T...
Page 17: ...saturation will linearly affect the mg L ppm concentration measurement it is important that the meter has to be first calibrated in the Saturation mode and temperature mode before commencing the mg L...
Page 18: ...ffect the calibration in the percentage saturation mode To completely recalibrate your meter or when you use a replacement electrode it is best to clear all calibration data To erase all the old calib...
Page 19: ...ror message of Err 1 will be indicated and will return the meter to the measurement mode All new calibration values will automatically override the existing data It is recommended to calibrate the met...
Page 20: ...libration ensure that the meter displays annunciator A to indicate that it is in automatic temperature compensation mode Please see Set Up menu on page 36 for its activation procedure 1 Switch the met...
Page 21: ...rature bath 5 Press the HOLD ENTER key to confirm temperature calibration and return to measurement mode NOTE To exit from Temperature Calibration mode without confirming the calibration press CAL ins...
Page 22: ...tion 5 4 1 Pressure Setting Adjustment on page 26 to change the pressure setting 4 4 1 To calibrate 100 Saturation 1 Rinse the probe well with DI water or rinse solution Do not touch the membrane 2 Pr...
Page 23: ...to 49 9 the display will show the absolute value measurement for 1 5 seconds before displaying Err 1 and goes to the measurement mode 5 Press the HOLD ENTER key to confirm the calibration The meter d...
Page 24: ...is with respect to the factory default calibration Note When calibration is attempted on a factory calibrated absolute value measurement of 10 1 to 49 9 the display will show the absolute value measu...
Page 25: ...select between mg L and ppm units see page 38 Selection of mg L or ppm mode 4 5 1 To calibrate in mg L ppm Concentration mode 1 Calibrate 100 Saturation as per Section 4 4 2 Rinse the probe well with...
Page 26: ...e concentration calibration window is 40 of the factory default value However the minimum point of calibration is 2 mg L In an event where the default measured value is less than 2 mg L and a calibrat...
Page 27: ...mpensation ATC For Automatic temperature compensation make sure the phono jack of the probe see Figure 6 in Section 3 5 is securely inserted The ATC annunciator A will be blinking if the ATC probe is...
Page 28: ...een 0 and 50 C Default value is 25 C 1 Switch on the meter and if necessary press MODE key to select temperature measurement mode 2 Press CAL key to start temperature calibration process 3 The CAL ind...
Page 29: ...DO 6 24 value of the reference thermometer used 5 Press the HOLD ENTER key to confirm the manual temperature setting made The CO indicator will appear for 1 5 seconds before the display returns to th...
Page 30: ...ements 1 Rinse the probe well with DI water or rinse solution 2 Select the appropriate measurement mode Press the MODE key to toggle between modes a Percentage Saturation b Concentration mg L or ppm c...
Page 31: ...760 mm Hg 101 3 kPa barometric pressure setting and a salinity factor of 0 0 ppt 5 4 1 Pressure Setting Adjustment See Figure 16 for flow chart explanation 1 Switch off your meter in mg L ppm Concentr...
Page 32: ...ator CO will be displayed for 1 5 seconds before the meter shows the next display of Salinity setting b SAL If the Set Up menu is derived from other than the mg L ppm Concentration mode the meter will...
Page 33: ...play will return back to DPr 7 HOLD ENTER HOLD ENTER HOLD ENTER HOLD ENTER HOLD ENTER CO will display for 1 5 seconds CO will display for 1 5 seconds Display will continue to Salinity setting menu b S...
Page 34: ...r the Salinity setting mode 4 Use the and keys to enter the salinity of your solution in parts per thousand ppt Factory default is 0 0 Salinity values up to 50 ppt can be entered 5 Press HOLD ENTER ke...
Page 35: ...hat the measurement is being held 2 To release the held value press the HOLD ENTER again The annunciator will stop blinking to indicate that the held value has been released 3 Continue to take measure...
Page 36: ...ey pressed power the unit on by pressing the ON key Release the ON key before releasing the MODE key 3 SEt P indicator will appear momentarily and COF 1 will appear next 4 You are now in the Saturatio...
Page 37: ...ration Calibration data will be viewed according to its respective Set Up menu ELE 3 Viewing the Electrode properties FACT Viewing the Slope Factor OFS Viewing the Saturation offset adjustment Only av...
Page 38: ...Up menu DPr 7 Enter Barometric Pressure Selection Menu A HG Selection of Barometric Pressure Setting Adjustment in mmHg A PA Selection of Barometric Pressure Setting Adjustment in Kilo Pascal b SAL E...
Page 39: ...DO 6 34 SEt P will display for 1 second ON OFF MODE Switch off from Saturation or Temperature measurement mode Press and hold MODE key and then switch on Figure 19 Overview of DO 6 Saturation or Temp...
Page 40: ...ction Manual DO 6 35 SEt P will display for 1 second ON OFF MODE Switch off from Concentration measurement mode Press and hold MODE key and then switch on Figure 20 Overview of DO6 Concentration Set u...
Page 41: ...c Temperature Compensation From COF 1 of any Set Up menu 1 Press the HOLD ENTER key for the display to show the Automatic Temperature Compensation selection menu A ATC 2 Press the HOLD ENTER key to en...
Page 42: ...O 6 37 Note The meter will either return to the main group menu COF 1 if Saturation or Temperature Set Up menu is used or will continue to the mg L or ppm mode configuration if mg L ppm Concentration...
Page 43: ...e HOLD ENTER key thrice to enter the mg L or ppm mode selection menu b DO 2 Use the and keys to select the desired mode of measurement 3 Press the HOLD ENTER key to confirm the selection made and to r...
Page 44: ...w the latest Saturation calibration data 3 To exit to the main group menu press the HOLD ENTER key or the CAL key 4 Press the CAL key to return to the measurement mode 7 3 2 Viewing the mg L ppm Conce...
Page 45: ...by the probe to the theoretical value The higher the number the lower the mV output from the probe The ratio displays from 0 5 to 1 999 From the Saturation or Temperature Set Up menu 1 Enter the Set U...
Page 46: ...arameter lets you view the sensor s mV output corresponding to 0 Saturation From Step 6 above 7 Press the HOLD ENTER key The display will show LO mV momentarily before displaying the sensor s mV outpu...
Page 47: ...V displays for 1 5 seconds LO mV displays for 1 5 seconds Viewing of the offset percentage adjustment will be available only if set up menu is selected from the DO Saturation or the Temperature Mode O...
Page 48: ...sing the and keys until the meter displays the Automatic Off menu AtO 4 2 Press the HOLD ENTER key to enter the menu 3 Use the and keys to activate or deactivate the automatic off selection a YES acti...
Page 49: ...nd other customized setup functions and reset it to factory default See Section 11 for factory default settings 7 6 1 Calibration Reset From any Set Up menu 1 Scroll the Set Up main group menu by usin...
Page 50: ...urn to the main group menu Press CAL to return to the measurement mode Note When you reset your meter from Saturation Set Up menu both Saturation and mg L ppm Concentration calibrations are reset to f...
Page 51: ...ntil meter displays the User Reset menu b USR 2 Press HOLD ENTER key to enter the menu 3 Use the and keys to activate or deactivate the User Reset selection a YES activates User Reset b NO deactivates...
Page 52: ...eading to stabilize 2 Check the reading of another DO meter being used as a reference This reference meter should have its probe immersed in the same sample solution and at the same depth 3 Switch off...
Page 53: ...d value 6 Use the and keys to enter the new value 7 Press the HOLD ENTER key to confirm the offset adjustment CO will be displayed for 1 5 seconds before the display returns to the subgroup menu 8 Pre...
Page 54: ...r the Set Up menu by displaying SEt P By releasing the MODE key the display will show the configuration menu COF 1 4 Press the and keys to scroll through the Set Up main group menu till the display sh...
Page 55: ...play will return back to DPr 7 HOLD ENTER HOLD ENTER HOLD ENTER HOLD ENTER HOLD ENTER CO will display for 1 5 seconds CO will display for 1 5 seconds Display will continue to Salinity setting menu b S...
Page 56: ...ENTER key to enter the Salinity setting mode 4 Use the and keys to enter the salinity of your solution in ppt Note The salinity value is in ppt parts per thousand 5 Press HOLD ENTER key to confirm th...
Page 57: ...current which flows through the cable to the meter The electric current produced is proportional to the oxygen that passes through the membrane and the layer of electrolyte This makes it possible to m...
Page 58: ...of deposits if necessary If growth develops on the probe use a disinfecting chemical to clean NOTE Although the membrane is strong and not easily damaged wipe it gently while cleaning it If the membra...
Page 59: ...on the tip of the plastic bottle 4 Hold the probe upside down Insert the needle into one of the 4 holes surrounding the silver cathode Squeeze the bottle to inject fill solution into the probe body In...
Page 60: ...olution in your probe s cap will deplete on usage and will need to be replaced periodically Your DO probe comes with replacement electrolyte solution The replacement electrolyte comes premixed and rea...
Page 61: ...ample e External noise pickup or induction caused by nearby electric motor f Broken probe a Fill probe with electrolyte replace pre membraned cap b Stir or tap probe to remove bubbles c Clean the prob...
Page 62: ...ation error Calibration is performed when the calibration solution factory absolute measurement is below 2 00 mg L or ppm Check the calibrating solution to be above 2 mg L or ppm Check that the correc...
Page 63: ...he Electrode properties Parameter Title Only Parameter Title Only FACT Viewing the Slope Factor Viewing Only Viewing Only 1 000 OFS Viewing the Saturation offset adjustment Viewing Only Viewing Only 0...
Page 64: ...election of Barometric Pressure Setting Adjustment in mmHg and 500 to 1499 mmHg 760 mm Hg A PA Selection of Barometric Pressure Setting Adjustment in Kilo Pascal and 66 6 to 199 9 kPA 101 3 kPA b SAL...
Page 65: ...lution Method 0 0 50 0 ppt 0 1 ppt Automatic correction after manual input Barometric Pressure Correction mm Hg Range Resolution Method 500 to 1499 mm Hg or 66 6 to 199 9 kPA 1 mm Hg or 0 1 kPA Automa...
Page 66: ...ory default measurement Offset Adjustments Saturation 10 0 of reading in Saturation mode HOLD function Yes Auto Off function Selectable Auto Off function 20 minutes after last key press Display Custom...
Page 67: ...nic DO probe with 10 mL electrolyte 12 mm dia 1 meter cable ECDO6HANDY 35642 50 DO probe refilling electrolyte 01X211226 50 mL 35640 71 500 mL Replacement cap with pre installed membrane and 10 mL ele...
Page 68: ...until saturation occurs Oxygen is also produced by aquatic plants and algae as a by product of photosynthesis The amount of DO that can be held by water depends on 3 factors water temperature salinit...
Page 69: ...ty of DO in mg L in water at various temperatures Solubility of oxygen in water contact with water saturated air at standard atmospheric pressure 0 2 4 6 8 10 12 14 16 0 10 20 30 40 50 60 Temperature...
Page 70: ...is chemically consumed the partial pressure of oxygen in the electrolyte is zero Therefore a partial pressure gradient exists across the membrane and the rate at which oxygen enters the probe is a fu...
Page 71: ...alibration temperature Note The closer the air calibration temperature to the water temperature the more accurate is the calibration 14 1 5 Applications Oxygen is essential for fish invertebrate plant...
Page 72: ...keep DO concentration to a minimum Some pollutants such as acid mine drainage produce direct chemical demands on oxygen in the water DO is consumed in the oxidation reduction reactions of introduced...
Page 73: ...iod please return freight pre paid and correction will be made without charge Eutech Instruments Oakton Instruments will determine if the product problem is due to deviations or customer misuse Out of...
Page 74: ...reason the items are to be returned For your protection items must be carefully packed to prevent damage in shipment and insured against possible damage or loss Eutech Instruments Oakton Instruments w...
Page 75: ......
Page 76: ...ruments P O Box 5136 Vernon Hills IL 60061 USA Tel 1 888 462 5866 Fax 1 847 247 2984 E mail info 4oakton com Web sites www 4oakton com www oaktoninstruments com Eutech Instruments Pte Ltd Blk 55 Ayer...