


OPERATING INSTRUCTIONS
DIRECTIVES D’UTILISATION
Note: Regarding Cloth Dust Bag
(Reusable)
If you are using the
washable cloth
bag
, it should be emptied for reuse.
Please note however that the cloth bag
will require periodic washing, especially
while vacuuming fine dust particles that
can block suction. To wash cloth bag,
first remove plastic bag collar
attachment by removing all four (4)
screws. (Be careful not to lose any
parts.) We suggest washing by hand in
warm water with laundry detergent until
clean. Do not dry in electric dryer, cloth
should be laid out or left hanging to dry
and then reassembled.
Please note
your vacuum cleaner
includes both Paper Bags (3) and a
Cloth Bag
. The cloth bag offers
convenience for reusability, however,
please note that paper bags will offer
the best cleaning performance and
clean air results. Select the one most
suitable to your needs.
Fig. 3
Cordon d’alimentation
Cet aspirateur est muni d’un cordon
d’alimentation rétractable. Pour
dérouler le cordon d’alimentation, saisir
la fiche à l’arrière et tirer doucement
jusqu’à obtention de la longueur
désirée (Fig. 3). Ne pas dérouler le
cordon au-delà de la première ligne-
guide, sous peine de ne pouvoir le
réenrouler.
Lorsque le nettoyage est terminé,
couper d’abord le contact et débrancher
la fiche. Appuyer ensuite sur le bouton
de réenroulement du cordon
d’alimentation. (Fig. 4) Tenir la fiche
afin de l’empêcher de claquer lorsque
vous réenroulez le cordon. Si le cordon
ne se rétracte pas complètement, le
redérouler, puis appuyer à nouveau sur
le bouton de réenroulement.
Assemblage de l’aspirateur
1. Insérer l’extrémité étroite du tube
télescopique dans l’accessoire de
luxe pour planchers et tapis.
2. Raccorder la rallonge courbe
tuyau/tube au tube télescopique.
3. Raccorder l’attache du boyau à
l’unité principale, en le poussant
jusqu’à ce qu’il s’enclenche. (Fig.1)
Fig. 1
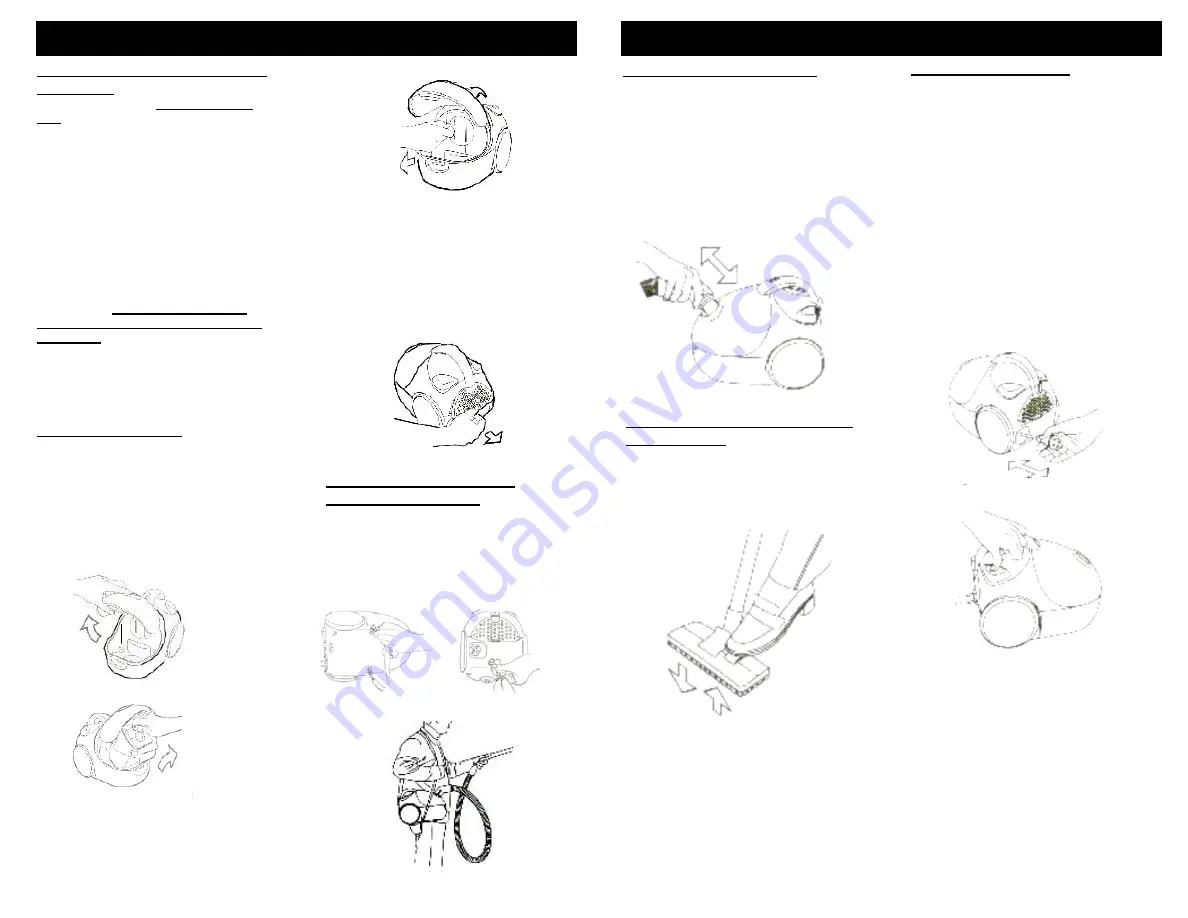
Replacing the two back filters
1. Remove the back filter holder by
pushing upwards on its lock. (Fig. 12)
2. Remove the two filters from their
holder.
3. Place two new filters into the filter
holder.
4. Put the filter holder back in its place.
Fig. 11
Fig. 12
Fig. 2
Utilisation d ’accessoire de luxe
pour plancher
Les brosses en-dessous du suçoir pour
planchers et tapis peuvent être mises en
position « abaissée » pour le nettoyage
des tapis, ou en position « relevée » pour
le nettoyage des planchers. (Fig.2)
Fig. 10
Changing the Filters
Replacing the front filter
(Behind the
Dust bag)
1. Open the dust bag cover. (Fig. 9)
2. Take out the dust bag holder.
(Fig. 10)
3. Take out front filter. (Fig, 11)
4. Put in new filter.
5. Replace the dust bag holder and
close the dust bag cover.
Fig. 9
Using the Vacuum Cleaner
with a Shoulder Strap
Fig. 4
Use the hooks to attach the shoulder
strap to the vacuum cleaner. (Fig. 13)
First attach the two hooks to the bottom
of the vacuum as shown in A and then
attach the last hook to the back of the
vacuum as shown in B.
A
B
Fig. 12
Avertissement: Tenir la fiche
lorsque vous réenroulez le
cordon. Ne pas faire
claquer le cordon.
5
10


