6
CAUTION: Use only charger model A7400 for 120 volt;
model HKA-A0740 for 230 volt.
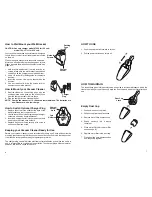
Your vacuum cleaner has a special bracket designed
to hold the unit, so that it may recharge while mounted
on the wall.
Cleaner hangs in bracket with the nozzle end down.
Mount on a wall where there are no dangerous objects
hidden beneath the wall surface like electrical wires,
pipes, etc.
1. Hold bracket against wall to mark location for
screws. Make sure the wall bracket is positioned
vertically, with the charger socket at the bottom.
2. Use a 1/4 inch drill for drilling holes for the plastic
anchors.
3. Insert the anchors. Line up the bracket with the
anchors.
4. Use a screwdriver to drive the screws into the
anchors to secure the bracket.
How to Mount your Vacuum Cleaner
5. Rest the cleaner on the docking pegs, with the
nozzle pointed down push on the unit until you
hear the charger socket click into place.
6. Plug the charger into an electrical outlet.
How to Switch Optional Charger Plug
1. Remove the screw in the middle of the back of the
wall bracket and remove back cover.
2. Unwind the cord from cord holders and pull charger
socket up and away from wall bracket.
3. Insert new charger socket into charger socket hole
and wind cord around cord holders.
4. Replace back cover lining cord up with notch in
back cover. Replace screw.
Keeping your Vacuum Cleaner Ready for Use
Return your vacuum cleaner to the wall holder after every use. Firmly position into the
mounting bracket ensuring that the vacuum cleaner fits correctly into the charging socket.
It will then be recharged and ready for operation at all times.
The charger plug can be left in the electrical outlet at all times, even when the unit is in
use. It is impossible to overcharge the batteries. The charger plug will become warm,
however, this is not a cause for concern.
Charger
Socket
Docking
Pegs
Holes for
Screws.
Charger
Plug
How to Wall Mount your Wall Bracket
NOTE: Charge the cleaner for 14-16 hours before initial use. The batteries of a
new cleaner are on a low charge.
Charger
Socket
Hole
Cord
Holders
HOW TO USE
1. Push the power switch forward to turn on.
2. Pull the power switch back to turn off.
HOW TO MAINTAIN
The instructions given in this booklet serve as a guide to routine maintenance. Keep the
cleaner operating at top efficiency. Empty the dust cup and clean the filter after each
use.
Empty Dust Cup
1. Push down on dust cup latch.
2. Pull dust cup from handle section.
3. Remove motor filter from dust cup.
4. Shake contents into a waste
container.
5. Clean motor filter (refer to motor filter
section, page 8).
6. Replace motor filter in the dust cup.
7. Press dust cup onto handle section
until they snap together.
Dust Cup
Latch
7
Of
f
On


