background image

EN 11

INSTALLATION AND CONNECTION

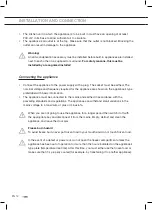
Selecting the location

•  Do not place the appliance near a source of heat, such as a gas cooker, radiator or boiler, 

etc., and do not expose it to direct sunlight.

•  Place the appliance in a dry and well aired room. The permitted ambient temperature range 

for the appliance depends on the appliance’s climate class, which is shown on the type 
plate.

Description

Class

Ambient temperature range °C

Relative humidity

Extended temperate

SN

+10 to +32

≤ 75%

Temperate

N

+16 to +32

Subtropical

ST

+16 to +38

Tropical

+16 to +43

Do not place the appliance in a room where the temperature can fall below the lowest 
permitted ambient temperature: the appliance may not work properly!

Do not place the appliance in a room where the temperature can fall below 5 °C: the 
appliance may become defective!

The appliance is not suitable for outdoor use and may not be exposed to rain.

•  The appliance must be placed at a distance of at least 5 cm from an electrical or gas cooker 

and at least 30 cm from a radiator or heater. An insulation panel must be fitted when these 
distances cannot be kept.

•  The appliance must be placed at a distance of about 5 cm from the wall, back and sides 

of a cupboard. A kitchen cupboard above the refrigerator must have a gap of at least 5 cm 
between the back of the cupboard and the wall. This is needed to make sure that there is 
sufficient cooling air for the condenser.

•  The plug of the installed appliance must remain accessible!

Place the appliance in a room with a sufficient volume of air. The room must have a 
volume of at least 1 m

3

 of air for every 8 grams of refrigerant. The quantity of refrigerant is 

shown on the type plate on the inside of the appliance.

Summary of Contents for KCD6178NF

Page 1: ...GEBRUIKSAANWIJZING INSTRUCTIONS FOR USE KOELKAST MET VRIEZER REFRIGERATOR WITH FREEZER KCS6178NF KCD6178NF...

Page 2: ...en in een kast 13 Voor het eerste gebruik Voordat u het toestel de eerste keer gebruikt 14 Advies om energie te besparen 14 Toestelbeschrijving Toestel 15 Bediening van het toestel Instellen van de th...

Page 3: ...te pictogrammen Belangrijk om te weten Tip Waarschuwing Brandgevaar ontvlambare materialen Onderhoud Het toestel ontdooien 21 Het toestel reinigen 22 Storingen Storingstabel 23 Milieuaspecten Verpakki...

Page 4: ...eel van de installatie instructies worden afzonderlijk meegeleverd Op onze website kunt u de meest recente versie van de gebruiksaanwijzing vinden Link naar de EPREL database van de EU De QR code op h...

Page 5: ...ervoor te zorgen dat ze niet met het apparaat spelen Reiniging en onderhoud mogen niet door kinderen worden uitgevoerd zonder toezicht Houd alle verpakkingsmaterialen uit de buurt van kinderen Alleen...

Page 6: ...k geen mechanische of andere middelen om het ontdooiproces te versnellen behalve die middelen die door de fabrikant zijn aanbevolen WAARSCHUWING Let op dat u het koelcircuit niet beschadigt WAARSCHUWI...

Page 7: ...en minste 4 uur alvorens het apparaat aan de netstroom aan te sluiten Hierdoor kan de olie terug in de compressor stromen Installeer het apparaat niet in de nabijheid van radiators fornuizen ovens of...

Page 8: ...iveau van de stopcontact Steek de stekker pas in het stopcontact als de installatie is voltooid Zorg ervoor dat het netsnoer na installatie bereikbaar is Pak altijd de stekker vast als u de kabel uit...

Page 9: ...gt Het bevat isobutaan R600a aardgas met een hoge ecologische compatibiliteit Dit gas is ontvlambaar Als er schade aan het koelcircuit optreedt zorg er dan voor dat er zich geen vlammen en andere onts...

Page 10: ...ng Haal de stekker uit het stopcontact Snij het netsnoer van het apparaat af en gooi dit weg Verwijder de deur om te voorkomen dat kinderen en huisdieren opgesloten raken in het apparaat Het koelcircu...

Page 11: ...an een onjuiste werking veroorzaken Plaats het toestel niet in een ruimte waar de temperatuur kan dalen tot onder 5 C want dit kan een storing veroorzaken Het toestel is niet geschikt voor buitengebru...

Page 12: ...informatie op het toestel Het toestel moet in overeenstemming met de geldende normen en regels op het elektriciteitsnet worden aangesloten en geaard Het toestel is bestand tegen kortstondige afwijking...

Page 13: ...ng deur wijzigen toestel inbouwen in een kast Het proces voor aanpassing van de draairichting van de deur en inbouw van het toestel wordt beschreven in een afzonderlijk installatievoorschrift INSTALLE...

Page 14: ...nenzijde en alle accessoires schoongemaakt worden met lauw water met een neutraal reinigingsmiddel Neem na het reinigen de delen af met schoon water en droog ze zorgvuldig Als u het toestel voor de ee...

Page 15: ...NL 15 Toestel Koelkast 1 Thermostaatknop 2 Ledlampje met deksel 3 Ventilator 4 Schappen 5 Groentelade 6 Deurvakken Vriezer 7 Vriesladen TOESTELBESCHRIJVING 2 10 11 6 4 5 7 3 1 2 10 11 6 4 5 7 3...

Page 16: ...f vriezen acht uur voordat u verse etenswaren wilt invriezen in De vriezer werkt nu op continu voor maximale koeling De vriestemperatuur wordt verlaagd en het apparaat schakelt naar de laagste tempera...

Page 17: ...it bananen ananas papaja citrusvruchten en groenten courgettes tomaten aubergines komkommers paprika s en aardappelen die gevoelig zijn voor lage temperaturen niet in de koelkast Delen van de deur Bov...

Page 18: ...het toestel de juiste temperatuur heeft het toestel schoon is Let op de houdbaarheidsdatum op de verpakking van het voedsel Plaats voedsel in de koelkast in gesloten bakjes of in een geschikte verpak...

Page 19: ...ct op een plateau en op de bodem van de vriezer Invriezen van kleine hoeveelheden vers voedsel ijsblokjes maken Zie hoofdstuk Aanbevolen indeling voor de beste locatie voor het invriezen van vers voed...

Page 20: ...p de juiste manier wordt ontdooid Geschikte manieren om voedsel te ontdooien in de koelkast in koud water in een magnetron of oven met een geschikt ontdooiprogramma Sommige bevroren producten kunnen b...

Page 21: ...verstopte afvoer weer vrij maken Ontdooien van de NoFrost vriezer Ontdooien van de NoFrost vriezer gaat automatisch Rijp dat zich af en toe afzet zal vanzelf verdwijnen Als er toch ijs of rijpafzetti...

Page 22: ...nnen niet al te lange tijd te consumeren Maak regelmatig de binnenzijde van het toestel schoon met lauw water met eventueel een neutraal reinigingsmiddel of speciale koelkastreiniger Maak alle oppervl...

Page 23: ...et het servicecentrum als de deurrubbers beschadigd zijn Water loopt uit de koelkast Dooiwater afvoer verstopt Maak de dooiwater afvoer vrij zie Ontdooien Toestel maakt lawaai Onjuiste plaatsing van l...

Page 24: ...f expansiegeluiden maken dat is normaal Wanneer het probleem blijft bestaan neemt u contact op met het servicecentrum en geeft u het type model en het serienummer door die op het typeplaatje of het la...

Page 25: ...he huishoudelijke apparaten afzonderlijk moeten worden afgedankt Dit houdt in dat het toestel aan het einde van zijn levensduur niet met het gewone huisvuil mag worden meegegeven Het toestel moet naar...

Page 26: ...ppliance into a cupboard 13 Before using the appliance for the first time Before you use the appliance for the first time 14 Energy saving advice 14 Description of the appliance Appliance 15 Operating...

Page 27: ...s used Important information Tip Warning Risk of fire flammable materials Maintenance Defrosting the appliance 21 Cleaning the appliance 22 Faults Faults table 23 Environmental aspects Disposal of pac...

Page 28: ...nstallation instructions is supplied separately You can find the most recent version of the instructions for use on our website Link to the EU EPREL database The QR code on the energy label supplied w...

Page 29: ...safety Children should be supervised to ensure that they do not play with the appliance Cleaning and user maintenance shall not be made by children without supervision Keep all packaging away from chi...

Page 30: ...chanical devices or other means to accelerate the defrosting process other than those recommended by the manufacturer WARNING Do not damage the refrigerant circuit WARNING Do not use electrical applia...

Page 31: ...east 4 hours before connecting the appliance to the power supply This is to allow the oil to flow back in the compressor Do not install the appliance close to radiators or cookers oven or hobs Do not...

Page 32: ...ation Make sure that there is access to the mains plug after the installation Do not pull the mains cable to disconnect the appliance Always pull the mains plug WARNING Do not locate multiple portable...

Page 33: ...t let hot items to touch the plastic parts of the appliance Do not store flammable gas and liquid in the appliance Do not put flammable products or items that are wet with flammable products in near o...

Page 34: ...and pets to be closed inside of the appliance The refrigerant circuit and the insulation materials of this appliance are ozone friendly The insulation foam contains flammable gas Contact your municip...

Page 35: ...ure can fall below 5 C the appliance may become defective The appliance is not suitable for outdoor use and may not be exposed to rain The appliance must be placed at a distance of at least 5 cm from...

Page 36: ...h basic information The appliance must be connected to the mains and earthed in accordance with the prevailing standards and regulations The appliance can withstand small variations in the mains volta...

Page 37: ...he door opens building the appliance into a cupboard Information about changing the side on which the door opens and building the appliance into a cupboard is enclosed in separate installation instruc...

Page 38: ...kewarm water and a neutral cleaning agent Wipe the cleaned parts with a cloth with clean water and then dry them thoroughly If you use the appliance for the first time do not put food into the applian...

Page 39: ...Appliance Refrigerator 1 Thermostat knob 2 LED lamp cover 3 Fan 4 Shelves 5 Vegetable drawer 6 Door compartments Freezer 7 Freezer drawers DESCRIPTION OF THE APPLIANCE 2 10 11 6 4 5 7 3 1 2 10 11 6 4...

Page 40: ...Activate the intensive freezing function eight hours before freezing fresh food and the freezer will run continuously to provide maximum cooling The freezing temperature drops and the appliance switc...

Page 41: ...not store fruit bananas pineapples papaya citrus fruits and vegetables courgettes tomatoes aubergines cucumber sweet peppers and potatoes that are sensitive to low temperatures in the refrigerator Se...

Page 42: ...t the correct temperature the appliance is clean Take good note of the use by date stated on the food packaging Put food in the refrigerator in sealed containers or in suitable packaging This will pre...

Page 43: ...on the base of the freezer Freezing small quantities of fresh food making ice cubes See the chapter Recommended distribution for the best location for freezing fresh food 1 to 2 kilograms and making...

Page 44: ...the correct way Suitable methods of thawing food are in the refrigerator in cold water in a microwave or conventional oven with a suitable thaw program Some frozen products can be prepared without nee...

Page 45: ...example Defrosting of the NoFrost freezer The NoFrost freezer defrosts automatically Any frost deposits will then disappear Any ice or frost deposits that nevertheless form in the freezer compartment...

Page 46: ...me Regularly clean the interior of the appliance with lukewarm water If so required add a neutral cleaning agent or special refrigerator cleaner to the water Clean all surfaces with a soft cloth Wipe...

Page 47: ...maged Clean the door seals Call the service centre if the door seals are damaged Water runs from the refrigerator Defrost water drain clogged Clean defrost water drain see Defrost Appliance makes a no...

Page 48: ...ooling circuit to make gurgling or expansion noises If you are unable to solve the problem then contact the service centre When you do so state the type model and serial number shown on the type plate...

Page 49: ...to draw your attention to the requirement for the separate disposal of domestic electrical appliances This means that the appliance may not be disposed of in unsorted household waste at the end of it...

Page 50: ...EN 26...

Page 51: ...EN 27...

Page 52: ...829109 VER 3 21 04 2022 829109 www etna nl www etna be...

Page 53: ...MODE D EMPLOI BEDIENUNGSANLEITUNG R FRIG RATEUR AVEC CONG LATEUR K HL GEFRIER KOMBINATION KCS6178NF KCD6178NF...

Page 54: ...remi re utilisation de l appareil Avant d utiliser l appareil pour premi re fois 14 Conseils pour faire des conomies d nergie 14 Description de l appareil Appareil 15 Utilisation de l appareil R glage...

Page 55: ...eil 21 Nettoyage de l appareil 22 Probl mes Tableau des probl mes 23 Aspects environnementaux Mise au rebut de l appareil et de l emballage 25 Pictogrammes utilis s Important savoir Conseil Mise en ga...

Page 56: ...guide d installation est fournie s par ment Vous pouvez trouver la version la plus r cente de le mode d emploi sur notre site Web Lien vers la base de donn es EPREL de l UE Le code QR sur l tiquette...

Page 57: ...surveill s pour s assurer qu ils ne jouent pas avec l appareil Les enfants ne peuvent en aucun cas nettoyer ou entretenir cet appareil sans tre supervis s Tenez tous les emballages hors de port e des...

Page 58: ...a structure d encastrement MISE EN GARDE Ne pas utiliser de dispositifs m caniques ou d autres moyens pour acc l rer le processus de d givrage en dehors de ceux recommand s par le fabricant MISE EN GA...

Page 59: ...ours des gants de s curit Assurez vous que l air circule autour de l appareil Attendez au moins 4 heures avant de brancher l appareil sur secteur Ceci afin de permettre l huile de refouler dans le com...

Page 60: ...dessous du niveau de la fiche secteur Branchez la fiche secteur dans la prise de courant uniquement la fin de l installation Assurez vous que la fiche secteur est accessible une fois l appareil instal...

Page 61: ...lev de compatibilit environnementale Ce gaz est inflammable Si le circuit de r frig ration est endommag assurez vous de l absence de flammes et de sources d ignition dans la pi ce A rez la pi ce vitez...

Page 62: ...nchez l appareil de la prise secteur Coupez le c ble d alimentation et mettez le au rebut Retirez la porte pour emp cher que les enfants et les animaux ne s enferment l int rieur de l appareil Le circ...

Page 63: ...que de devenir d fectueux L appareil n est pas con u pour un usage en ext rieur et ne doit pas tre expos la pluie Placez l appareil une distance d au moins 5 cm d une cuisini re lectrique ou gaz et d...

Page 64: ...appareil doit tre raccord au secteur et reli la terre conform ment aux normes et r glementations en vigueur L appareil peut supporter des variations de tension secteur de l ordre de plus ou moins 6 m...

Page 65: ...orte encastrement de l appareil dans un meuble Les informations relatives au changement du sens d ouverture de la porte et l encastrement de l appareil dans un meuble sont fournies dans un guide d ins...

Page 66: ...accessoires internes doivent tre nettoy s l eau ti de et un d tergent neutre Essuyez les parties nettoy es avec un chiffon imbib d eau claire puis s chez les soigneusement Si vous utilisez l appareil...

Page 67: ...g rateur 1 Bouton du thermostat 2 Lampe LED et capot 3 Ventilateur 4 tag res 5 Tiroir de l gumes 6 Balconnets de porte Cong lateur 7 Tiroirs du cong lateur DESCRIPTION DE L APPAREIL 2 10 11 6 4 5 7 3...

Page 68: ...ion de cong lation rapide huit heures avant de congeler des aliments frais afin que le cong lateur fonctionne en continu pour fournir un refroidissement maximal La temp rature de cong lation s abaisse...

Page 69: ...nes ananas papayes agrumes et les l gumes courgettes tomates aubergines concombres poivrons et pommes de terre sensibles aux basses temp ratures dans le r frig rateur Sections de la porte Balconnets d...

Page 70: ...ature de l appareil soit ad quate l appareil soit propre Tenez compte de la date de p remption indiqu e sur l emballage des aliments Conservez les aliments dans des r cipients ou des emballages herm t...

Page 71: ...tites quantit s d aliments frais fabrication de gla ons Voir le chapitre R partition recommand e pour en savoir plus sur les zones optimales pour congeler des aliments frais 1 2 kg et faire des gla on...

Page 72: ...recommand es sont les suivantes dans le r frig rateur dans de l eau froide dans un four micro ondes ou un four conventionnel poss dant un programme de d cong lation ad quat Certains produits congel s...

Page 73: ...exemple un pique brochette D givrage du cong lateur NoFrost Le cong lateur NoFrost se d givre automatiquement Tout d p t de givre est alors limin Tout d p t de glace ou de givre se formant n anmoins d...

Page 74: ...ur de l appareil r guli rement avec de l eau ti de Ajoutez au besoin un produit nettoyant neutre ou sp cial cong lateur dans l eau Nettoyez toutes les surfaces avec un chiffon doux Essuyez les parties...

Page 75: ...stat R glez correctement le thermostat Les joints de la porte sont sales ou endommag s Nettoyez les joints s ils sont endommag s contactez le service apr s vente De l eau s coule du r frig rateur La r...

Page 76: ...s Nettoyez les joints s ils sont endommag s contactez le service apr s vente Remarque Il est normal que le circuit de r frig ration produisent des bruits de gargouillement ou de dilatation Si vous ne...

Page 77: ...re attention sur le tri s lectif et la n cessit d liminer les appareils m nagers domestiques s par ment des ordures m nag res Cela signifie qu la fin de son cycle de service l appareil ne peut pas tre...

Page 78: ...Vor der ersten Verwendung des Ger ts Vor der ersten Verwendung des Ger ts 14 Hinweise zum Sparen von Energie 14 Beschreibung des Ger ts Ger t 15 Bedienung des Ger ts Einstellen des Thermostats 16 Schn...

Page 79: ...lege Abtauen des Ger ts 21 Ger t reinigen 22 St rungen St rungstabelle 23 Umweltschutz Entsorgung von Ger t und Verpackung 25 Verwendete Piktogramme Wichtiger Hinweis Tipp Warnung Brandgefahr brennbar...

Page 80: ...ird separat mitgeliefert Die neueste Version der Bedienungsanleitung finden Sie auf unserer Website Link zur EU EPREL Datenbank Der QR Code auf dem Energielabel das sich am Ger t befindet enth lt eine...

Page 81: ...eug Halten Sie Kinder davon fern Kinder d rfen Reinigungs und Wartungsma nahmen am Ger t nur unter Aufsicht Erwachsener durchf hren Verpackungsmaterialien von Kindern fern halten Nur f r den europ isc...

Page 82: ...n WARNUNG Beim Abtauen keine mechanischen Hilfsmittel verwenden die nicht ausdr cklich vom Hersteller empfohlen werden WARNUNG K ltemittelkreislauf nicht besch digen WARNUNG Keine elektrischen Ger te...

Page 83: ...e das Ger t nach der Lieferung mindestens 4 Stunden aufrecht stehen bevor Sie es mit der Stromversorgung verbinden So lassen Sie dem l ausreichend Zeit zur ck in den Kompressor zu flie en Ger t nicht...

Page 84: ...n Das Netzkabel muss stets tiefer liegen als die Steckdose Installation erst vollst ndig abschlie en danach Stecker in die Steckdose stecken Achten Sie darauf dass die Steckdose auch nach der Installa...

Page 85: ...s Gas ist brennbar Falls der K ltemittelkreislauf besch digt ist offenes Feuer und Z ndquellen im Raum vermeiden Raum l ften Hei e Gegenst nde von den Kunststoffteilen des Ger ts fernhalten Im Ger t k...

Page 86: ...des Ger ts abmontieren um sicherzustellen dass sich keine Kinder und Haustiere im Ger t einschlie en Der K ltemittelkreislauf und die Isoliermaterialien dieses Ger ts sind unsch dlich f r die Ozonsch...

Page 87: ...kann es zu Sch den am Ger t kommen Das Ger t eignet sich nicht f r den Einsatz im Freien Es darf keinem Niederschlag ausgesetzt werden Halten Sie stets einen Abstand von mindestens 5 cm zwischen dem...

Page 88: ...Ger t sind auf dem Typenschild angegeben Das Ger t muss entsprechend den gesetzlichen Vorschriften an das Stromnetz angeschlossen und geerdet werden Das Ger t toleriert Schwankungen der Netzspannung...

Page 89: ...der Ger tet r ndern Ger t in Schrank einbauen Informationen zum ndern der Anschlagseite der Ger tet r und zum Einbau des Ger ts in einen Schrank finden Sie in separaten Installationsanweisungen INSTAL...

Page 90: ...betriebnahme das Innere des Ger ts sowie alles interne Zubeh r mit lauwarmem Wasser und einem neutralen Reinigungsmittel Gereinigte Teile mit einem Tuch und klarem Wasser abwischen und danach gr ndlic...

Page 91: ...Ger t K hlschrank 1 Thermostatknopf 2 LED Leuchte Abdeckung 3 L fter 4 Einlegeb den 5 Gem selade 6 T rablagen Gefrierschrank 7 Gefrierraum Schubladen BESCHREIBUNG DES GER TS 2 6 4 5 7 3 1 2 10 11 6 4...

Page 92: ...e die Schnellgefrierfunktion acht Stunden vor dem Einfrieren von frischen Lebensmitteln und der Gefrierschrank l uft kontinuierlich um eine maximale K hlung zu gew hrleisten Die Gefriertemperatur sink...

Page 93: ...Lagern Sie im K hlschrank keine k lteempfindlichen Fr chte wie Bananen Ananas Papaya und Zitrusfr chte sowie keine k lteempfindliches Gem se wie Zucchini Tomaten Auberginen Gurken Paprikas und Kartof...

Page 94: ...rpacken Ger t auf korrekte Temperatur einstellen Ger t sauber halten Achten Sie besonders auf die Haltbarkeitsdaten auf den Lebensmittelverpackungen Lebensmittel immer in verschlossenen Beh ltern oder...

Page 95: ...enboden oder auf den Boden des Gefrierschranks Einfrieren geringer Mengen frischer Lebensmittel Herstellung von Eisw rfeln Die besten Einlegepositionen f r frische Lebensmittel 1 bis 2 Kilogramm und d...

Page 96: ...ahren f r das Auftauen im K hlschrank in kaltem Wasser in einer Mikrowelle oder einem konventionellen Ofen mit geeignetem Auftauprogramm Einige gefrorene Produkte k nnen ohne vorheriges Auftauen zuber...

Page 97: ...ost Gefrierschrank wird automatisch abgetaut Alle Eisreste verschwinden Wenn sich im Gefrierraum dennoch Eisreste bilden kann dies durch ungew hnliche Nutzung des Ger ts verursacht sein zu h ufiges un...

Page 98: ...nnenraum des Ger ts mit lauwarmem Wasser Wenn n tig Neutralreiniger oder K hlschrankreinigungsmittel zum Wasser hinzuf gen Alle Oberfl chen mit einem weichen Tuch reinigen Gereinigte Teile mit einem T...

Page 99: ...rdichtungen sind verschmutzt oder die Dichtungen sind besch digt Reinigen Sie die T rdichtungen Wenn die T rdichtungen besch digt sind wenden Sie sich an den Kundendienst Wasser l uft aus dem K hlsch...

Page 100: ...Sie die T rdichtungen Wenn die T rdichtungen besch digt sind wenden Sie sich an den Kundendienst Bemerkung Es ist normal dass der K hlkreislauf blubbernde oder expandierende Ger usche macht Wenn sich...

Page 101: ...t ist mit dem Symbol einer durchstrichenen M lltonne gekennzeichnet Dieses Symbol weist darauf hin dass Elektroger te getrennt entsorgt werden m ssen Das Ger t darf am Ende seiner Nutzungsdauer nicht...

Page 102: ...DE 26...

Page 103: ...DE 27...

Page 104: ...829110 VER 3 21 04 2022 829110 www etna nl www etna be...

Reviews: