8
EtherWAN Series Router Hardware Installation Guide
Installation
Installation
The steps for a typical installation are:
1.
Inserting the SIM card/s. See
2.
Connecting the antenna/s. See
3.
Connecting the Ethernet Port. See
4.
Connecting the Serial Port. See
5.
Connecting to the Console Port in Console Mode. See
Connecting to the USB-C port in
Mode
6.
Using the Console port as a virtual Ethernet port. See
Connecting to the USB-C port as
7.
Connecting the power. See
In this mode, the USB-C port behaves as if a PC is
Ethernet port, allowing access to networks and the Internet. See the
EtherWAN User’s Guide for
more information.
8.
Logging into the routerC4G-S-1P3M. See
in Con-sole Mode
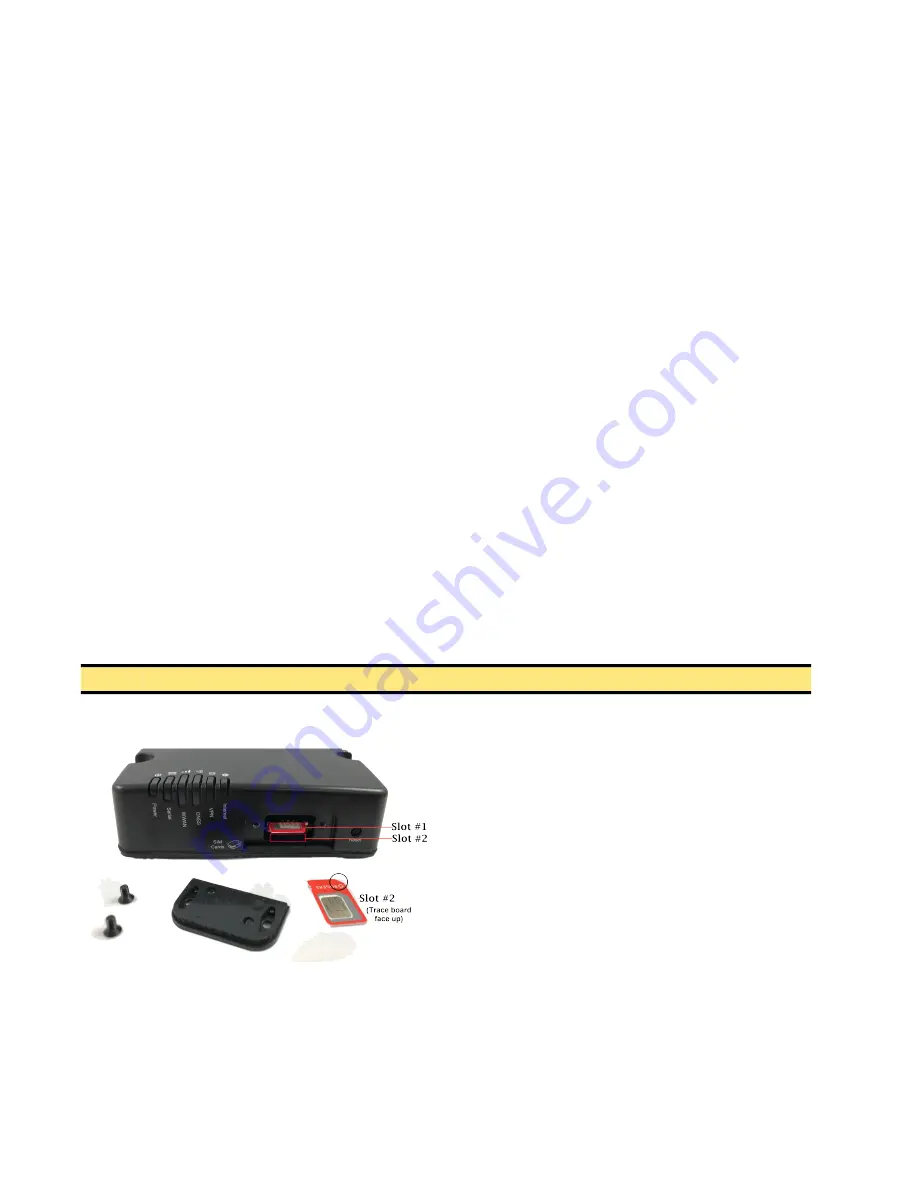
Inserting the SIM card
TheC4G-S-1P3M comes with two SIM sockets for mini-SIM (2FF) cards. Ensure the power
is disconnected before you insert the SIM card/s.
1. Using your Phillips screwdriver, removed the two screws from the panel covering the
SIM slots. Gently pry the cover loose from the opening.
2. Align the SIM card so that the SIM card will slide into the top slot (slot#1). Each SIM
card has a notched corner for orientation and the SIM card can only be inserted the
correct way. You will hear an audible click when the SIM is inserted correctly. Always
populate slot#1 first. Add a second SIM card if your network setup requires it.
3. Align the SIM cover plate and secure the plate with the screws.
Connecting the Antenna/s
The router C4G-S-1P3M/has three SMA female antenna connectors:
•
Main Cellular antenna connector
•
Rx Diversity antenna connector
•
GNSS antenna connector
Note:
Do not force the SIM(s) card in or you may damage the card on your
C4G-S-1P3M/
.


