GB
4
Congratulations on your purchase of this high-quality ESYLUX product. To ensure proper operation, please read these user
instructions carefully and keep them for future reference.
1 • SAFETY INSTRUCTIONS
CAUTION: work on the 230 V power system must be carried out by authorised personnel only with due regard to
the applicable installation regulations. Switch off the power supply before installing the system.
Use this product only as intended (as described in the user instructions). Changes or modifications to the
product or painting it will result in loss of warranty. You should check the device for damage immediately
after unpacking it. If there is any damage, you should not install the device under any circumstances.
If you suspect that safe operation of the device cannot be guaranteed, you should turn the device off
immediately and make sure that it cannot be operated unintentionally.
The RCi KNX series is only intended for use in a KNX (EIB), TP (twisted pair) bus system in conjunction
with other KNX components.
2 • ASSEMBLY
Before installing the device, observe the following:
• Turn off the power supply.
• Information concerning range is based on an installation height of 2.50 m (the field of detection will
vary according to the height).
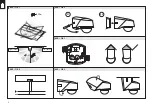
• For optimum performance (i.e. maximum range), position the device so that people vehicles are moving
parallel to the detector
(fig. 1)
.
• Make sure that the detector has a clear line of sight, as infrared beams cannot penetrate solid objects.
• To avoid influencing the light sensor, maintain a minimum distance of 1 m in relation to the connected
lighting and do not point light sources directly at the detector.
• When installing the device, bear in mind the surrounding area e.g. neighbouring properties or the
distance to the road.
• The motion detector should only be installed on a stable, flat surface (wall/ceiling).
The wall base unit and sensor are connected. For installation purposes, separate the two parts. Fit the
screwdriver into the side opening and lever in the direction of the sensor, pulling the detector away from
the wall base
(fig. 2.1)
. If mounting on a wall, the cable inlets must face downwards. If mounting on a
ceiling, the cable inlets must face forwards. Feed the cable into the detector and mount the wall base unit
in the required position
(fig. 3)
. Connect the motion detector according to the circuit diagram
(fig. 4)
.
If fitting to a ceiling, the two sensor parts are turned away from each other by 180°
(fig. 5)
. Press the
sensor into the wall base until it clicks into place
(fig. 2.2).
NB: The motion detector’s sensor must be facing downwards.
INSTaLLaTION INSTRUCTIONS
GB
3 • START-UP INFORMATION
For information about starting up the device, programming buttons, setting the functions and other
characteristics, refer to the user instructions and application description.
The product database and application description are available to download at www.esylux.com.
4 • PRACTICAL ADVICE
• Small animals, nearby trees or bushes moving in the wind may trigger the device.
• The detector’s range can be dramatically reduced by objects moving towards it,
rather than parallel with it.
5 • DISPOSAL
NOTE: this device must not be disposed of as unsorted household waste. Used devices must be disposed of
correctly. Contact your local town council for more information.
6 • ESYLUX MANUFACTURER’S GUARANTEE
ESYLUX products are tested in accordance with applicable regulations and manufactured with the utmost
care. The guarantor, ESYLUX Deutschland GmbH, Postfach 1840, D22908 Ahrensburg, Germany
(for Germany) or the relevant ESYLUX distributor in your country (visit www.esylux.com for a complete
overview) provides a guarantee against manufacturing/material defects in ESYLUX devices for a period
of three years from the date of manufacture.
This guarantee is independent of your legal rights with respect to the seller of the device.
The guarantee does not apply to natural wear and tear, changes/interference caused by environmental
factors or damage in transit, nor to damage caused as a result of failure to follow the user or maintenance
instructions and/or as a result of improper installation. Any illuminants or batteries supplied with the
device are not covered by the guarantee.
The guarantee can only be honoured if the device is sent back with the invoice/receipt, unchanged,
packed and with sufficient postage to the guarantor, along with a brief description of the fault, as soon as
a defect has been identified.
If the guarantee claim proves justified, the guarantor will, within a reasonable period, either repair the
device or replace it. The guarantee does not cover further claims; in particular, the guarantor will not be
liable for damages resulting from the device’s defectiveness. If the claim is unfounded (e.g. because the
guarantee has expired or the fault is not covered by the guarantee), then the guarantor may attempt to
repair the device for you for a fee, keeping costs to a minimum.
Summary of Contents for RC 230i KNX
Page 15: ...15...


