background image

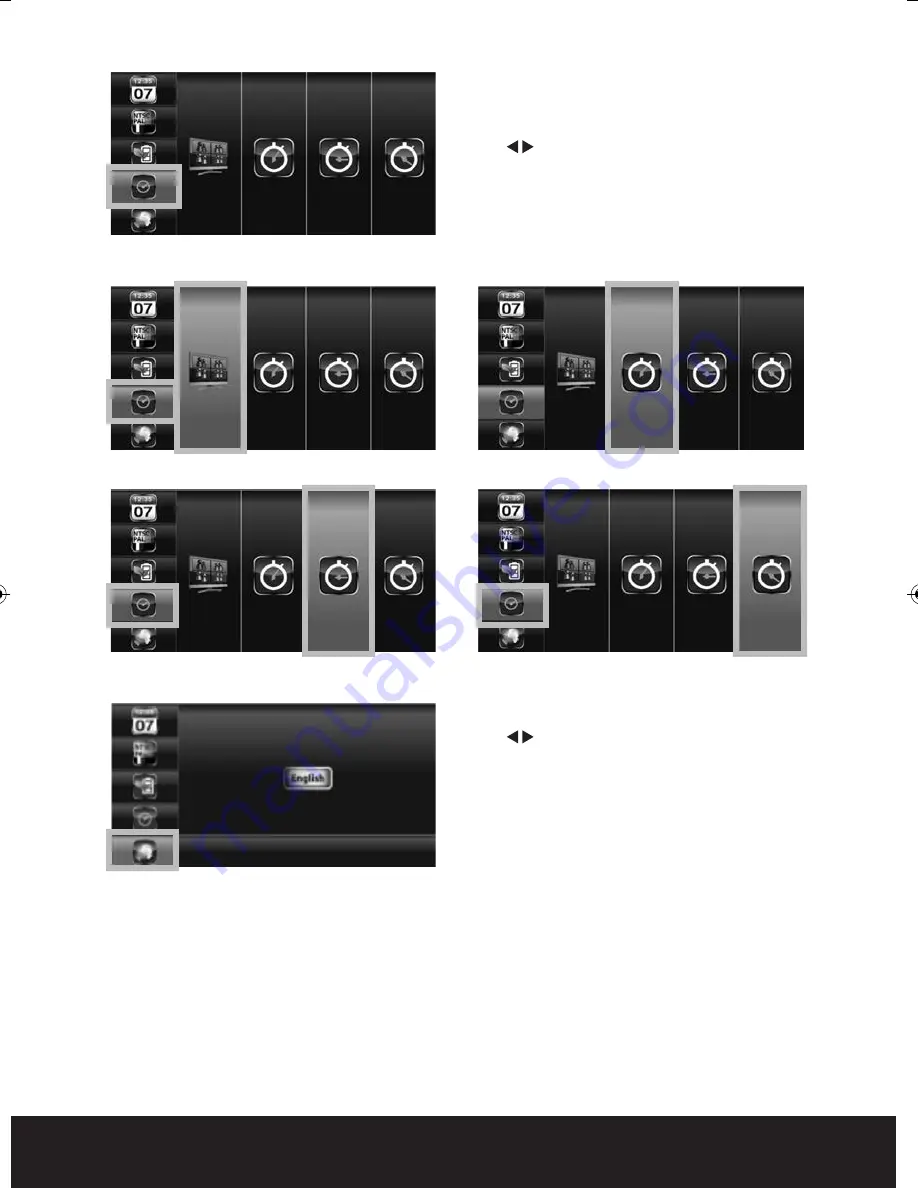
Multi Channels Idle Display

Selects style of display after no inputs received or
selections made for 3 minutes .

Use 

to select: 

DISPLAY QUAD(all images) after idle period  
Display each channel at 5 SEC intervals 
Display each channel at 10 SEC intervals
Display each channel at 15 SEC intervals
Press MENU to confirm selection
Press ESC to save and exit

Display QUAD mode

Display each channel at 5 sec Intervals

Display each channel at 10 sec Intervals

Display each channel at 15 sec Intervals

15

Default

Use 

to select the system language for

SYSTEM RESTORE. 

Press MENU to confirm selection and system
will restore to factory default.

A.  Camera Setup

CH1=ON CH2=ON CH3=OFF CH4=OFF
Brightness= level 2

B.  Recorder Setup

X = Manual REC
Motion detection sensitivity = level 2
Masking area = all activated
REC time = 2 minutes

C.  System Setup

Time = 2013 01 01
Power Save = OFF
Idle display = Quad

D.  Alarm = OFF
E.  SD Card Overwrite = OFF

GuardCam WF Manual_Layout 2  28/11/2013  10:29  Page 15

Summary of Contents for GuardCam WF-MR

Page 1: ...Wire free external area protection system Installation and operation manual GuardCam WF SAR GuardCam WF T GuardCam WF MR...

Page 2: ...2...

Page 3: ...dCam WF T 6 GuardCam WF SAR 6 GuardCam WF MR 7 GuardCam WF T Installation 8 PIR Set Up 9 System Set Up 10 System Setup 14 Captured Image Playback Software 17 Connecting to a Television 21 Trouble Shoo...

Page 4: ...4 GuardCam WF T Combined PIR Floodlight camera and transmitter GuardCam WF MR Combined Monitor receiver GuardCam WF SAR Stand alone receiver module System components...

Page 5: ...that across an open field Any line of transmission obstruction will reduce the useful range When siting units consider minimising the number of walls trees doors hills within landscaping or other soli...

Page 6: ...R PLAY PAUSE 5 Switch Channel Cursor Down Fast Backward 6 ESC EXIT Previous 7 REC STOP DEL STOP 8 ZOOM Next 9 ALARM 10 Power Button 3 4 6 8 9 1 2 10 7 5 Pairing button Camera Termination box and mount...

Page 7: ...own Fast Backward 8 EXIT Previous 9 Next Start STOP 10 ZOOM 11 Alarm on off 12 Power Button General Channel Indicator Signal Indicator Recording Indicator Red Flashing Display mode Quad Display Scan D...

Page 8: ...ure the polarity is correct Double check the connections after wiring Errors may damage the motion sensor or cause a fire hazard 5 Attach the unit to the mounting plate You will first need to angle th...

Page 9: ...n 30 seconds to 7 minutes Turning the dial clockwise will increase the time turning counter clockwise will reduce the time Lux control PIR activation of the floodlight is also controlled by a photocel...

Page 10: ...onfirm selection and enter sub menu Camera Setup Select CAMERA SETUP press the MENU button to enter sub menu Use to select the camera to set up camera 1 4 Use to select the sub menu Pair a new device...

Page 11: ...ble to select a specific recording style for each hour of the day or generally for the whole day Note all channels are effected by selection made M Motion Only record when on movement is visible on sc...

Page 12: ...5 minutes or 10 minutes Use to select RECORD TIME section Use to highlight recording period 2 Min 5 Min 10 Min press the MENU button to confirm Press ESC to save and exit Event List Playback Select EV...

Page 13: ...a display press MENU once after playback started to PAUSE Use to select from channel to channel Channel indicator bottom left screen will indicate the channel number selected 1 2 3 4 Channel 1 playbac...

Page 14: ...Press ESC to save and exit Power Saving After a preset time following no button or menu selection the system can automatically switch off the monitor only when using GuardCam WF MR to save energy and...

Page 15: ...lay QUAD mode Display each channel at 5 sec Intervals Display each channel at 10 sec Intervals Display each channel at 15 sec Intervals 15 Default Use to select the system language for SYSTEM RESTORE...

Page 16: ...system will record over the oldest recorded file when the SD card is full Select MEMORY CARD OVERWRITE press MENU to activate overwrite function and press MENU again to deactivate Note One of the foll...

Page 17: ...a Player included on the CD provided with your GuardCam WF Files are physically transferred from GuardCam WFs micro SD card using the included MicroSD SD coverter and SD USB adaptor 1 Channel 1 Playba...

Page 18: ...Sec24 Media Player icon Please read the following steps to complete installation Sec24 Media Player icon If Window 7 is running on your PC please right click on icon Sec24 Media Player and select Run...

Page 19: ...19 Double click the icon to start the installation process Click Next to continue the installation When the installation is completed click Finish to exit the install wizard...

Page 20: ...ing the supplied SD USB adapter During playback all four channels can playback at once Select 1 to playback video image from channel 1 Select 2 to playback video image from channel 2 Select 3 to playb...

Page 21: ...g to a Television Both GuardCam WF receivers can be directly connected to a television with AV inputs to display live images or menu controls An AV lead is supplied for this purpose GUARDCAM WF MR GUA...

Page 22: ...es Motion detection not working Confirm the motion detection has been correctly set up or scheduled Adjust the sensitivity of the motion sensor The recording doesn t Make sure correct DATE AND TIME ha...

Page 23: ...hould be checked on the GuardCam WF receivers if the units may have been left without power If power has been removed from the receiver and or battery power has been lost stored images will retain the...

Page 24: ...ensions 160 x 176 x 260MM Weight 1400g GuardCam WF SAR Channels 4 Reception Range 150 meters in open field Receiver Resolution 800 X 480 Maximum SD card size 32Gb Receiver technology 2 4GHz FHSS Techn...

Reviews: