background image

13

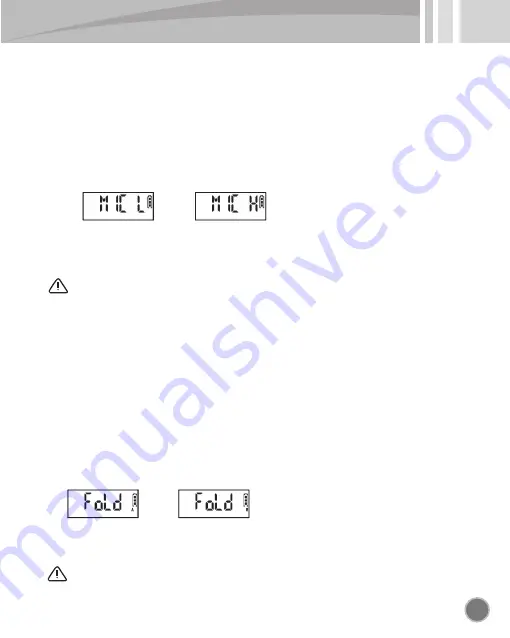
17-3. Setting mic sensitivity(MIC)

You can set mic sensitivity according to the distance of sound source and size of sound. 

● You can move to setting screen by pressing and holding mode button(M) more than 

   3 seconds in standby screen.

● You can move to MIC mode by pushing jog button to the direction of ), 

   volume(-) shortly. 

● You can select option(L, H) by pushing jog button to the direction of 

   previous(<<), next(>>) shortly. 

● When you move to next mode or press mode button(M) more than 3 seconds in 

   the setting screen you selected, set-up is saved and it is moved to standby screen. 

17-4. Setting folder to save recording(FOLD)

You can select folder(A, B) to save recording file. 

● You can move to setting screen by pressing and holding mode button(M) more than 

   3 seconds in standby screen. 

● You can move to FOLD mode by pushing jog button to the direction of ), 

   volume(-) shortly. 

● You can select option(A, B) by pushing jog button to the direction of 

   previous(<<), next(>>) shortly.

Caution

* Set it to suit the distance of sound source you want to record

* It is useful when you record long distance or low sound. 

● When you move to next mode or press mode button(M) more than 3 seconds in 

   the setting screen you selected, set-up is saved and it is moved to standby screen.

Caution

* It is convenient if you sort and manage folder according to place. 

<Mic sensitivity basics>

<Mic sensitivity amplification>

Summary of Contents for memoQ MR-250

Page 1: ... can be changed without prior notice to improve the quality of product We appreciate your purchasing of this product Please read the manual before use understand all functions and use it Please write purchasing date and purchasing place etc in warranty card and keep it Without warranty card free after sale service is not possible ...

Page 2: ... time 9 15 Checking recording remains 10 16 Deleting recording file 10 17 Setting mode 11 17 1 Setting recording mode MODE 12 17 2 Setting low pass noise cancellation LCF 12 17 3 Setting mic sensitivity MIC 13 17 4 Setting folder to save recording FOLD 13 17 5 Setting voice operated recording system VOS 14 17 6 Setting VOS level VL 14 17 7 Setting repetition REP 15 17 8 Setting LCD 15 17 9 Setting...

Page 3: ...eave it alone at the humid place or oily place That can be the cause of fire and breakdown Caution and warning for body Warning Caution Do not impact or drop product That can be the cause of breakdown Do not wash the surface of product by using alcohol benzene thinner etc Do not hear by using earphone or operate product during driving or walking due to the risk of traffic accident Do not cut disas...

Page 4: ...ton M 2 Name of each part 4 Jog button details 3 Composition Body REC II REC PLAY II POWER STOP ERASE REC II REC PLAY II POWER STOP ERASE Record Pause Play Pause Power Stop Erase Speaker Battery cover USB cable Stereo earphone User s manual Battery ...

Page 5: ...serting battery Battery indication icon Slight consumption Much consumption Time to change battery Hours of battery use in recording is by the state of earphone separation Hours of battery use Recording Play about 25 hours When you put battery check the polarity of battery like above picture Attached battery is for testing and its life can be short When you remove battery during operation like rec...

Page 6: ... record more than 3 seconds power is turned on and recording starts right away Connect USB cable to the earphone USB terminal of product and then connect it to the USB port of PC After a while LCD is changed to When you press and hold the button of play more than 3 seconds it is changed to standby status you can use the function of record and play In case of using external power file upload downlo...

Page 7: ...MUSIC mode of product Caution When battery is separated or discharged date is initialized Before recording perform time setup again and use it 9 Date and time setup Folder structure of recorder Screen of removable disk Caution When you separate product from PC perform safe removal of hardware to prevent the data damage Connect USB cable to the earphone USB terminal of product and then connect it t...

Page 8: ... sound by set up Recording files are saved in the set folder A B and basic folder is set to A In case of battery shortage during recording power is turned off after saving automatically In case of the shortage of memory capacity or maximum file numbers FULL is indicated Delete unnecessary files or delete after backup into PC and secure memory capacity Screen of recording progress Folder saving rec...

Page 9: ... Minimum volume Maximum volume How to operate volume Push job button down How to operate volume Push jog button up 14 Checking recording time When you press mode button M shortly in the screen of standby the recording time of selected file is indicated Error of 1 3 seconds or so can be made according to file Screen to indicate recording time Mode button M Push the center When you press the button ...

Page 10: ...ss and hold the button of stop more than 5 seconds at the selected file the mark of ERASE blinks and this file is played back for 10 seconds to prevent deleting error When you press the button of stop shortly one more time while it is played back for 10 seconds file is deleted If you press other button during deleting or you do not press the button of stop within 10 seconds deleting is canceled au...

Page 11: ...hing jog button to the direction of previous next shortly Direction Direction Direction Direction Jog button use by pressing center Jog button use by pushing to the direction of top bottom left right shortly Mode button M Changing mode Changing option Setting recording mode PCM HQ SP LP Setting low pass noise cancellation ON OFF Setting microphone sensitivity L H Setting folder to save recording A...

Page 12: ...ode of LCF by pushing jog button to the direction of volume volume shortly You can select option on oF by pushing jog button to the direction of previous next shortly When you move to next mode or press mode button M more than 3 seconds in the setting screen you selected set up is saved and it is moved to standby screen PCM HQ SP LP When you move to next mode or press mode button M more than 3 sec...

Page 13: ...ng folder to save recording FOLD You can select folder A B to save recording file You can move to setting screen by pressing and holding mode button M more than 3 seconds in standby screen You can move to FOLD mode by pushing jog button to the direction of volume volume shortly You can select option A B by pushing jog button to the direction of previous next shortly Caution Set it to suit the dist...

Page 14: ... M more than 3 seconds in standby screen You can move to VL mode by pushing jog button to the direction of volume volume shortly You can select option 2 1 0 1 2 by pushing jog button to the direction of previous next shortly Caution Adjust sensing level to suit place and situation and use after testing When you move to next mode or press mode button M more than 3 seconds in the setting screen you ...

Page 15: ...by pushing jog button to the direction of volume volume shortly You can select option ON 10 30 60 by pushing job button to the direction of previous next shortly When you move to next mode or press mode button M more than 3 seconds in the setting screen you selected set up is saved and it is moved to standby screen REP NO It plays back from the file of current position to the last file of folder o...

Page 16: ...og button to the direction of volume volume shortly You can select option by pushing job button to the direction of previous next shortly Caution It is not applied in VOICE mode EQ is applied only in playing back with earphone FL FLAT ro ROCK Ho HOUSE dA DANCE JA JAZZ bA BALLAD rb R B CL CLASSIC When you move to next mode or press mode button M more than 3 seconds in the setting screen you selecte...

Page 17: ...l data saved in MUSIC folder are deleted FOLD A all data saved in A folder are deleted FOLD B all data saved in B folder are deleted To proceed deletion select YES by pushing jog button to the direction of previous next shortly and press mode button M shortly To cancel select NO and return to the previous screen by pressing mode button M shortly Caution Before performing CLEAN be sure to save impo...

Page 18: ...d recording starts Press stop button shortly and it stops and recording is saved Recording phone call by using ear mic option After putting ear mic in ear and connecting its plug to the mic terminal of product when you hold the receiver or cellphone to ear next to ear mic and talk press recording button and phone conversation is recorded Caution The design of tel adaptor can be changed without pri...

Page 19: ...19 MEMO ...

Page 20: ...tery use Recording about 25 hours Playback about 23 hours earphone MP3 1kHz 128kbps 44 1kHz Vol 20 Recording folder VOICE 999 Files A 999Files B Practical maximum output earphone 3 5mW 3 5mW 16 ohm Dimension Power 1 5V AAA Alkaline x 1 Usage environment Temperature 0 40 Humidity 20 80 Accessory Earphone Battery USB cable Manual Speaker output 100mW 17mm 8ohms W x H x D 105 5 x 22 5 x 14 5 mm Manuf...

Reviews: