


ESI
Juli@
21
can listen to the signal via the analog output in real-time. The monitoring level can be set using the
mouse, mouse wheel, or cursor keys.
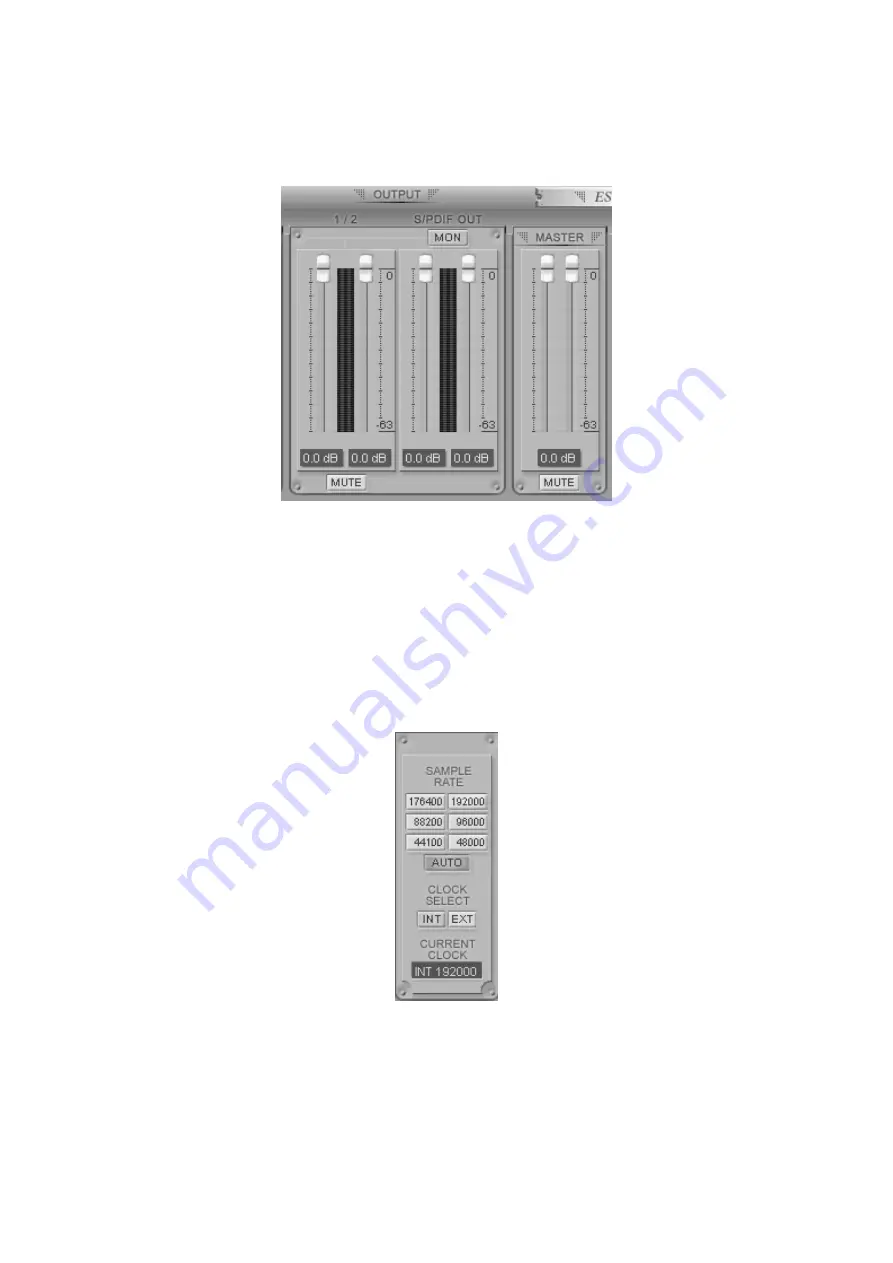
MASTER FADER
Allows you to change the level of the final output signal. The level can be set using the mouse,
mouse wheel, or cursor keys.
MUTE
Select this button to mute each signal source.
Sample Rate and Clock
Sample Rate
Selects the sample rate for Juli@. The green lit will indicate current sample rate. Juli@ supports
44.1, 48, 88.2, 96, 176.4, 192 (kHz) as sample rates. Select ‘AUTO’ to match the sample rate of the
played audio source automatically (a red light shows that AUTO is on). Deselecting Auto mode
allows you to set the sample rate manually (red light AUTO is off). This selection might not work


