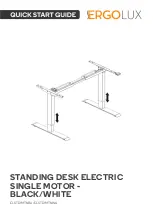
Ergolux ELSTD1MTNBA Quick Start Manual Download Page 2


Service Environment: 0–40°C 


Unplug the power plug before cleaning, wipe the dust on surface with a damp 
cloth when cleaning and be careful not to let water drops into the internal parts or 
loosen the connector.  


Check carefully to ensure correct and complete assembly before using. 


Familiarise yourself with all functions and program settings of the product before 
first use. 


This product is not a toy. Do not allow children to play with the product or be 
around it without supervision. 


Some slight noise caused by the belt or brake system is normal and will not have 
any effect on the use of the equipment. 


Do not clean the equipment with corrosive or abrasive materials. 


This appliance can be used by children aged from 8 years and above and persons 
with reduced physical, sensory or mental capabilities or lack of experience and 
knowledge if they have been given supervision or instruction concerning use of the 
appliance in a safe way and understand the hazards involved. 


If the supply cord is damaged, it must be replaced by the manufacturer, its service 
agent or a similarly qualified person in order to avoid a hazard. 


Ensure there are no hazards in your operating environment: e.g., do not leave tools 
around. Dispose of the plastic packaging materials as they may pose a choking 
hazard to children. 


Keep the original package of the equipment if necessary in case of the future use in 
transportation. 


This marking indicates that this appliance should not be disposed with other 
household wastes. To prevent possible harm to the environment or human health 
from uncontrolled waste disposal, recycle it responsibly to promote the 
sustainable reuse of material resources.


       SAFETY & WARNINGS 

Summary of Contents for ELSTD1MTNBA

Page 1: ...STANDING DESK ELECTRIC SINGLE MOTOR BLACK WHITE ELSTD1MTNBA ELSTD1MTNWA...

Page 2: ...persons with reduced physical sensory or mental capabilities or lack of experience and knowledge if they have been given supervision or instruction concerning use of the appliance in a safe way and un...

Page 3: ...2 x Pedestal 2 1 x Column OVERVIEW Note The drawings below are only for reference and maybe slightly different from the product you receive If you are missing any parts or have any issues installing p...

Page 4: ...3 1 x Column 4 1 x Supporting beam 5 1 x Transmission rod 6 2 x Supporting plate 7 1 x Adapter 8 2 x Baffle 9 1 x Power cable 10 4 x Cable tie...

Page 5: ...destal 1 Connect 1 2 and 3 together use 5x5 wrench C to tighten the screws A Step 2 Install supporting beam 4 Loosen screws on 4 with 4x4 wrench C Adjust the supporting beams to suit table top dimensi...

Page 6: ...Install supporting beam on the column 2 and 3 Tighten screw B with wrench 5x5 C Tighten screws on supporting beam with wrench 4x4 C Step 3 Install transmission rod 5...

Page 7: ...Install 5 2 and 3 as in picture 1 first and then picture 2 use 2 5x2 5 wrench D to tighten Step 4 Install supporting plate 6 Install 6 2 and 3 use 5x5 wrench C to tighten the screws A...

Page 8: ...Step 5 Install desk top Distance 200mm Install desk top with screw F use drill to tighten Install baffle 8 Install 8 using 2 5x2 5 wrench D to tighten the screws E...

Page 9: ...Step 6 Connect all cables to the adapter 7 Use cable ties 10 to secure cables to the desk Control Panel Instruction Press the UP button or DOWN button to raise or lower the height of desk surface...

Page 10: ...ogan com Overwork Duty cycle Maximum 2 minutes on 30 minutes OFF 1 Turn off and restast after 30 minutes 2 Contact Kogan com If any issues persist contact Kogan com g k 0 7 d a o L m u m i x a M s m m...

Page 11: ...IN THE BOX...

Page 12: ...is is a Quick Start Guide and while we hope that this has given you the assistance needed for a simple set up a full user guide outlining all of this product s instructions and features can be found o...

Reviews: