AIR NIBBLER
UNPACK
1. Unpack all parts and lay them on a flat, stable
surface.
2. Remove all packing materials and shipping
devices if applicable.
3. Make sure the delivery contents are complete
and free of any damage. If you find that parts are
missing or show damage do not use the product
but contact your dealer.
4. Using an incomplete or damaged product
represents a hazard to people and property.
5. Ensure that you have all the accessories and
tools needed for assembly and operation. This
also includes suitable personal protective
equipment.
ASSEMBLY
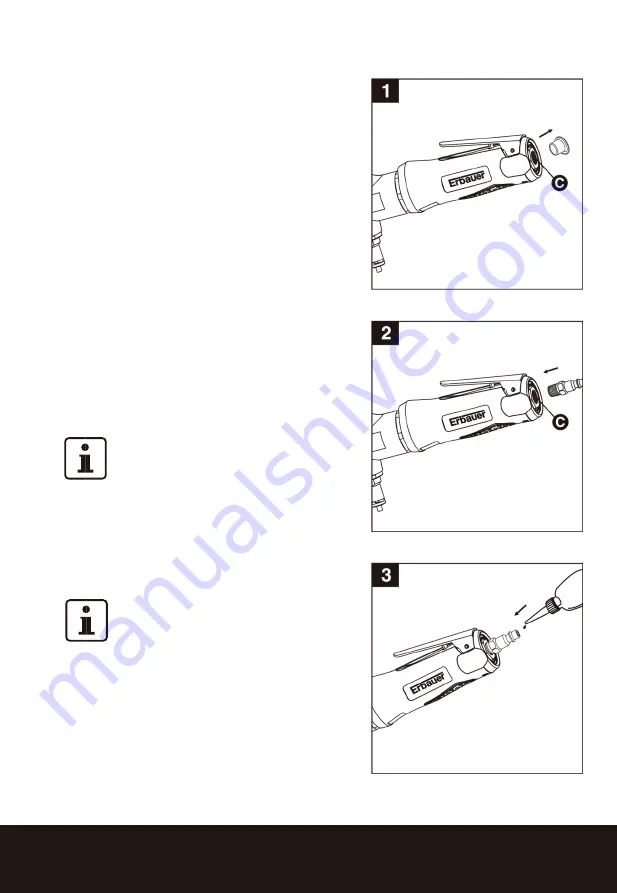
1. Remove the air inlet protective cap from the air
inlet (C). (See Figure 1)
2. Mount the male plug by hand into the air inlet (C).
(See Figure 2)
NOTE:
Use thread sealant tape
(not included) on the male plug and
tighten it with a wrench for airtight
connection. Do not overtighten.
3. Place 2 - 3 drops of air tool oil into the male plug
before each use. (See Figure 3)
4. Connect air supply hose to the male plug.
(See Figure 4)
5. Set the working pressure at 90psi/6.3bar for best
tool performance.
NOTE:
Working pressure refers to the
air line pressure set to tool when tool is
under working conditions.
OPERATION
1.
Slowly press on the trigger (B) and let
thetool (A) run at full speed. (See Figure 5)
2.
Hold the tool (A) firmly and get the open
side of the die (D) to the workpiece being cut. Push
the tool forward along the workpiece with normal
hand force. (See Figure 6)


