4.
Select
Various prints
on the control panel.
To select an item, move the focus to the item using the
u
d
l
r
buttons, and then press the OK button.
5.
Select
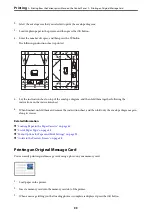
Message Card
.
6.
Select the device from which you want to load images, make settings for images and ruled lines, and then
select
Done
.
7.
Do one of the following.
❏
When selecting
Template Art
as the
Select Location
setting: Select an image.
❏
When selecting
Memory Device
as the
Select Location
setting: Select a photo, and then select
Use This
Photo
.
❏
When selecting
Do Not Use Image
as the
Select Location
setting: Go to the next step.
8.
Make the paper settings.
9.
Press the
r
button.
10. Select the layout.
11. Press the
button to edit the photo as necessary.
12. Enter the number of copies, and then press the
x
button.
Related Information
&
“Loading Paper in the Paper Cassette” on page 44
&
“List of Paper Type” on page 48
&
“Inserting a Memory Card” on page 50
&
“Menu Options for Printing Original Message Cards” on page 100
&
“Menu Options for Paper and Print Settings” on page 93
&
“Guide to the Preview Screen” on page 88
&
“Guide to the Edit Photo Screen” on page 88
&
“Menu Options for Editing Photos” on page 94
Menu Options for Printing Original Message Cards
Select Location:
When printing an image on a message card, select whether to use an image stored in the printer or a
photo on a memory device. If you do not print any images, select
Do Not Use Image
.
Image Position:
Select where you want to place the image on the message card.
>
Printing from the Various prints Menu on the Control Panel
>
Printing an Original Message Card
100

