


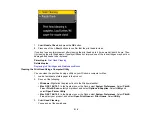


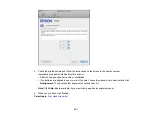


Print head needs cleaning
• If there are no gaps, click
Finish
.
• If there are gaps or the pattern is faint, click
Clean
to clean the print head again.
If you don’t see any improvement after cleaning the print head up to 4 times, wait at least 6 hours. Then
try cleaning the print head again. If quality still does not improve, one of the ink cartridges may be old or
damaged and needs to be replaced.
Parent topic:
Related topics
Replacing Ink Cartridges and Maintenance Boxes
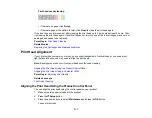
Print Head Alignment
If your printouts become grainy or blurry, you notice misalignment of vertical lines, or you see dark or
light horizontal bands, you may need to align the print head.
Note:
Banding may also occur if your print head nozzles need cleaning.
Aligning the Print Head Using the Product Control Panel
Aligning the Print Head Using a Computer Utility
Parent topic:
Related concepts
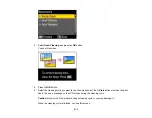
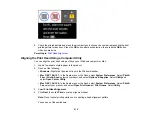
Aligning the Print Head Using the Product Control Panel
You can align the print head using the control panel on your product.
1.
Make sure plain paper is loaded in the product.
2.
Press the
Setup
button.
3.
Press the arrow buttons to select
Maintenance
and press the
OK
button.
You see this screen:
217
Summary of Contents for WorkForce Pro WP-4530
Page 1: ...WorkForce Pro WP 4530 User s Guide ...
Page 2: ......
Page 12: ......
Page 13: ...WorkForce Pro WP 4530 User s Guide Welcome to the WorkForce Pro WP 4530 User s Guide 13 ...
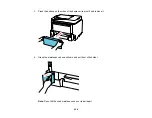
Page 28: ...4 Load a stack of paper printable side down in the cassette as shown 28 ...
Page 50: ...Parent topic Placing Originals on the Product 50 ...
Page 51: ...Related topics Copying Scanning Faxing 51 ...
Page 115: ...3 Adjust the scan area as necessary 115 ...
Page 122: ...122 ...
Page 130: ...3 Adjust the scan area as necessary 130 ...
Page 176: ...5 Select Fax Settings for Printer You see this window 176 ...
Page 177: ...6 Select your product 7 Select Speed Dial Group Dial List You see this window 177 ...
Page 215: ...215 ...
Page 220: ...220 ...
Page 246: ...6 Lower the document cover 7 Raise the ADF input tray 8 Carefully remove the jammed pages 246 ...


