IMPORTANT NOTE: before starting to print verify that the ink quantityis
sufficient in order to avoid
that the ink tanks get completely empty.
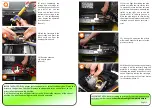
11) For the right functioning the pipe
should not ridde the the trolley race.
To make shure that it moves correctly
we raccommend to move manually the
trolley to the right and to the left
(photo 10-11). In this way you can a-
djust the pipe length so that, during
the movement will always remain well
stretched out and do not tuck into i-
tself.
12) During the operation the printer
will must be have the lid oper to let the
pie turn correctly.
13) When you see the message of empty
cartridge it will be necessary bring the
machine in cartridge change position
following the display instructions, it will
not be necessary remove the cartridges,
you just have to press the reset button
for 10 seconds. Photo 12
8) Insert completely the
syringe tip in a cartridge val-
ve and aspire until the syrin-
ge is full of ink. You can
return the ink that is accu-
mulate in the syringe in the
tank of the corresponding
color. Repeat the operation
for all the colors.
(Photo 7)
9)Place the cartridges in the
print trolley and press the
block untill you hear the
hooking click. photo 8
10) Place the adhesive
clip and the pipes
(photo 9).
Pag 2/2
7
8
9
10
11
12
IMPORTANT NOTE: If the printer jams the paper or or turn off suddenly, don’t leave the
printer in this position. You should remove the paper and turn on the printer, so the
print trolley can resume the position.
It will be necessary turn off the printer correctly, if the trolley stays out of the correct
position, the print head could get dry and become unusable.


