


EPSON TM-H2000
4 -
EPSON TM-H2000
6/12
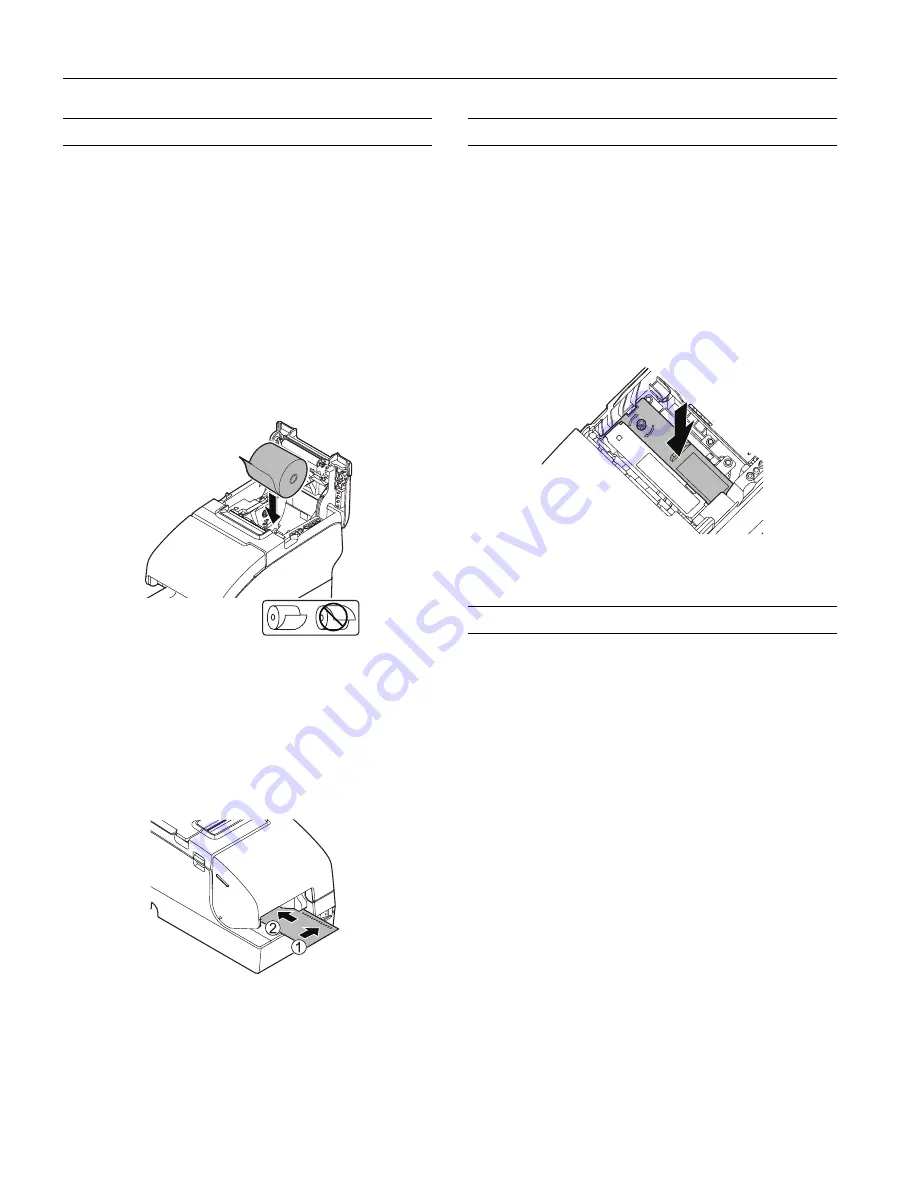
Loading Paper
Receipt Section
Caution:
To avoid injury, do not touch any part of the printer other
than the roll paper when the cover is open.
Note:
Do not open the paper roll cover when the printer is printing or
feeding paper. Only use paper that meets specifications, and do not
use rolls that have the paper glued onto the core.
1. Be sure the printer is not receiving data, then open the roll
paper cover by lifting the two tabs on the roll paper cover
and pushing the cover back.
2. Remove the used roll paper core, if there is one, and insert
the roll paper in the direction shown below.
3. Pull out some paper, and close the roll paper cover.
4. Tear off the extra paper using the manual cutter.
Slip Section
When inserting slip paper, be sure that the right side of the
paper is against the right side of the paper guide as shown
below.
Installing a Ribbon
Note:
Be sure to turn on the power before installing the ribbon.
1. Unpack the ribbon and turn the knob on the ribbon in the
direction marked on the ribbon to remove any slack.
2. Turn the printer on.
3. Open the printer’s front cover using the tabs on each side of
the cover.
4. Remove the old ribbon, if this is one.
5. Insert the new ribbon until it clicks into place.
6. Close the printer’s front cover.
Testing the Printer
Receipt Section
Follow the steps below to perform a self-test on roll paper:
1. Make sure the printer is off and all the covers are closed.
2. Press and hold the
Feed
button and turn on the printer. The
printer prints its status and the
Paper
LED begins flashing.
3. To continue the self-test, press the
Feed
button.
The self test is complete when
*** completed ***
is printed.
Slip Section
Follow the steps below to perform a self-test on roll paper:
1. Make sure the printer is off and all the covers are closed.
2. Press and hold the
Release
button and turn on the printer.
3. When the
Slip
LED begins flashing, insert a slip.
The self test is complete when
*** completed ***
is printed.


