background image

Printing Directly from a Memory Card

48

Adjusting Print Image and Printing with 
Additional Information

Using this feature, you can adjust the quality of printouts. You can 
also include the following information in printouts: shooting date 
and time, and photo details (exposure time/shutter speed, F number, 
ISO speed rate). This feature provides you with the following options 
to enrich your printing experience.

Note:

You cannot use this feature when you print an Index Form or print photos 
from an Index Form.

How to select options you want

1.

Press the 

Menu

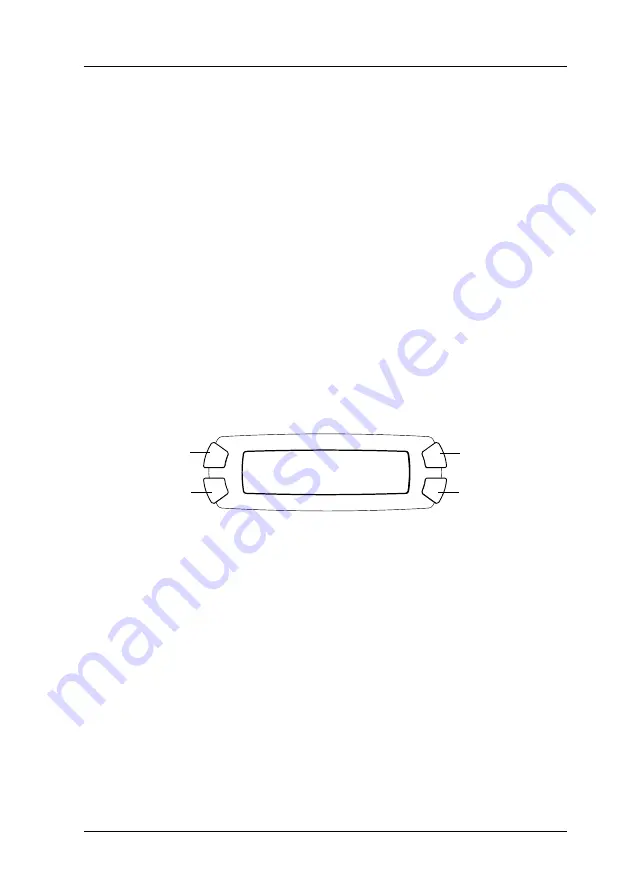
 button while the LCD panel is shown below.

Plain

B-Free

A4

A

C

B

D

XXX

Summary of Contents for Stylus Photo RX510

Page 1: ......

Page 2: ... support output tray feeder guard document cover transportation lock lever document table control panel See Control Panel Functions on page 11 reflective document mat memory card slot ink cartridge clamps scanner unit USB cable connector ...

Page 3: ...se designated as Original EPSON Products or EPSON Approved Products by SEIKO EPSON CORPORATION SEIKO EPSON CORPORATION shall not be held liable for any damage resulting from electromagnetic interference that occurs from the use of any interface cables other than those designated as EPSON Approved Products by SEIKO EPSON CORPORATION EPSON is a registered trademark and EPSON Stylus is a trademark of...

Page 4: ...her product names used herein are for identification purposes only and may be trademarks of their respective owners EPSON disclaims any and all rights in those marks Copyright 2003 by SEIKO EPSON CORPORATION Nagano Japan ...

Page 5: ...uts 20 How to change the layout 20 Copying without margins 22 Copying with small margins 23 Copying an image multiple times on one sheet 25 Making a poster 26 Copying several pages on one sheet 27 Mirror copy 29 Changing Copy Setting 30 Saving and recalling copy settings 31 Selecting the paper type 31 Selecting the copy quality 32 Reducing or enlarging copies automatically 32 Selecting the paper s...

Page 6: ...POF Functions 42 Loading Memory Cards 43 Loadable memory card 43 Available image files 44 Inserting memory cards 44 Ejecting memory cards 46 Changing Print Setting 46 Adjusting Print Image and Printing with Additional Information 48 How to select options you want 48 1 Resolution 49 2 Color Effect 50 3 Auto Correct 50 4 Enhance Res 51 5 Brightness 51 6 Contrast 52 7 Sharpness 52 8 Saturation 53 9 D...

Page 7: ... 68 Checking the Ink Level 68 Checking the ink level using the LCD panel 69 Precautions on Ink Cartridge Replacement 69 Replacing an Ink Cartridge 71 Maintenance and Transporting Checking the Print Head Nozzles 76 Cleaning the Print Head 78 Aligning the Print Head 79 Transporting This Product 80 Troubleshooting Error Messages 83 The Copied Image is Improperly Sized 86 The Image is Printed in Sepia...

Page 8: ...6 Contacting Customer Support Regional Customer Services 88 Product Information Product Specifications 92 Electrical 92 Environmental 92 Mechanical 93 Printing 93 Scanning 93 Paper 94 ...

Page 9: ...eave enough room around this product for sufficient ventilation Place this product near a wall outlet where you can easily plug in and unplug this product Place this product on a flat stable surface that extends beyond this product base in all directions If you place this product by the wall leave more than 10 cm between the back of this product and the wall This product will not operate properly ...

Page 10: ...rd does not exceed the cord s ampere rating Also make sure that the total ampere rating of all devices plugged into the wall outlet does not exceed the wall outlet s ampere rating If you plan to use this product in Germany the building installation must be protected by a 10 or 16 amp circuit breaker to provide adequate short circuit protection and over current protection for this product When usin...

Page 11: ... area thoroughly with soap and water If ink gets into your eyes flush them immediately with water If discomfort or vision problems remain after a thorough flushing see a doctor immediately Do not touch the green IC chip on the side of the cartridge This can damage the ink cartridge Do not remove or tear the label on the cartridge otherwise ink will leak When using this product Do not put your hand...

Page 12: ...ninginthe print headnozzledrysout thisproductmay becomes unable to print When using the LCD panel Only use a dry soft cloth to clean the display Do not use liquid or chemical cleansers If the display on this product is damaged contact your dealer If the liquid crystal solution contained in the LCD panel leaks out and gets on your hands wash them thoroughly with soap and water iftheliquidcrystalsol...

Page 13: ... right for the B the lower left for the C and the lower right for the D button When you turn on this product it enters the mode selected the last time this product was turned off The example below shows the state when this product is in the Copy Mode You can also check the error messages on the LCD panel For details of the error messages see Error Messages on page 83 Plain Text A4 100 01 Paper typ...

Page 14: ...lears the setting you have entered Resets the number of copies to one Resets the values to their defaults when a menu item appears on the LCD panel When you press and hold this button for 3 seconds all of the settings are reset to their defaults Menu Displays menu items for detailed settings on the LCD panel OK Enters the settings you have selected x B W Copies or prints in grayscale x Color Copie...

Page 15: ...st appears on the LCD panel and then press the x Color button The LCD panel is shown below 4 Adjust the density of the LCD panel Press the C button to make the panel lighter or the D button to make it darker 5 When the adjustment is finished press the OK button Light Pattern Status Error On An error occurs For details see Troubleshooting on page 83 Mode Copy MemoryCard Scan Setup On Shows the mode...

Page 16: ...e reduce enlarge ratio or shift the position of the original document Overview of the Basic Procedure The instructions below provide an example on how to make copies in the Copy Mode 1 Press the P On button to turn on this product 2 Press the Copy Mode button to enter the Copy Mode The LCD panel shows the current copy settings as indicated below 3 Load paper see Loading Paper on page 15 and place ...

Page 17: ...scale cCaution Never open the scanner unit while scanning or copying otherwise you may damage this product Note Do not pull on the paper being copied If this product runs out of paper while making copies be sure to load additional paper as soon as possible If left without paper for a long period of time the colors of the first copy made after reloading may not accurately reflect those of the origi...

Page 18: ...e in front of this product for paper to be fully ejected 1 Open the output tray 2 While holding down its locking tab slide out the left edge guide sothatthe distance between thetwoedge guides isslightly wider than the paper you are going to load 3 Move the feeder guard towards you ...

Page 19: ...e facing down and resting against the guide of the feeder guard 6 Stand the stack of paper against the paper support Note Always load paper into the sheet feeder s short edge first Make sure that the paper stack fits under the arrow mark inside the edge guide 7 Set the feeder guard back Note Always load paper before you start printing ...

Page 20: ...per Up to 120 sheets EPSON Bright White Ink Jet Paper Up to 80 sheets EPSON Photo Quality Ink Jet Paper EPSON Photo Paper Up to 20 sheets EPSON Matte Paper Heavyweight EPSON Glossy Photo Paper EPSON Premium Glossy Photo Paper EPSON Premium Semigloss Photo Paper EPSON Iron On Cool Peel Transfer Paper One sheet at a time ...

Page 21: ...own on the document table Make sure that the document is properly aligned cCaution Never open the document cover beyond its limit by intention Note Make sure the document is flat against the glass surface otherwise the image becomes out of focus An area of up to 2 5 mm from the edge of the document table glass cannot be scanned 2 5 mm max 2 5 mm max ...

Page 22: ...rnal light Do not leave photographs on the document table for an extended period of time They may stick to the glass of the document table Do not place heavy objects on top of this product Copying in Various of Layouts How to change the layout 1 Press the Copy Mode button to enter the Copy Mode 2 Press the Menu button to enter the Copy Menu The LCD panel is shown as below 3 Press the OK button to ...

Page 23: ...Copy an image in actual size as many as it fits to the paper you have selected page 25 5 Repeat 4 6 Repeat 9 7 Repeat 16 Copyanimagemultipletimeson one sheet page 25 8 Poster 4 9 Poster 9 10 Poster 16 Divide an original image to 4 9 or 16 enlarged copies fit to the paper size you have selected You can get a poster size image by gluing all of the copies together page 26 11 2 up 12 4 up Copy several...

Page 24: ... indicates the default setting Menu item Setting items values Paper type see page 31 Plain Glossy Prem Glossy SemiGloss Matte PQIJ Photo Paper BrightWhite Print Quality Draft Text Photo Best Paper size see page 33 A4 10 15 4 6 Number of copies 01 to 99 Copy Density see page 34 Nine steps Reduce Enlarge see page 32 Actual 100 Auto Fit Page 10 15 A4 219 A4 10 15 54 4 6 A4 215 A4 4 6 55 A4 A5 74 A5 A...

Page 25: ...size the portion of the image that extends beyond the edge of the paper will not be copied Copying with small margins You can make a copy with a 1 5 mm margins around all edges of the paper by using the Small Margins layout see page 20 to select this layout 1 2 3 4 5 6 7 8 9 10 11 12 13 14 15 16 17 18 19 20 21 22 23 24 25 26 27 28 29 30 31 8 1 2 3 4 5 6 7 8 9 10 11 12 13 14 15 16 17 18 19 20 21 22...

Page 26: ...hen Auto Fit Page is selected Menu item Setting items values Paper type see page 31 Plain Glossy Prem Glossy SemiGloss Matte PQIJ Photo Paper BrightWhite Print Quality Draft Text Photo Best Paper size see page 33 A4 10 15 4 6 Number of copies 01 to 99 Copy Density see page 34 Nine steps Reduce Enlarge see page 32 Actual 100 Auto Fit Page 10 15 A4 198 A4 10 15 47 4 6 A4 195 A4 4 6 48 A4 A5 70 A5 A4...

Page 27: ... can change the following settings see Changing Copy Setting on page 30 indicates the default setting Note When you select Repeat Auto zoom setting is set to 100 When you select Repeat 4 Repeat 9 or Repeat 16 zoom setting is set to Auto Menu item Setting items values Paper type see page 31 Plain Glossy Prem Glossy SemiGloss Matte PQIJ Photo Paper BrightWhite Print Quality Draft Text Photo Best Pap...

Page 28: ... default setting Note You can only use A4 paper for the Poster layout Depending on the original image the number of divided images may not be 4 9 or 16 as you selected because this product reads the entirely white area as blank and the area will not be printed Menu item Setting items values Paper type see page 31 Plain Glossy Prem Glossy SemiGloss Matte PQIJ Photo Paper BrightWhite Print Quality D...

Page 29: ...Warning Be careful when using edged tools Copying several pages on one sheet You can copy two or four original images on a single sheet of paper by using 2 up or 4 up layout see page 20 to select this layout The illustration shows the example of making poster with 4 printouts The gray area shows the excess area to be cut ...

Page 30: ...ing on page 30 indicates the default setting Note You can only use A4 paper for the 2 up and 4 up layout Menu item Setting items values Paper type see page 31 Plain Glossy Prem Glossy SemiGloss Matte PQIJ Photo Paper BrightWhite Print Quality Draft Text Photo Best Copy Density see page 34 Nine steps ...

Page 31: ... Mirror layout you can change the following settings see Changing Copy Setting on page 30 indicates the default setting Note You can only use A4 paper for the Mirror layout Menu item Setting items values Paper type see page 31 Plain Iron On Print Quality Draft Text Photo Best Number of copies 01 to 99 Copy Density see page 34 Nine steps Reduce Enlarge see page 32 Actual 100 Auto Fit Page ...

Page 32: ...ou are in the Copy Mode you can adjust the following features as well Button Copy setting Page to see A Paper type page 31 B Reduce Enlarge page 34 C Print quality page 32 D Paper size page 33 Numeric buttons Number of copies page 33 Menu item Page to see Copy Layout page 20 Copy Density page 34 Optional Zoom page 34 Plain Text A4 100 01 A C D B Numeric buttons ...

Page 33: ...aper type Select the appropriate type of the paper you have loaded on the sheet feeder as follows Press the A button repeatedly until the type of paper you load appears on the LCD panel The paper type you can use are Paper Type Description Plain Plain Paper BrightWhite EPSON Bright White Ink Jet Paper Glossy EPSON Glossy Photo Paper Photo Paper EPSON Photo Paper Prem Glossy EPSON Premium Glossy Ph...

Page 34: ...nd the copying result Note In the 2 up 4 up Repeat or Poster layout you cannot use this feature Press the B button repeatedly until the option you want appears on the LCD panel Selection Copy result Actual Copy in the actual size 10 15 A4 A4 10 15 4 6 A4 A4 4 6 A4 A5 A5 A4 Copy in the reduced or enlarged size by selecting the appropriate selection original document size copy result size The value ...

Page 35: ...aper select 10 15 for the paper size setting Setting the number of copies Enter the number of copies you want to make using the numeric buttons as described below Note You can make up to 99 copies To clear the number of copies press the Clear button How to use the numeric buttons To enter 7 press the 7 button To enter 54 press the 5 button and then the 4 button To change from 54 to 48 simply press...

Page 36: ...panel is shown below 4 Adjust the copy density monitoring the LCD panel Press the C or the l Select button to make the copy lighter press the D or the r Select button to make it darker 5 When the adjustment is finished press the OK button Reducing or enlarging copies manually You can reduce or enlarge a copy by entering a value Note In the 2 up 4 up Repeat Poster or Mirror layout you cannot use th...

Page 37: ... the numeric buttons see How to use the numeric buttons on page 33 or press the l r Select button repeatedly until the number you want appears on the LCD panel and then press the OK button Note You can adjust the size from 25 to 400 Canceling Copying To cancel copying press the y Stop button Note Do not pull on the paper The paper being copied will come out automatically to the output tray XX A C ...

Page 38: ...ng large jobs try a single sheet to confirm the print quality We recommend that you disconnect the USB cable when printing directly from a memory card if you are printing directly from a memory card with the USB cable connected the print operation may take longer time Printing Using an Index Form Using an Index Form is an easy and convenient way to print directly from a memory card The Index Form ...

Page 39: ...to the next step 3 If 1 Print Index does not appear on the LCD panel press the A or the l r Select button repeatedly until it appears and then press the D or OK button 4 Load a A4 paper see Loading Paper on page 15 Note You can only use A4 paper to print an Index Form You cannot print more than one Index Form at a time and cannot select the layout The Index Form may be several pages long depending...

Page 40: ...orm 4 If 2 Scan Index does not appear on the LCD panel press the A or the l r Select button repeatedly until it appears and then press the D or OK button 5 Place the Index Form with its face down and its top touching the front left edge of the document table see Placing a Document on the Document Table on page 19 6 Press the x Color button to start printing 7 Eject the memory card after printing i...

Page 41: ...m number of copies this product can print at a time is 999 If the total number of copies you set exceeds the maximum the number will be automatically adjusted to the maximum 6 Change the print setting see Changing Print Setting on page 46 and adjust print image quality see Adjusting Print Image and Printing with Additional Information on page 48 if necessary 7 Press the x Color or x B W button to ...

Page 42: ...to number in the same way you entered the first photo number and then press the D or OK button 6 Enter the number of copies you want to make using the numeric buttons and then press the D or OK button Note The maximum number of copies this product can print at a time is 999 If the total number of copies you set exceeds the maximum the number will be automatically adjusted to the maximum 7 Change t...

Page 43: ...ton 4 Enter the number of copies you want to make using the numeric buttons and then press the D or OK button Note The maximum number of copies this product can print at a time is 999 If the total number of copies you set exceeds the maximum the number will be automatically adjusted to the maximum 5 Change the print setting see Changing Print Setting on page 46 and adjust print image quality see A...

Page 44: ... with DPOF information see Loading Memory Cards on page 43 and paper see Loading Paper on page 15 2 Press the Memory Card Mode button to enter the Memory Card mode 3 Press the A or the l r Select button repeatedly until the LCD panel shows 6 DPOF and then press the D or OK button Note 6 DPOF appears only if your memory card contains the DPOF data 4 Change the print setting see Changing Print Setti...

Page 45: ...slot are shown below An adapter is required Note The method to use a memory card varies depending on its card type Be sure to refer to the documentation packaged with your memory card for details Slot Card a Memory Stick MagicGate Memory Stick Memory Stick Duo Memory Stick PRO SD Card miniSD Card MultiMediaCard b SmartMedia xD Picture Card c CompactFlash Microdrive a b c ...

Page 46: ...ociation JEITA Supports Exif Version 2 1 2 2 Note You cannot print images with file name containing double byte characters Inserting memory cards 1 Press the P On button to turn on this product 2 Open the memory card slot cover Media format DCF version 1 0 compliant File format JPEG or TIF format image files DOS FAT taken with a DCF version 1 0 compliant digital camera Image size Vertical 120 to 4...

Page 47: ...nnot be fully inserted into the card slots Incorrect loading of a memory card may damage this product memory card or both Keep the memory card slot cover closed while the memory card is loaded which protects the memory card and the slot from dust and static otherwise data on the memory card may be lost or this product may be damaged Depending on the memory card loaded in this product the static ch...

Page 48: ...move the memory card or turn off the product while the printing or while the memory card light is flashing Data on the memory card may be lost If you are using this product with a computer which has Windows 2000 or XP installed never turn this product off or disconnect the USB cable with a memory card inserted in this product this may destroy data on the memory card See the Reference Guide for det...

Page 49: ...SON Glossy Photo Paper Photo Paper EPSON Photo Paper Prem Glossy EPSON Premium Glossy Photo Paper SemiGloss EPSON Premium Semigloss Photo Paper Matte EPSON Matte Paper Heavyweight PQIJ EPSON Photo Quality Ink Jet Paper B Paper size A4 10 15 4 6 C Layout B Free Prints without margin image covering the whole page 1 up 2 up 4 up 8 up 20 up 80 up Prints multiple photos on one sheet e g with 8 up 8 pho...

Page 50: ...n in printouts shooting date and time and photo details exposuretime shutter speed Fnumber ISO speed rate This feature provides you with the following options to enrich your printing experience Note You cannot use this feature when you print an Index Form or print photos from an Index Form How to select options you want 1 Press the Menu button while the LCD panel is shown below Plain B Free A4 A C...

Page 51: ...ng this feature to enhance the resolution The default setting is Best Option Page to see for details 1 Resolution page 49 2 Color Effect page 50 3 Auto Correct page 50 4 Enhance Res page 51 5 Brightness page 51 6 Contrast page 52 7 Sharpness page 52 8 Saturation page 53 9 Date page 53 10 Time page 54 11 Print Info page 54 12 Fit to Frame page 55 13 Hi Speed page 55 Option Description Photo Prints ...

Page 52: ... Description Color Does not print in sepia tone but in color or gray scale Sepia Prints in sepia tone Option Description P I M PRINT Image Matching Prints using the PRINT Image Matching function If the photo data does not include P I M try printing with PhotoEnhance Exif Prints using the Exif Print function It provides you with high quality printouts Auto Photo Fine Prints enhanced images automati...

Page 53: ... to adjust the brightness of printouts The default setting is Standard Option Description Printing speed On Removes digital noise and enhances the resolution Slower Off Does not remove digital noise or enhance the resolution Faster Option Description Brightest Makes printouts very bright Brighter Makes printouts slightly brighter Standard No brightness adjustment Darker Makes printouts slightly da...

Page 54: ...ting is Standard Option Description Super Hi Makes contrast of printouts very strong Hi Makes contrast of printouts slightly stronger Off No contrast adjustment Option Description Sharpest Makes the outline of subjects very sharp Sharper Makes the outline of subjects slightly sharper Standard No sharpness adjustment Softer Makes the outline of subjects slightly softer Softest Makes the outline of ...

Page 55: ...ut You can choose a date formatting style from the list below The default setting is None Option Description Most Makes printouts very vivid More Makes printouts slightly more vivid Standard No saturation adjustment Less Makes printouts slightly duller Least Makes printouts very dull Option Description None Prints with no date information yyyy mm dd e g 2003 05 18 mmm dd yyyy e g Oct 18 2003 dd mm...

Page 56: ... Print Info By turning this function on you can print the shooting information exposure time shutter speed F number ISO speed rate in the bottom right area of a printout The default setting is Off Note This function is available only when the photo information complies with the Exif standard Option Description None Prints with no time information 12 hour system e g 10 00 24 hour system e g 22 00 O...

Page 57: ...tio is higher than 1 2 it is treated as a panoramic panoramatic photo you cannot print it to fit the frame regardless of the setting 13 Hi speed By turning this function on you can perform bidirectional printing printing from right to left and from left to right Turn this function on or off according to your printing purpose The default setting is On Note If the print head is misaligned vertical l...

Page 58: ...Printing Directly from a Memory Card 56 Canceling Printing To cancel printing press the y Stop button Note Do not pull on the paper The paper being copied will come out automatically to the output tray ...

Page 59: ...irectly without using a computer The scanned images are saved in the JPEG format Note If the message The card is not properly formatted Would like to format the card appears on the LCD panel format the memory card see Formatting a memory card on page 59 or press the C button to cancel formatting and then exchange it with a formatted one 1 Load a memory card see Loading Memory Cards on page 43 2 Pr...

Page 60: ... button 5 Place an original document on the document table see Placing a Document on the Document Table on page 19 Then press the x Color button to start scanning cCaution Never open the scanner unit while scanning or copying otherwise you may damage this product Note The scanned images are saved in the epscan folder automatically created when you scan to the memory card Button Setting Selection A...

Page 61: ...d is deleted when you format the memory card 1 Press the D button 2 Press the x Color button to start formatting After formatting is finished this product returns to the mode before you began formatting the memory card Scanning to Your Computer This product allows you to scan an image to a computer or send an e mail with the scanned image attached by using this feature Before using this feature ma...

Page 62: ... open the scanner unit while scanning or copying otherwise you may damage this product Scanning Directly to Your e mail This product allows you to scan an image and then send an e mail with the scanned image attached Before using this feature make sure you have installed EPSON Scan and EPSON Smart Panel on your computer 1 Connect this product to your computer and then start up the computer 2 Place...

Page 63: ...le scanning or copying otherwise you may damage this product Canceling Scanning To cancel scanning press the y Stop button Using the Film Holder You can scan 35 mm film strips and slides using EPSON Scan or EPSON Smart Panel For information about using EPSON Scan and EPSON Smart Panel see the Reference Guide Note You cannot use the To Photo Card feature in the Scan Mode on this product s LCD panel...

Page 64: ...ngerprints or other traces on the film Note Wipe the inside of the document cover and the document table before scanning transparencies 1 Make sure the document cover s cable is connected to the TPU interface connector Note Before connecting or disconnecting the document cover s cable make sure this product is turned off 2 Open the document cover 3 Remove the reflective document mat gently along t...

Page 65: ...owing sections for details 35 mm film strips on page 64 35 mm slides on page 65 Note The base side of the film is the side where the film maker s name and film ID numbers can be read correctly Also when you look at an image on the film from the base side the image should appear normally not as the reverse of it Set the film correctly in the film holder and position the film holder properly on the ...

Page 66: ...e newton ring set the film with the base side facing up See the Reference Guide for detail When you are not using the film holder you can store it inside the document cover See Storing the film holder on page 66 for details 35 mm film strips 1 Remove the film cover 2 Slide the edge of the strip in the 35 mm film holder base side facing down Place it so that all of the frame is positioned inside th...

Page 67: ...le so that it fits the hole on this product with the 35 mm film strips holder coming to the center of the document table 35 mm slides 1 Place the film holder on the document table so that it fits the hole on this product with the 35 mm slides holder coming to the center of the document table ...

Page 68: ...uttons 66 2 Place slides in the 35 mm slides holder as shown below Storing the film holder When not using the film holder you can store it inside the document cover 1 Open the document cover 2 Slide the film holder into the document cover ...

Page 69: ...67 Scanning by using the LCD panel and buttons 3 Insert the reflective document mat Note Make sure to hold the document cover with both hands 4 Close the document cover ...

Page 70: ...ges You can use the following cartridges with this product cCaution EPSON recommends the use of genuine EPSON ink cartridges EPSON will not warranty any damage caused by the use of other products Checking the Ink Level You can check the ink level either on the LCD panel or on your computer See the Reference Guide for details on how to check the ink level on the computer Black ink cartridge Black T...

Page 71: ...cartridge installed until just before replacement otherwise ink remaining in the print head nozzles may dry out Precautions on Ink Cartridge Replacement Read all of the instructions in this section and When handling ink cartridges on page 9 before replacing the ink cartridge If you need to remove an ink cartridge temporarily from this product besure toprotectthe inksupplyarea oftheinkcartridge fro...

Page 72: ... you cannot continue copying even if the other cartridge still contains ink Before copying replace the empty cartridge In addition to being used in document copying ink is also consumed in the following operations print head cleaning self cleaning cycle performed when this product is turned on and ink charging when an ink cartridge is installed in this product Do not refill the ink cartridges This...

Page 73: ...ge 9 1 Make sure this product is on 2 When the ink is empty Refer to the LCD panel message to see which ink cartridge is empty and then press the x Color button When the ink is low Press the Setup Mode button to enter the Setup Mode and press the A button repeatedly until 4 Ink cartridge appears on the LCD panel and then press the x Color button The ink cartridges move to the replacement position ...

Page 74: ...ed and then open the scanner unit cCaution Do not open the scanner unit when the document cover is still open Do not move the print head by hand Doing so may damage this product Do not start replacing an ink cartridge before the print head stops 4 Open the cartridge cover ...

Page 75: ...d ink cartridges There may be some ink around the ink supply port If ink gets on your skin wash the area thoroughly with soap and water If ink gets into your eyes flush them immediately with water If discomfort or vision problems remain after a thorough flushing see a doctor immediately cCaution Leave the used ink cartridge installed until just before replacement otherwise ink remaining in the pri...

Page 76: ...r and then press the top of the cartridge until it clicks into place If you need to replace the other ink cartridge repeat steps 5 and 6 8 Close the cartridge cover Note If you find it difficult to close the cartridge cover see step 6 to make sure the ink cartridge has been installed correctly ...

Page 77: ...in progress Charging disappears from the LCD panel ink charging is completed cCaution Never turn off this product while Charging appears on the LCD panel Otherwise this will cause incomplete charging of the ink Note If you install a used ink cartridge with ink level already low it may become empty right after the replacement In this case replace the ink cartridge with a new one ...

Page 78: ...e When the Error light is on and a message appears on the LCD panel to prompt you to replace the ink cartridge or to indicate the ink is low you cannot cleantheprinthead In thiscase replacetheappropriateinkcartridge first 1 Make sure that A4 or Letter paper is loaded in the sheet feeder 2 Make sure that this product is on and the Error light is off 3 Press the Setup Mode button to enter the Setup ...

Page 79: ...od print head does not need to be cleaned yet Not Good print head needs to be cleaned The actual printouts are printed in color CMYK If the nozzle check result is not good there is a problem with this product It may be a clogged ink nozzle or a misaligned print head To solve these problems see the next two sections for details ...

Page 80: ...ds to be cleaned This saves ink When the Error light is on and a message appears on the LCD panel to prompt you to replace the ink cartridge or to indicate the ink is low you cannot clean the print head In this case replace the appropriate ink cartridge first Follow the steps below to clean the print head using the Control Panel 1 Make sure this product is on and the Error light is off 2 Press the...

Page 81: ... be old or damaged and may need to be replaced To replace an ink cartridge see Replacing an Ink Cartridge on page 71 To maintain good print quality we recommend printing a few pages at least once every month Aligning the Print Head If you notice vertical lines are not aligned properly on the nozzle check result you may be able to solve this problem by aligning the print head Follow the steps below...

Page 82: ...aining alignment patterns 2 through 4 After all patterns are set the print head alignment operation is completed Transporting This Product If you need to transport this product carefully repack it using the original box or a similar box that this product fits snugly into and packing materials as follows cCaution When storing or transporting this product avoid tilting it placing it vertically or tu...

Page 83: ...Pick up the tightener from the storage 3 Install it in the secure position Finally close the scanner unit 4 Open the document cover and slide the transportation lock lever as shown in the illustration below to lock the scanner carriage ...

Page 84: ...t and the feeder guard Close the output tray 7 Attach the protective materials to both sides of this product and then repack this product the power cord and the USB cable in the box 8 Keep this product on a flat surface to protect it from shocks during transportation Note Do no forget to remove the protective materials from this product before using it again ...

Page 85: ...et correctly Please perform again after a check The Index Form is not placed correctly Place the Index Form correctly See Placing a Document on the Document Table on page 19 Check of a picture is not carried out or marking is not right Please perform again after a check The photos and thepaper type are not selected correctly on the Index Form Fill in the circle on the Index Formtoselectthephotosan...

Page 86: ...y card is write protected Operation canceled You cannot save the image to the memory card Release the write protection or load another memory card There is not enough free space on the memory card Operation canceled Notenoughspace is available to save the image to the memory card Load a new memory card Cannot create a memory card folder Operation canceled Cannot create a folder on the memory card ...

Page 87: ...e x Color button and open the scanner unit by following the messages to replace the empty cartridge See Replacing an Ink Cartridge on page 71 Paper out Load paper into the sheet feeder then press the Color button No paper is loaded in the sheet feeder Load paper in the sheet feeder and then press the x Color button Scanner unit open Close the scanner unit Scanner unit is open Close the scanner uni...

Page 88: ...print in full color orsepia Ifyouhave selected the Sepia theimageisprintedinsepia color when you press the x Color button to start printing To change the setting and print in full color see How to select options you want on page 48 Scanner error See your documentation and call service if necessary Error occurs in the scanner parts Turnthisproductoff andthen back on Then make sure the transportatio...

Page 89: ...is jammed at the paper feeding position or the ejecting position remove all of the paper by hand If the paper is jammed inside this product press the P On button to turn off this product Open the scanner unit and then remove all of the paper inside by hand including any torn pieces 3 After clearing the jammed paper close the scanner unit and then press the P On and the x Color button 4 Load a stac...

Page 90: ...p you much more quickly if you give them the following information Product serial number The serial number label is usually on the back of the product Product model Product software version Click About Version Info or similar button in the product software Brand and model of your computer Your computer operating system name and version Names and versions of the software applications you normally u...

Page 91: ...on com Telephone 562 276 1300 U S 905 709 9475 Canada URL http www epson co uk Telephone UK 08701 637 766 The Republic of Ireland 01 679 9016 URL http www epson com Telephone 971 4 352 4488 Fax 971 4 351 6617 Email epson_support compubase co ae URL http www epson com Telephone Denmark 80 88 11 27 Finland 0800 523 010 Norway 800 11 828 Sweden 08 445 12 58 URL http www epson co za Telephone 011 444 ...

Page 92: ... Telephone 1300 361 054 Fax 02 9903 9189 URL http www epson com sg Telephone 65 6586 3111 URL http www epson co th Telephone 66 2 670 0333 URL http www epson co id Telephone Fax Jakarta 62 21 62301104 Bandung 62 22 7303766 Surabaya 62 31 5479541 Medan 62 61 4516173 Telephone Yogyakarta 62 274 566353 22 143 URL http www epson com hk Phone 852 2585 4399 Fax 852 2827 4383 ...

Page 93: ...alaysia For users in India For users in the Philippines URL http www epson com my Phone 603 56288333 URL http www epson co in Phone 1600 440011 URL http www epson com ph Phone 63 2 813 6567 Fax 63 2 813 6545 E mail customersupport epc epson com ph ...

Page 94: ...Input voltage range 108 to 132V Rated frequency range 50 to 60 Hz Power consumption Approx 21 W ISO10561 Letter pattern Approx 4 W in sleep mode Approx 0 4 W in power off mode Input voltage range 198 to 264V Rated frequency range 50 to 60 Hz Power consumption Approx 21 W ISO10561 Letter pattern Approx 4 W in sleep mode Approx 0 5 W in power off mode Temperature Operation 10 to 35 C 50 to 95 F ...

Page 95: ... and loading tray Weight Approx 10 0 kg 22 0 lb Printing method On demand ink jet Nozzle configuration Monochrome black 90 nozzles Color cyan magenta yellow light cyan light magenta 450 nozzles 90 nozzles per color 5 Scanner type Flatbed color image scanner Document size 8 5 11 7 216 297 mm A4 or US letter size The reading area can be specified from your software Scanning resolution 2400 dpi main ...

Page 96: ...le sheets Envelopes Size A4 210 297 mm A5 148 210 mm Letter 216 279 mm Half letter 140 216 mm Legal 216 356 mm Executive 184 2 267 mm 5 7 127 178 mm 8 10 203 254 mm 3 5 5 89 127 mm Paper types Plain bond paper special paper distributed by EPSON Thickness forplainbond paper 0 08 to 0 11 mm 0 003 to 0 004 inch Weight for plain bond paper 64 g m 17 lb to 90 g m 24 lb Size No 10 105 241 mm DL 110 220 ...

Page 97: ...aper distributed by EPSON Size A4 210 297 mm Paper types Special paper distributed by EPSON Size A4 210 297 mm Letter 216 279 mm Paper types Special paper distributed by EPSON Size A4 210 297 mm Letter 216 279 mm Paper types Special paper distributed by EPSON Size A4 210 297 mm Letter 216 279 mm Paper types Special paper distributed by EPSON Size A6 105 148 mm 5 8 127 203 mm 8 10 203 254 mm Paper ...

Page 98: ...r mail Size 5 8 127 203 mm 8 10 203 254 mm Paper types Plain bond paper air mail Size A4 210 297 mm Paper types Special paper distributed by EPSON Size A4 210 297 mm Letter 216 279 mm Paper types Special paper distributed by EPSON Size A4 210 297 mm Letter 216 279 mm Paper types Special paper distributed by EPSON Size A4 210 297 mm Letter 216 279 mm 4 6 113 6 175 4 mm 4 6 102 152 mm No Perforation...

Page 99: ...EPSON Size A4 210 297 mm Letter 216 279 mm 5 7 127 178 mm 100 150 mm Paper types Special paper distributed by EPSON Size A4 210 297 mm Letter 216 279 mm Paper types Special paper distributed by EPSON Size Letter 216 279 mm Paper types Special paper distributed by EPSON Size A4 210 297 mm Letter 216 279 mm Paper types Special paper distributed by EPSON Size A4 210 297 mm Letter 216 279 mm Paper typ...

Page 100: ...le area Refer to the appropriate section for printable area of a single sheet using copy mode The diagonal lines indicates printable area Note Depending on the type of paper used print quality may decline in the top and bottom areas of the printout or these areas may be smeared Standard Copy Small Margins Copy BorderFree Copy A top margin 3 0 mm 0 12 1 5 mm 0 6 0 mm B L left margin 3 0 mm 0 12 1 5...

Page 101: ...ORE PTE LTD No 1 Temasek Avenue 36 00 Millenia Tower Singapore 039192 Phone 065 633 77 911 Fax 065 633 41 185 EPSON HONG KONG LTD Rooms 4706 10 47 F China Resources Bldg 26 Harbour Road Wanchai Hong Kong Phone 2585 4300 Fax 2827 7083 EPSON TAIWAN TECHNOLOGY TRADING LTD 14F No 7 Song Ren Road Taipei Taiwan 110 Phone 02 8786 6688 Fax 02 8786 6633 EPSON ITALIA S p A V le F lli Casiraghi 427 20099 Ses...

Page 102: ......

Reviews: