


32
Connecting to Computer Sources
Follow the instructions in these sections to connect a computer to the projector.
Connecting to a Computer for USB Video and Audio
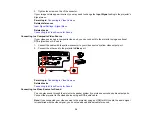
Connecting to a Computer for VGA Video
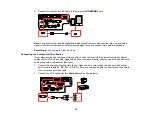
Connecting to a Computer for HDMI Video and Audio
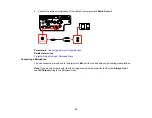
Connecting to a Computer for USB Mouse Control
Connecting to a Computer for Sound
Parent topic:
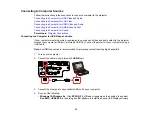
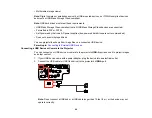
Connecting to a Computer for USB Video and Audio
If your computer meets the system requirements, you can send video and audio output to the projector
through the computer's USB port (preferably USB 2.0). Connect the projector to your computer using a
USB cable.
Note:
An HDMI connection is recommended for projecting content requiring high bandwidth.
1.
Turn on your computer.
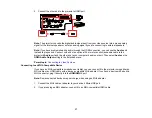
2.
Connect the cable to your projector's
USB-B
port.
3.
Connect the other end to any available USB port on your computer.
4.
Do one of the following:
•
Windows 10/Windows 8.x
: Click
EPSON_PJ_UD
when it appears on the desktop, then select
Run EMP_UDSE.EXE
in the dialog box that appears to install the Epson USB Display software.
Summary of Contents for PowerLite 2042
Page 1: ...PowerLite 2042 2142W 2247U User s Guide ...
Page 2: ......
Page 10: ......
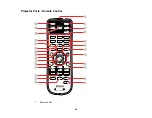
Page 24: ...24 Projector Parts Remote Control 1 Power button ...
Page 26: ...26 Parent topic Projector Part Locations ...
Page 137: ...137 Parent topic Copying Menu Settings Between Projectors ...