


Perfection 4870 Photo
Revision A
DISASSEMBLY/ASSEMBLY
Disassembly Procedure
59
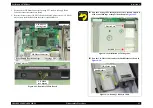
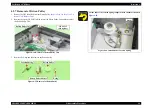
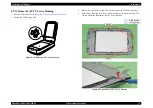
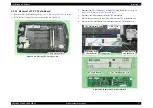
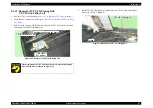
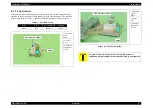
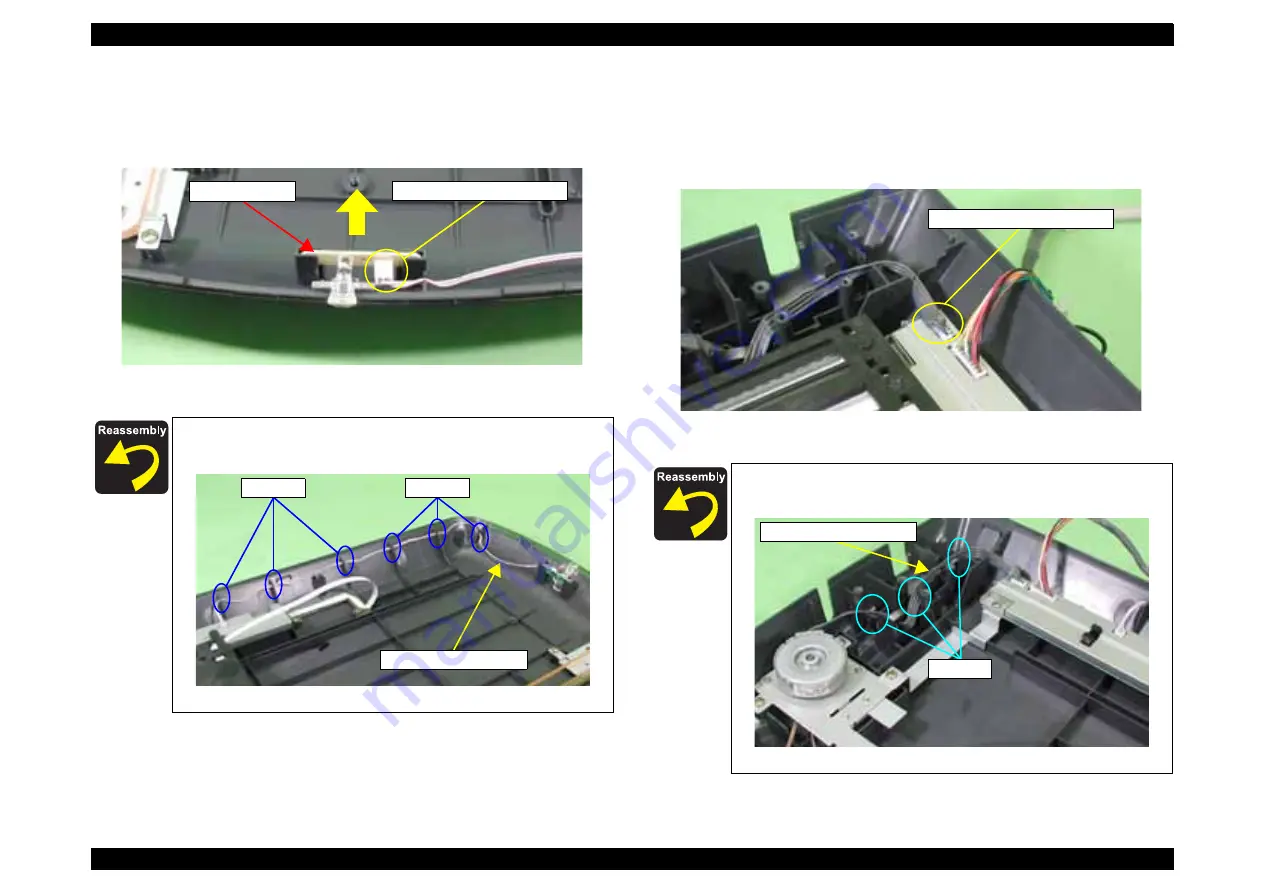
4.2.16 Removal of SUB_B Board
1. Remove of TPU Lower Housing.
(Refer to 4.2.11 Removal of TPU Lower Housing )
2. Remove the SUB_B Board and then disconnect the SUB_B Board Connector.
Figure 4-48. Removal of SUB_B Board
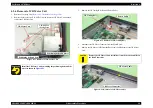
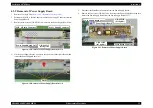
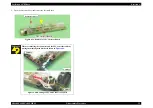
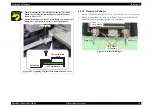
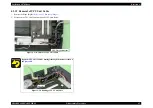
4.2.17 Removal of TPU CR Motor Unit/
TPU CR Motor Belt
(Refer to 4.2.15 Removal of Hinges )
2. Disconnect the TPU CR Motor Connector from the TPU Main Board.
Figure 4-50. Disconnection of TPU CR Motor Connector
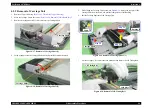
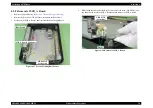
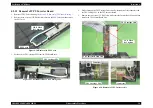
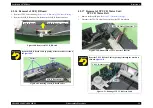
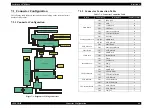
Route the SUB_B Board Cable by passing it into the notches as shown
in
Figure 4-49. Routing of SUB_B Board Cable
SUB_B Board
SUB_B Board Connector
Notches
SUB_B Board Cable
Notches
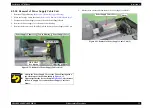
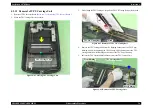
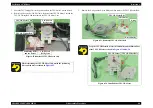
Route the TPU CR Motor Cable by passing it through the notches as
shown in
Figure 4-51. Routing of TPU CR Motor Cable
TPU CR Motor Connector
TPU CR Motor Cable
Notches
Summary of Contents for Perfection 4870 Photo
Page 1: ...EPSON Perfection4870Photo Color Image Scanner Service Manual SESC03 008 ...
Page 5: ...Revision Status Revision Date of Issue Description A December 10 2003 First release ...
Page 8: ...C H A P T E R 1 PRODUCTDESCRIPTION ...
Page 19: ...C H A P T E R 2 OPERATINGPRINCIPLES ...
Page 29: ...C H A P T E R 3 TROUBLESHOOTING ...
Page 37: ...C H A P T E R 4 DISASSEMBLY ASSEMBLY ...
Page 63: ...C H A P T E R 5 ADJUSTMENT ...
Page 65: ...C H A P T E R 6 MAINTENANCE ...
Page 68: ...C H A P T E R 7 APPENDIX ...
Page 71: ......
Page 72: ......
Page 73: ......
Page 74: ......
Page 75: ......
Page 76: ......
Page 77: ......
Page 78: ......
Page 79: ......
Page 80: ......
Page 81: ......