L800/L801
Revision A
Adjustment
Banding Reduction System (BRS) Adjustment / Paper Feed Amount Profile (PFP) Correction
86
Confidential
2.3.2.2 PFP Adjustment
¸
Printing the PFP Adjustment Pattern
1.
Load 4 x 6 Premium Glossy Photo Paper on the paper support.
2.
Select [PFP Adjustment] in the adjustment program.
3.
Click the [Print] button on the “1. Print Test Pattern” column to print the
adjustment pattern.
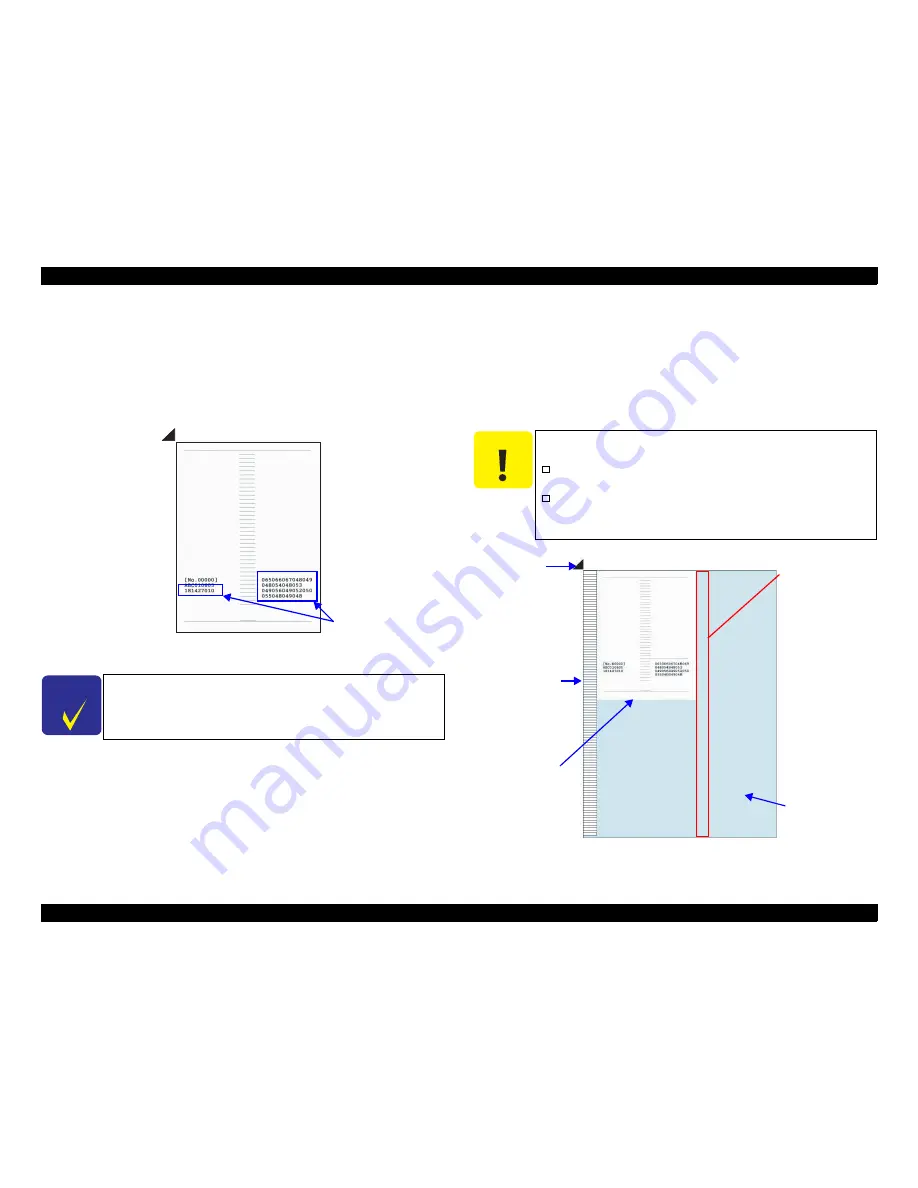
Figure 2-15. PFP Test Pattern
¸
Scanning the PFP Adjustment Pattern
4.
Set the PFP Base Scale and the PFP test pattern on the document table and click
the [Scan] button on the “3. Scan Test Pattern” column.
5.
According to the scanned result, PFP calibration values are automatically
calculated and are written to the serial flash ROM. If an error occurs, check that
the document table glass and the scale is clean, and the scale/adjustment pattern is
not tilted, then repeat from step 4.
Figure 2-16. PFP Base Scale and PFP Adjustment Pattern Position
(When viewed from the document glass of the scanner)
C H E C K
P O I N T
In the Adjustment program, the identification code is used to
distinguish whether the printer that printed the pattern and the
printer to register the adjustment value is the same.
Printer Identification
Code
C A U T I O N
Be careful of the following when setting the PFP Base Scale and
the adjustment pattern on the scanner.
̈
Place the scale on the document glass aligning the scale corner
with the scanner origin position.
̈
Place the pattern-printed sheet along the scale as shown in the
figure below. Make sure to place it parallel to the scale, with
no gaps.
PFP Adjustment
Pattern
(4 x 6 size)
Scanner Document
Table
PFP Base Scale
Scanner Origin
Position
Position of the other
PFP Base Scale when
using the scanner for
which two PFP Base
scales for the
adjustment are
required.
Summary of Contents for L800
Page 2: ...L800 L801 Color Inkjet Printer SEMF10 008 SERVICE MANUAL Confidential ...
Page 7: ...Confidential Revision Status Revision Date of Issue Description A April 6 2011 First Release ...
Page 10: ...Confidential C H A P T E R 1 DISASSEMBLY REASSEMBLY ...
Page 70: ...Confidential C H A P T E R 2 ADJUSTMENT ...
Page 89: ...Confidential C H A P T E R 3 MAINTENANCE ...


