background image

179

Related references

Input Signal Settings - Signal Menu
Projector Setup Settings - ECO Menu
Image Quality Settings - Image Menu

Related topics

Connecting to Computer Sources
Connecting to Video Sources

Solutions to Sound Problems

If there is no sound when you expect it or the volume is too low or high, try the following solutions:

• Adjust the projector's volume settings.

• Press the

A/V Mute

button on the remote control to resume video and audio if they were temporarily

stopped.

• Press the

Source Search

button to switch to the correct input source, if necessary.

• Check your computer or video source to make sure the volume is turned up and the audio output is set

for the correct source.

• Try disconnecting and reconnecting the audio cable.

• Check the audio cable connections between the projector and your video source.

• If you do not hear sound from an HDMI source, set the connected device to PCM output.

• Make sure any connected audio cables are labeled "No Resistance".

• If you are using the USB Display function, turn on the

Output audio from the projector

setting in the

Epson USB Display Settings program on your computer.

• If you are using a Mac and you do not hear sound from an HDMI source, make sure your Mac

supports audio through the HDMI port. If not, you need to connect an audio cable.

• If you want to use a connected audio source when the projector is off, set the

Quick Startup

option to

Off

and make sure the

A/V Settings

options are set correctly.

• If the volume for the computer is set to the minimum while the projector's volume is set to maximum,

the noise may be mixed. Turn up the computer's volume and decrease the projector's volume.

• Make sure the

Audio Output Device

option is set to the correct audio port for your video device.

• If you turn the projector on immediately after turning it off, the cooling fans may run at high speed

momentarily and cause an unexpected noise. This is normal.

Parent topic:

Solving Image or Sound Problems

Summary of Contents for Home Cinema LS-100

Page 1: ...Home Cinema LS 100 User s Guide ...

Page 2: ......

Page 3: ...ctor Parts Top Side 18 Projector Parts Back Panel 20 Projector Parts Base 22 Projector Parts Control Panel 23 Projector Parts Remote Control 24 Setting Up the Projector 27 Projector Placement 27 Projector Setup and Installation Options 27 Projection Distance 29 Removing and Attaching the Cable Cover 31 Projector Connections 32 Connecting to Computer Sources 33 Connecting to a Computer for USB Vide...

Page 4: ...the Projector on a Network 49 Wired Network Projection 49 Connecting to a Wired Network 49 Selecting Wired Network Settings 50 Wireless Network Projection 53 Installing the Wireless LAN Module 54 Connecting Directly to a Smartphone or Tablet 56 Using Quick Wireless Connection Windows 58 Selecting Wireless Network Settings Manually 60 Wireless LAN Menu Settings 63 Selecting Wireless Network Setting...

Page 5: ...ration 91 Using the Remote Control as a Wireless Mouse 92 Using the Remote Control as a Pointer 93 Selecting an Image Source 94 Projection Modes 95 Changing the Projection Mode Using the Remote Control 96 Changing the Projection Mode Using the Menus 96 Image Aspect Ratio 97 Changing the Image Aspect Ratio 97 Available Image Aspect Ratios 98 Color Mode 99 Changing the Color Mode 99 Available Color ...

Page 6: ...ut of Images 120 Projector Security Features 121 Password Security Types 121 Setting a Password 122 Selecting Password Security Types 123 Entering a Password to Use the Projector 124 Saving a User s Logo Image to Display 126 Locking the Projector s Buttons 128 Unlocking the Projector s Buttons 129 Installing a Security Cable 129 Creating a User Pattern to Display 130 Adjusting the Menu Settings 13...

Page 7: ...ge Appears 172 Solutions When Image is Incorrect Using the USB Display Function 173 Solutions When No Signal Message Appears 173 Displaying From a PC Laptop 174 Displaying From a Mac Laptop 175 Solutions When Not Supported Message Appears 175 Solutions When Only a Partial Image Appears 175 Solutions When the Image is Not Rectangular 176 Solutions When the Image Contains Noise or Static 176 Solutio...

Page 8: ...ical Specifications 188 Projector Environmental Specifications 189 Projector Safety and Approvals Specifications 189 Supported Video Display Formats 189 USB Display System Requirements 192 Notices 193 Recycling 193 Important Safety Information 193 Laser Safety Information 194 Important Safety Instructions 195 Restriction of Use 198 List of Safety Symbols corresponding to IEC60950 1 A2 198 FCC Comp...

Page 9: ...9 Home Cinema LS 100 User s Guide Welcome to the Home Cinema LS 100 User s Guide For a printable PDF copy of this guide click here ...

Page 10: ...te light output measured in accordance with ISO 21118 Native resolution of 1920 1200 pixels Full HD Flexible connectivity Three HDMI ports including one MHL compatible port for computer or video device connection Plug and play 3 in 1 USB projection audio and mouse control for instant setup Wired and wireless network support for projection Projector monitoring and control via remote network compute...

Page 11: ...monitoring systems Network message broadcast system to project timely messages to all networked projectors Product Box Contents Additional Components Optional Equipment and Replacement Parts Warranty and Registration Information Parent topic Introduction to Your Projector Product Box Contents Save all the packaging in case you need to ship the projector Always use the original packaging or equival...

Page 12: ...r for purchase information Signal or connection type Additional component necessary Composite video RCA style video or A V cable Component video D sub 15 pin component to VGA video cable or adapter Available for purchase from Epson or an authorized Epson reseller HDMI Compatible HDMI cable Available for purchase from Epson or an authorized Epson reseller Note Older Mac computers 2009 and earlier m...

Page 13: ...tor Features Warranty and Registration Information Your projector comes with a basic warranty that lets you project with confidence For details see the warranty brochure that came with your projector In addition Epson offers free Extra Care Home Service In the unlikely event of an equipment failure you won t have to wait for your unit to be repaired Instead Epson will ship you a replacement unit a...

Page 14: ...t 24 hours a day If you still need help after checking this manual and any other sources listed here you can use the Epson PrivateLine Support service to get help fast For details see Where to Get Help Parent topic Introduction to Your Projector Related references Where to Get Help Additional Projector Software and Manuals After connecting and setting up the projector download the projector softwa...

Page 15: ...asyMP Network Updater Windows only EasyMP Network Updater Operation Guide Lets you update firmware for a projector over a wired LAN You can download the latest software and documentation from the Epson web site Go to epson com support U S or epson ca support Canada and select your projector Epson iProjection app Instructions are included with the app Lets you project from an iOS device Android dev...

Page 16: ...ustrations to learn about the parts on your projector Projector Parts Front Side Projector Parts Top Side Projector Parts Back Panel Projector Parts Base Projector Parts Control Panel Projector Parts Remote Control Parent topic Introduction to Your Projector ...

Page 17: ...17 Projector Parts Front Side 1 Remote control receiver 2 Status lights 3 Speaker 4 Exhaust vent 5 Cable cover screws 6 Cable cover ...

Page 18: ...18 Parent topic Projector Part Locations Projector Parts Top Side 1 Air filter cover latch 2 Wireless LAN light 3 Obstacle sensors ...

Page 19: ...iver 5 Projection window 6 Control panel 7 Security cable installation slot 8 Air filter cover 9 Focus lever 10 Air intake vent air filter Parent topic Projector Part Locations Related references Projector Light Status ...

Page 20: ...20 Projector Parts Back Panel 1 Monitor Out port 2 Video port 3 Audio port for use with the Video port 4 Audio Out port 5 Audio port for use with the Computer port 6 Power inlet 7 HDMI 1 MHL port ...

Page 21: ...10 Network LAN port 11 USB B port for computer connection 12 USB A ports for USB memory device 13 Computer port 14 RS 232C port 15 Wireless LAN module port Parent topic Projector Part Locations Related concepts Projector Connections ...

Page 22: ...22 Projector Parts Base 1 Rear feet 2 Security cable attachment point 3 Front adjustable foot Parent topic Projector Part Locations ...

Page 23: ...ne adjustment buttons display the adjustment screen and adjust screen shape and arrow buttons 4 Esc button cancels exits functions 5 W T Wide Tele buttons adjust projected image size and arrow buttons 6 Menu button accesses projector menu system 7 Home button accesses projector Home screen 8 Power button Parent topic Projector Part Locations ...

Page 24: ...24 Projector Parts Remote Control ...

Page 25: ...tation slides 13 E Zoom buttons zoom into and out of the image 14 A V Mute button turns off picture and sound 15 Split button splits the screen between two image sources 16 Strap attachment point 17 Home button accesses projector Home screen 18 Freeze button stops video action 19 Volume up down buttons adjust speaker volume 20 Pointer button activates on screen pointer 21 Esc button cancels exits ...

Page 26: ...26 28 Source Search button searches for connected sources 29 Remote control emitter Parent topic Projector Part Locations ...

Page 27: ...you select a projector location Place the projector on a sturdy level surface Leave plenty of space around and under the projector for ventilation and do not place it on top of or next to anything that could block the vents Place the projector parallel to the screen Position the projector within reach of a grounded electrical outlet or extension cord Projector Setup and Installation Options Projec...

Page 28: ...ector make sure to position it squarely in front of the center of the screen not at an angle if possible If you project from the ceiling or from the rear be sure to select the correct Projection option in the projector s menu system Parent topic Projector Placement ...

Page 29: ...ing on the zoom factor aspect ratio and other settings Use the tables here to determine approximately how far to place the projector from the screen based on the size of the projected image Conversion figures may have been rounded up or down You can also use the Projection Distance Calculator here U S here Canada or here Caribbean 1 Projection distance 2 Distance from the top of the projector to t...

Page 30: ...8 6 inches 53 0 to 72 8 cm 7 3 inches 18 6 cm 55 inches 139 7 cm 100 inches 254 cm 23 3 inches 59 3 cm 8 4 inches 21 4 cm 61 4 inches 156 0 cm 110 inches 279 4 cm 25 8 inches 65 6 cm 9 5 inches 24 2 cm 67 8 inches 172 2 cm 120 inches 304 8 cm 28 3 inches 71 9 cm 10 6 inches 27 0 cm 74 2 inches 188 5 cm 130 inches 330 2 cm 30 7 inches 78 1 cm 11 7 inches 29 8 cm 80 6 inches 204 8 cm Wide resolution...

Page 31: ... cm 16 4 to 22 6 inches 41 7 to 57 5 cm 7 2 inches 18 3 cm 41 5 inches 105 5 cm 80 inches 203 2 cm 18 9 to 26 inches 48 1 to 66 2 cm 8 6 inches 21 9 cm 47 8 inches 121 5 cm 90 inches 228 6 cm 21 5 to 29 5 inches 54 6 to 74 9 cm 10 inches 25 5 cm 54 1 inches 137 6 cm 100 inches 254 cm 24 inches 61 0 cm 11 4 inches 29 1 cm 60 4 inches 153 6 cm 110 inches 279 4 cm 26 5 inches 67 5 cm 12 8 inches 32 6...

Page 32: ...ews 2 Slide off the cable cover To attach the cable cover slide it into position and tighten the screws with a screwdriver Parent topic Setting Up the Projector Projector Connections See these sections to connect the projector to a variety of projection sources ...

Page 33: ...r to the projector Connecting to a Computer for USB Video and Audio Connecting to a Computer for VGA Video and Audio Connecting to a Computer for HDMI Video and Audio Connecting to a Computer for Sound Parent topic Projector Connections Connecting to a Computer for USB Video and Audio If your computer meets the system requirements you can send video and audio output to the projector through the co...

Page 34: ...y software Mac The USB Display setup folder appears on your screen Select USB Display Installer and follow the on screen instructions to install the Epson USB Display software Follow any on screen instructions You need to install this software only the first time you connect the projector to the computer The projector displays the image from your computer s desktop and outputs sound if your presen...

Page 35: ...jector 4 Tighten the screws on the VGA connector Parent topic Connecting to Computer Sources Connecting to a Computer for HDMI Video and Audio If your computer has an HDMI port you can connect it to the projector using an optional HDMI cable Note To connect a Mac that includes only a Mini DisplayPort Thunderbolt port or Mini DVI port for video output you need to obtain an adapter that allows you t...

Page 36: ...onal 3 5 mm stereo mini jack audio cable to one of the projector s audio ports and the other end to your computer s audio out port Then select the audio port you connected to as the HDMI1 Audio Output HDMI2 Audio Output or HDMI3 Audio Output setting in the Extended menu Parent topic Connecting to Computer Sources Connecting to a Computer for Sound If your computer presentation includes sound and y...

Page 37: ... an HDMI Video Source Connecting to an MHL Compatible Device Connecting to a Component Video Source Connecting to a Composite Video Source Connecting to a Video Source for Sound Parent topic Projector Connections Connecting to an HDMI Video Source If your video source has an HDMI port you can connect it to the projector using an optional HDMI cable The HDMI connection provides the best image quali...

Page 38: ... and the other end to your video source s audio out port Then select the audio port you connected to as the HDMI1 Audio Output HDMI2 Audio Output or HDMI3 Audio Output setting in the Extended menu Parent topic Connecting to Video Sources Related references Projector Setup Settings Extended Menu Connecting to an MHL Compatible Device If you have an MHL compatible smartphone or tablet you can connec...

Page 39: ...l speakers Parent topic Connecting to Video Sources Connecting to a Component Video Source If your video source has component video ports you can connect it to the projector using an optional component to VGA video cable Depending on your component ports you may need to use an adapter cable along with a component video cable 1 Connect the component connectors to your video source s color coded com...

Page 40: ...ting in the projector s Signal menu Parent topic Connecting to Video Sources Related references Input Signal Settings Signal Menu Connecting to a Composite Video Source If your video source has a composite video port you can connect it to the projector using an optional RCA style video or A V cable 1 Connect the cable with the yellow connector to your video source s yellow video output port ...

Page 41: ...e has audio output ports If you are projecting video using the Video or Computer port connect the projector to the video source using an optional stereo mini jack audio cable Note If you connected your video source to the projector using an HDMI cable the audio signal is transferred with the video signal you do not need an additional cable for sound 1 Connect the audio cable to your video source s...

Page 42: ...an External Computer Monitor If you connected a computer to the projector s Computer port you can also connect an external monitor to the projector This lets you see your presentation on the external monitor even when the projected image is not visible If you want to output images to an external monitor when the projector is turned off you need to select Always On as the A V Output setting in the ...

Page 43: ... you want to output audio from the external speakers when the projector is turned off you need to select Always On as the A V Output setting in the projector s Extended menu Note The projector s built in speaker system is disabled when you connect external speakers 1 Make sure your computer or video source is connected to the projector with both audio and video cables as necessary 2 Locate the app...

Page 44: ...ns to connect external USB devices to the projector USB Device Projection Connecting a USB Device or Camera to the Projector Selecting the Connected USB Source Disconnecting a USB Device or Camera From the Projector Parent topic Projector Connections Related tasks Starting a PC Free Slide Show USB Device Projection You can project images and other content without using a computer or video device b...

Page 45: ...n FAT or FAT32 Self powered by their own AC power supplies bus powered hard drives are not recommended Does not have multiple partitions You can project slide shows from image files on a connected USB device Parent topic Connecting to External USB Devices Related tasks Starting a PC Free Slide Show Connecting a USB Device or Camera to the Projector You can connect your USB device or camera to the ...

Page 46: ...cting to External USB Devices Related tasks Starting a PC Free Slide Show Selecting the Connected USB Source You can switch the projector s display to the source you connected to one of the USB A ports To display the connected USB device select the USB1 source 1 Make sure the connected USB source is turned on if necessary 2 Press the Source Search button on the remote control Parent topic Connecti...

Page 47: ... the device 2 Disconnect the USB device or camera from the projector Parent topic Connecting to External USB Devices Related tasks Starting a PC Free Slide Show Installing Batteries in the Remote Control The remote control uses the two AA batteries that came with the projector Caution Use only the type of batteries specified in this manual Do not install batteries of different types or mix new and...

Page 48: ...d press it down until it clicks into place Warning Dispose of used batteries according to local regulations Do not expose batteries to heat or flame Keep batteries out of the reach of children they are choking hazards and are very dangerous if swallowed Parent topic Setting Up the Projector ...

Page 49: ...bed here download and install the network software and manuals as necessary Note If your projector is connected via a LAN Ethernet cable to a network that includes a wireless access point you can connect to the projector wirelessly through the access point using the Epson network software Connecting to a Wired Network Selecting Wired Network Settings Parent topic Using the Projector on a Network R...

Page 50: ...n Selecting Wired Network Settings Before you can project from computers on your network you must select the network settings for the projector using its menu system Note Make sure you already connected the projector to your wired network using the LAN port 1 Turn on the projector 2 Press the Menu button ...

Page 51: ... and press Enter 6 Select the following basic options as necessary Projector Name lets you enter a name up to 16 alphanumeric characters long to identify the projector over the network PJLink Password lets you enter a password up to 32 alphanumeric characters long for using the PJLink protocol for projector control ...

Page 52: ...displayed randomized keyword from a computer using the Epson iProjection software to access the projector Display Keyword lets you select whether or not to display a projector keyword on the projected image when using the Epson iProjection software to access the projector Display LAN Info lets you select how the projector displays network information You can select an option to display a QR code t...

Page 53: ...k To do this you must set up your projector and computer for wireless projection Note The Epson 802 11b g n wireless LAN module is not included with your projector and is optional To connect wirelessly to your projector configure the connection using the projector s Network menus After setting up the projector as described here download the network software and manuals as necessary Note If your pr...

Page 54: ...k install the Epson 802 11b g n wireless module in the projector Do not install any other type of wireless module Caution Never remove the module while its indicator light is blue or flashing or while you are projecting wirelessly You may damage the module or lose data Note The wireless LAN module is not included with your projector 1 Turn off the projector and unplug the power cord ...

Page 55: ...55 2 Unscrew and remove the cable cover if it is attached screwdriver not included ...

Page 56: ...tly to a Smartphone or Tablet You can display a QR code on the screen and use it to connect a single smartphone or tablet to your projector with the Epson iProjection app 1 Download the latest version of Epson iProjection from the App Store or Google Play and install it on your smartphone or tablet 2 Press the Menu button on the projector or the remote control 3 Select the Network menu and press E...

Page 57: ...on and press Enter 6 Select the Wireless LAN menu and press Enter 7 Select Connection Mode and press Enter 8 Select Quick and press Enter then press Enter again 9 When you finish selecting settings select Complete and follow the on screen instructions to save your settings and exit the menus ...

Page 58: ...smartphone must be on the same wireless network in order to establish a connection Your smartphone or tablet is now connected to your projector Visit epson com iprojection U S or epson ca iprojection Canada for information on controlling your projector with the Epson iProjection app Parent topic Wireless Network Projection Using Quick Wireless Connection Windows You can create a Quick Wireless Con...

Page 59: ...s installed in your projector 3 Turn on the projector 4 Press the LAN button on the remote control The LAN standby screen is displayed 5 Verify the SSID and IP address 6 Insert the USB key into the projector s USB A port You see a projected message that the network information update is complete 7 Remove the USB key 8 Insert the USB key into a USB port on your computer Note In Windows Vista if you...

Page 60: ...uter 10 Run your presentation as necessary 11 When you finish projecting wirelessly select the Safely Remove Hardware option in the Windows taskbar then remove the USB key from your computer Note You can share the USB key with other computers without disconnecting your computer You may need to restart your computer to reactivate your wireless LAN connection Parent topic Wireless Network Projection...

Page 61: ...er setting is set to On 5 Select Network Configuration and press Enter 6 Select the Basic menu and press Enter 7 Select the following basic options as necessary Projector Name lets you enter a name up to 16 alphanumeric characters long to identify the projector over the network ...

Page 62: ...jector displays a random keyword that you must enter from a computer using the Epson iProjection software or an iOS or Android device using the Epson iProjection app Display Keyword lets you display a keyword on the projected image when accessing the projector from a computer using the Epson iProjection software or an iOS or Android device using the Epson iProjection app Display LAN Info lets you ...

Page 63: ... Settings Parent topic Wireless Network Projection Wireless LAN Menu Settings Setting Options Description Connection Mode Quick Advanced Selects the type of wireless connection Quick lets you directly connect to multiple devices and computers using the projector s wireless network requires the optional wireless LAN module Advanced lets you connect to multiple devices and computers via a wireless n...

Page 64: ... case sensitive If the network settings are reset after the passphrase has been changed more than once the first passphrase is restored Channel 1ch 6ch 11ch In Quick connection mode selects the frequency band channel used by the wireless LAN IP Settings DHCP On or Off IP Address Subnet Mask Gateway Address Selects DHCP if your network assigns IP addresses automatically or turns off DHCP so you can...

Page 65: ... menu bar at the top of the screen 2 Make sure AirPort is turned on then do one of the following If your projector is set up on an existing network Advanced mode select the network name SSID If your projector is configured for Quick mode select the projector s SSID Parent topic Wireless Network Projection Setting Up Wireless Network Security You can set up security for your projector to use on a w...

Page 66: ...ork 8 When you finished select Complete and follow the on screen instructions to save your settings and exit the menus Parent topic Wireless Network Projection Setting Up Projector Network E Mail Alerts You can set up the projector to send you an e mail alert over the network if there is a problem with the projector 1 Press the Menu button 2 Select the Network menu and press Enter 3 Select Network...

Page 67: ...ddress as the From setting 9 Choose an Address field enter the e mail address and select the alerts you want to receive there Repeat for up to three addresses Your e mail address can be up to 32 alphanumeric characters long 10 If you are using the PJLink protocol for projector control turn on the PJLink Notification setting and enter the IP address where you want to receive PJLink notifications as...

Page 68: ...problem The IP address of the affected projector Detailed information about the problem Note If a critical problem causes a projector to shut down you may not receive an e mail alert Parent topic Setting Up Projector Network E Mail Alerts Setting Up Monitoring Using SNMP Network administrators can install SNMP Simple Network Management Protocol software on network computers so they can monitor pro...

Page 69: ...to receive SNMP notifications as the Trap IP Address setting using 0 to 255 for each address field Note To enter the IP address using the numeric keys on the remote control press and hold the Num button Do not use these addresses 127 x x x or 224 0 0 0 through 255 255 255 255 where x is a number from 0 to 255 ...

Page 70: ...mation system turn on the Control4 SDDP setting 12 If you want this projector to receive broadcast messages over the network turn on the Message Broadcasting setting Administrators can broadcast messages over the network using the Epson Projector Management software 13 When you finish selecting settings select Complete and follow the on screen instructions to save your settings and exit the menus ...

Page 71: ...tron RoomView Support To set up your projector for monitoring and control using a Crestron RoomView system make sure your computer and projector are connected to the network If you are connecting wirelessly set up the projector using the Advanced network connection mode Note If you want to use the Crestron RoomView system when the projector is turned off you need to adjust the Standby Mode setting...

Page 72: ... topic Crestron RoomView Support Related references Projector Setup Settings ECO Menu Controlling a Networked Projector Using Crestron RoomView Once you have set up your projector to use Crestron RoomView you can control and monitor projection using a compatible web browser 1 Start your web browser on a computer connected to the network 2 Type the projector s IP address into the browser s address ...

Page 73: ...ot directly correspond to the projector s remote control buttons OK acts as the Enter button Menu displays the projector s menu 5 To view information about the projector click the Info tab 6 To change projector Crestron and password settings click the Tools tab select settings on the displayed screen and click Send 7 When you finish selecting settings click Exit to exit the program Parent topic Cr...

Page 74: ... Image Height Resizing the Image with the Wide and Tele Buttons Adjusting the Image Position Focusing the Image Remote Control Operation Selecting an Image Source Projection Modes Image Aspect Ratio Color Mode Controlling the Volume with the Volume Buttons Projecting a PC Free Presentation Turning On the Projector Turn on the computer or video equipment you want to use before you turn on the proje...

Page 75: ... control to turn on the projector The projector beeps and the Status light flashes blue as the projector warms up After about 30 seconds the Status light stops flashing and turns blue Warning Never look into the projector lens when the laser is on This can damage your eyes and is especially dangerous for children and pets Caution Make sure no objects are blocking the light from the projector lens ...

Page 76: ... the computer when using a laptop Press the button for the video source on the remote control If the Home screen is displayed select the source you want to project Using the Home Screen Parent topic Using Basic Projector Features Related references Projector Setup Settings Extended Menu Using the Home Screen You can select input sources and other frequently used options from the Home screen 1 To d...

Page 77: ... Displays the on screen help 4 Hides the Home screen 5 Displays the settings assigned to Home screen in the projector s Extended menu 6 Projects two images from different image sources simultaneously by splitting the projected screen 7 Displays the brightness for the light source Note You can modify the customizable menu options using the Custom Setting L1 through Custom Setting R3 settings in the...

Page 78: ... conditions and usage Brightness decreases over time 1 Press the power button on the projector or remote control The projector displays a shutdown confirmation screen 2 Press the power button again To leave it on press any other button The projector beeps twice the laser turns off and the Status light turns off Note With Epson s Instant Off technology there is no cool down period so you can pack u...

Page 79: ...g the power cord when the Status light is on or flashing Parent topic Using Basic Projector Features Related references Projector Setup Settings Extended Menu Selecting the Language for the Projector Menus If you want to view the projector s menus and messages in another language you can change the Language setting 1 Turn on the projector 2 Press the Menu button ...

Page 80: ...projector at an angle to the screen or tilted up or down or off to the side you may need to correct the image shape for the best display quality Correcting Image Shape with the Keystone Buttons Correcting Image Shape with Quick Corner Correcting Image Shape with Arc Correction Parent topic Using Basic Projector Features Correcting Image Shape with the Keystone Buttons You can use the projector s k...

Page 81: ...ector and display an image Note You can display a pattern to aid in adjusting the projected image using the Settings menu 2 Press one of these keystone buttons on the control panel to display the Keystone adjustment screen ...

Page 82: ...e horizontal keystone adjustment buttons are labeled W and T After correction your image is slightly smaller Note If the projector is installed out of reach you can also correct the image shape with the remote control using the H V Keystone settings in the projector menus Parent topic Image Shape ...

Page 83: ...ing to correct the shape and size of an image that is unevenly rectangular on all sides 1 Turn on the projector and display an image Note You can display a pattern to aid in adjusting the projected image using the Settings menu 2 Press the Menu button 3 Select the Settings menu and press Enter 4 Select the Geometry Correction setting and press Enter ...

Page 84: ...t to adjust Then press Enter 7 Press the arrow buttons to adjust the image shape as necessary Press Enter to return to the area selection screen 8 When you are finished press Esc Parent topic Image Shape Related references Projector Feature Settings Settings Menu Correcting Image Shape with Arc Correction You can use the projector s Arc Correction setting to adjust the curve or arc of the sides of...

Page 85: ... at least 2 seconds to display a reset screen and select Yes 6 Use the arrow buttons on the projector or the remote control to select the corner or side of the image you want to adjust Then press Enter 7 Press the arrow buttons to adjust the image shape as necessary 8 When you are finished press Esc 9 To save your adjusted image position select Save Memory and select an entry You can save up to th...

Page 86: ...table or other flat surface and the image is too high or low you can adjust the image height using the projector s adjustable feet 1 Turn on the projector and display an image 2 To adjust the image height rotate the front and rear feet to extend or retract them ...

Page 87: ...esizing the Image with the Wide and Tele Buttons You can resize the image using the Wide and Tele buttons 1 Turn on the projector and display an image 2 To enlarge the image size press the W Wide button on the projector s control panel 3 To reduce the image size press the T Tele button After you adjust the image size the Image Shift screen is displayed automatically for adjusting the image positio...

Page 88: ...jector Features Related references Projector Feature Settings Settings Menu Adjusting the Image Position You can use the Image Shift feature to adjust the image position without moving the projector Note This feature is not available if the Zoom option is set to the widest setting 1 Turn on the projector and display an image 2 Adjust the image size using the W Wide and T Tele buttons ...

Page 89: ...the image position Note You can also use the Settings menu to adjust the Image Shift setting Parent topic Using Basic Projector Features Related references Projector Feature Settings Settings Menu Focusing the Image 1 Turn on the projector and display an image Note You can display a pattern to aid in adjusting the projected image using the Settings menu ...

Page 90: ...he air filter cover latch and open the air filter cover 3 Raise or lower the focus lever to sharpen the image Parent topic Using Basic Projector Features Related references Projector Feature Settings Settings Menu ...

Page 91: ...ctor Make sure that you aim the remote control at the projector s receivers within the angles listed here 1 19 7 feet 6 m 2 30 3 55 4 60 5 15 Note Avoid using the remote control in conditions with bright fluorescent lights or in direct sunlight or the projector may not respond to commands If you will not use the remote control for a long time remove the batteries Using the Remote Control as a Wire...

Page 92: ...ter or HDMI port to display video Note You cannot use the wireless mouse feature with an MHL connection 2 If you connected your computer to a port other than the projector s USB B port also connect a USB cable to the projector s USB B port and to a USB port on your computer for wireless mouse support 3 Start your presentation 4 Use the following buttons on the remote control to control your presen...

Page 93: ...ted references Projector Feature Settings Settings Menu Using the Remote Control as a Pointer You can use the projector s remote control as a pointer to help you call out important information on the screen The default pointer shape is an arrow but you can select an alternative shape using the Settings menu 1 Press the Pointer button on the remote control 2 Use the arrow buttons on the remote cont...

Page 94: ...her 1 Make sure the connected image source you want to use is turned on 2 For video image sources insert a DVD or other video media and press its play button if necessary 3 Do one of the following Press the Source Search button on the projector or remote control until you see the image from the source you want Press the button for the source you want on the remote control If there is more than one...

Page 95: ... a table in front of the screen Front Upside Down flips the image over top to bottom to project upside down from a wall or ceiling mount Rear flips the image horizontally to project from behind a translucent screen Rear Upside Down flips the image over top to bottom and horizontally to project from the wall or ceiling and behind a translucent screen You can change the projection mode using the rem...

Page 96: ...ute button on the remote control for 5 to 10 seconds The image disappears briefly and reappears flipped top to bottom 3 To change projection back to the original mode hold down the A V Mute button for 5 to 10 seconds again Parent topic Projection Modes Changing the Projection Mode Using the Menus You can change the projection mode to flip the image over top to bottom and or left to right using the...

Page 97: ...determines the image s aspect ratio However for certain images you can change the aspect ratio to fit your screen by pressing a button on the remote control If you always want to use a particular aspect ratio for a certain video input source you can select it using the projector s menus Changing the Image Aspect Ratio Available Image Aspect Ratios Parent topic Using Basic Projector Features Changi...

Page 98: ...rent topic Image Aspect Ratio Related references Input Signal Settings Signal Menu Available Image Aspect Ratios You can select the following image aspect ratios depending on the input signal from your image source Note Black bands and cropped images may project in certain aspect ratios depending on the aspect ratio and resolution of your input signal Aspect ratio setting Description Auto Automati...

Page 99: ...iewing environments and image types You can select a mode designed to match your image and environment or experiment with the available modes If you always want to use a particular color mode for a certain video input source you can select it using the projector menus Changing the Color Mode Available Color Modes Turning On Automatic Luminance Adjustment Parent topic Using Basic Projector Features...

Page 100: ...ource you are using Color Mode Description Dynamic Best for video games in a bright room Bright Cinema Best for projecting vivid images Cinema Best for movies projected in a dark room with natural tone images Game Best for gaming Parent topic Color Mode Turning On Automatic Luminance Adjustment In the Dynamic and Cinema color modes you can turn on the Dynamic Contrast setting to automatically opti...

Page 101: ...r Mode Related references Projector Setup Settings Extended Menu Controlling the Volume with the Volume Buttons You can use the Volume buttons on the remote control or projector to adjust the volume as you project a presentation with audio The volume buttons control the projector s internal speaker system or any external speakers you connected to the projector You must adjust the volume separately...

Page 102: ... Supported PC Free File Types Starting a PC Free Slide Show Starting a PC Free Movie Presentation PC Free Display Options Parent topic Using Basic Projector Features Supported PC Free File Types You can project these types of files using the projector s PC Free feature Note For best results place your files on media that is formatted in FAT16 32 If you have trouble projecting from media formatted ...

Page 103: ...G movie avi Supports only AVI 1 0 Make sure the file is not Saved with an audio codec other than PCM or ADPCM Above 1280 720 resolution Larger than 2GB Parent topic Projecting a PC Free Presentation Starting a PC Free Slide Show After connecting a USB device or digital camera to the projector you can switch to the USB input source and start your slide show Note You can change the PC Free operation...

Page 104: ...t Back to Top and press Enter To view additional files in a folder highlight Next page or Previous page and press Enter You can also press the Page up or down buttons on the remote control To display images from a different USB drive select Select Drive at the top of the PC Free screen and press Enter 3 Do one of the following To display an individual image press the arrow buttons to highlight the...

Page 105: ...n arrow button To move to the next or previous image press the left or right arrow button 5 To stop the display follow the on screen instructions or press the Esc button 6 Turn off the USB device if necessary and then disconnect the device from the projector Parent topic Projecting a PC Free Presentation Starting a PC Free Movie Presentation After connecting a USB device or digital camera to the p...

Page 106: ... press the Page up or down buttons on the remote control To display movie files from a different USB drive select Select Drive at the top of the PC Free screen and press Enter 3 To play back a movie press the arrow buttons to highlight the file and press Enter Note If any file names are longer than 8 characters or include unsupported symbols the file names may be shortened or changed only in the s...

Page 107: ...lays files in name order Date Order Displays files in date order Sort Order In Ascending Sorts files in first to last order In Descending Sorts files in last to first order Continuous Play On Displays a slide show continuously Off Displays a slide show one time through Screen Switching Time No Does not display the next file automatically 1 Second to 60 Seconds Displays files for the selected time ...

Page 108: ... Effect Wipe Transitions between images with a wipe effect Dissolve Transitions between images with a dissolve effect Random Transitions between images using a random variety of effects Parent topic Projecting a PC Free Presentation ...

Page 109: ...hutting Off the Picture and Sound Temporarily Stopping Video Action Temporarily Zooming Into and Out of Images Projector Security Features Creating a User Pattern to Display Operating Connected Devices Using the HDMI Link Features You can use the remote control to control certain features of devices connected to the projector s HDMI port 1 Press the Menu button on the projector or remote control 2...

Page 110: ...lect the HDMI Link setting and press Enter 4 Select HDMI Link and press Enter 5 Select On and press Esc 6 Select Device Connections and press Enter You see this screen Note Linked devices are indicated in blue ...

Page 111: ...linked device Select PJ Device or Bidirectional to turn the linked device on when the projector is turned on or Device PJ or Bidirectional to turn the projector on when the linked device is turned on Power Off Link select whether linked devices are turned off when the projector is turned off Link Buffer turn on to improve the performance of the linked operations by changing the settings if the HDM...

Page 112: ...ources next to each other You can control the split screen feature using the remote control or the projector menus Note While you use the split screen feature other projector features may not be available and some settings may be automatically applied to both images Note You cannot use split screen with certain input source combinations ...

Page 113: ...ing press Enter select the input source select Execute and press Enter You can also change image sources if necessary 4 To switch the images select the Swap Screens setting and press Enter 5 To change the image sizes select the Screen Size setting press Enter select a sizing option press Enter and press Menu to exit Note Depending on the video input signals the images may not appear at the same si...

Page 114: ... for Split Screen Projection You can choose from the input source combinations listed here for split screen projection Left Screen Right Screen HDMI1 MHL HDMI2 HDMI3 Computer Video USB Display USB1 USB2 LAN HDMI1 MHL HDMI2 HDMI3 Computer Video USB Display USB1 USB2 LAN Parent topic Projecting Two Images Simultaneously Using Multiple Projectors You can combine the projected images from two or more ...

Page 115: ...ors at once or individually Setting the Projector ID Setting the Remote Control ID Parent topic Using Multiple Projectors Setting the Projector ID If you want to control multiple projectors from a remote control give each projector a unique ID 1 Press the Menu button 2 Select the Extended menu and press Enter 3 Select Projector ID and press Enter 4 Press the arrow buttons on the remote control to ...

Page 116: ...ou want the remote control to operate with exclusively 2 Make sure you know the projector s ID number as set in the Extended menu Projector ID setting Note If you have forgotten the projector s ID aim the remote control at the projector and press the ID button to temporarily display the projector s ID on the screen If you turn off the Projector ID setting the remote control will operate the projec...

Page 117: ...ant to match the display quality 2 Set ID numbers on each projector 3 Make sure all projectors are using the same Color Mode setting 4 Set the remote control ID to match the first projector 5 Press the Menu button select the Image menu and press Enter 6 Select settings as necessary 7 Set the remote control ID to match the next projector then select Image menu adjustments as necessary to match the ...

Page 118: ...owing Normal Sets the brightness to the maximum level estimated life span of the light source is approximately 20 000 hours Quiet Sets the brightness to 70 and reduces fan noise estimated life span of the light source is approximately 20 000 hours Extended Sets the brightness to 70 and extends the life expectancy of the light source estimated life span of the light source is approximately 30 000 h...

Page 119: ...jector s menus 1 Press the A V Mute button on the remote control to temporarily stop projection and mute any sound 2 To turn the picture and sound back on press A V Mute again Note The projector s power automatically turns off thirty minutes after A V Mute is enabled You can disable this feature in the projector s Eco menu Parent topic Adjusting Projector Features Related tasks Saving a User s Log...

Page 120: ...Freeze again Parent topic Adjusting Projector Features Zooming Into and Out of Images You can draw attention to parts of a presentation by zooming into a portion of the image and enlarging it on the screen 1 Press the E Zoom button on the remote control You see a crosshair on the screen indicating the center of the zoom area ...

Page 121: ...es to the startup screen and other settings Button lock security to block operation of the projector using the buttons on the control panel Security cabling to physically cable the projector in place Password Security Types Locking the Projector s Buttons Installing a Security Cable Parent topic Adjusting Projector Features Password Security Types You can set up these types of password security us...

Page 122: ...ng a Password To use password security you must set a password Note The default password is set to 0000 1 Hold down the Freeze button on the remote control for about five seconds or until you see this menu 2 Press the down arrow to select Password and press Enter You see the prompt Change the password 3 Select Yes and press Enter ...

Page 123: ...confirmation prompt 5 Enter the password again You see the message Password accepted 6 Press Esc to return to the menu 7 Make a note of the password and keep it in a safe place in case you forget it Parent topic Password Security Types Selecting Password Security Types After setting a password you see this menu allowing you to select the password security types you want to use ...

Page 124: ...t changes to network settings select Network Protection press Enter select On press Enter again and press Esc You can attach the Password Protect sticker to the projector as an additional theft deterrent Note Be sure to keep the remote control in a safe place if you lose it you will not be able to enter the password required to use the projector Parent topic Password Security Types Entering a Pass...

Page 125: ...rrect password three times in succession you see a message telling you that the projector is locked After the message is displayed for 5 minutes the projector enters standby mode Unplug the projector plug in the power cord and turn on the projector You see a prompt to enter the password If you continue to enter an incorrect password many times in succession the projector displays a request code an...

Page 126: ...changes to the User s Logo by setting up password protection for it 1 Display the image you want to project as the User s Logo 2 Press the Menu button select the Extended menu and press Enter 3 Select the User s Logo setting and press Enter You see a prompt asking if you want to use the displayed image as a user s logo 4 Select Yes and press Enter You see a selection box overlaying your image Note...

Page 127: ...e screen 10 Select the Extended menu and press Enter 11 Select Display and press Enter 12 Select when you want to display the User s Logo screen To display it whenever there is no input signal select Display Background and set it to Logo To display it whenever you turn the projector on select Startup Screen and set it to On To prevent anyone from changing the User s Logo settings without first ent...

Page 128: ...ojector s control panel to prevent anyone from using the projector You can lock all the buttons or all the buttons except the power button Note The projector can still be operated using the remote control 1 Press the Menu button 2 Select the Settings menu and press Enter ...

Page 129: ...atures Unlocking the Projector s Buttons If the projector s buttons have been locked hold the Enter button on the projector s control panel for seven seconds to unlock them You can also set the Control Panel Lock setting to Off in the Settings menu Parent topic Locking the Projector s Buttons Related references Projector Feature Settings Settings Menu Installing a Security Cable You can install tw...

Page 130: ...User Pattern to Display You can transfer an image to the projector and then display it as a pattern to aid in presentations when you use the Pattern Display feature This transferred image is called the User Pattern Note Once you save a user pattern you cannot restore the default pattern 1 Display the image you want to project as the User Pattern from a connected computer or video source ...

Page 131: ...ser Pattern Note When you select User Pattern adjustments such as Keystone E Zoom Aspect Adjust Zoom or Image Shift are temporarily canceled 5 Select Yes and press Enter Note It takes a few moments for the projector to save the image do not use the projector its remote control or any connected equipment until it is finished You see a completion message 6 Press Esc to exit the message screen Parent...

Page 132: ...ature Settings Settings Menu Projector Setup Settings Extended Menu Projector Network Settings Network Menu Projector Setup Settings ECO Menu Projector Information Display Info Menu Projector Reset Options Reset Menu Using the Projector s Menus You can use the projector s menus to adjust the settings that control how your projector works The projector displays the menus on the screen 1 Press the M...

Page 133: ...on the current input source 3 To change settings in the displayed menu press Enter 4 Press the up or down arrow button to move through the settings 5 Change the settings using the buttons listed on the bottom of the menu screens 6 To return all the menu settings to their default values select Reset 7 When you finish changing settings on a menu press Esc 8 Press Menu or Esc to exit the menus Parent...

Page 134: ...ode See the list of available Color Modes Adjusts the vividness of image colors for various image types and environments Brightness Varying levels available Lightens or darkens the overall image Contrast Varying levels available Adjusts the difference between light and dark areas of the image Color Saturation Varying levels available Adjusts the intensity of the image colors Tint Varying levels av...

Page 135: ...ed and higher values tint the image blue G M Correction makes fine adjustments to the color tone higher values tint the image green and lower values tint the image red Customized adjusts the individual RGB components of the offset and gain Image Enhancement Noise Reduction Detail Enhancement Adjusts the resolution of the image Noise Reduction reduces flickering in analog images Detail Enhancement ...

Page 136: ...aced to progressive signals for certain video image types Off for fast moving video images Video for most video images Film Auto for movies computer graphics and animation Dynamic Contrast Off Normal High Speed Adjusts the projected luminance based on the image brightness when certain Color Modes are selected Note The Brightness setting does not affect laser brightness To change the laser brightne...

Page 137: ...ngs for an input source make sure the source is connected and select that source Setting Options Description Resolution Auto Wide Normal Sets the input signal resolution if not detected automatically using the Auto option Aspect See the list of available aspect ratios Sets the aspect ratio width to height ratio for the selected input source Tracking Varying levels available Adjusts signal to elimi...

Page 138: ...range automatically Normal normally for images from a device other than a computer select if the black areas of the image are too bright Expanded normally for images from a computer select if the image is too dark Input Signal specifies the signal type from input sources connected to computer ports Auto detects signals automatically RGB corrects color for computer RGB video inputs Component correc...

Page 139: ...H V Keystone Quick Corner Arc Correction Adjusts image shape to rectangular horizontally and vertically H V Keystone lets you manually correct horizontal and vertical sides Quick Corner select to correct image shape and alignment using an on screen display Arc Correction select to adjust the curve or arc of the horizontal and vertical sides and load and save settings ...

Page 140: ...ode press Menu to display the Split Screen options or Esc to cancel split screen display Zoom Varying levels available Adjusts the size of the projected image Image Shift Varying positions available Adjusts the position of the projected image Volume Varying levels available Adjusts the volume of projector s speaker system or external speakers ...

Page 141: ... audio from the internal speakers or a connected audio video system Power On Link controls what happens when you turn on the projector or a linked device Power Off Link controls whether linked devices are turned off when the projector is turned off Link Buffer improves the performance of operations when the HDMI Link feature is not working correctly Lock Setting Control Panel Lock Controls project...

Page 142: ...isplay Pattern Type User Pattern Test Pattern Selects various pattern display options Pattern Display lets you display the selected pattern type on the screen to aid in presentation Pattern Type selects the type of grid or line pattern to display User Pattern captures a projected screen and saves it as a pattern for display Test Pattern displays a test pattern to assist in focusing and zooming the...

Page 143: ...ons Description Home Screen Home Screen Auto Disp Custom Function 1 Custom Function 2 Adjusts settings on the Home Screen Home Screen Auto Disp controls whether the Home screen displays automatically when the projector is turned on Custom Function 1 and Custom Function 2 let you customize the options displayed on the Home screen and save your settings as a preset ...

Page 144: ...r a special screen appears when the projector starts up Color Uniformity adjusts the color tone balance Closed Caption Off CC1 CC2 Controls use of closed captions and selects the closed caption type closed captions are only visible for NTSC signals connected through the Video port User s Logo Creates a screen that the projector displays to identify itself and enhance security Projection Front Fron...

Page 145: ...s the projector s operating temperature at altitudes above 4921 feet 1500 m Auto Source Search automatically detects the image signal that is input when the projector is turned on Auto Power On automatically turns on the projector when it detects an input signal from the selected port Quick Startup the projector enters this mode when you turn it off you can start projecting in about five seconds b...

Page 146: ... the audio input port when projecting images from non HDMI ports HDMI1 Audio Output HDMI2 Audio Output and HDMI3 Audio Output select which Audio port provides audio when viewing images from HDMI ports Projector ID Off 1 through 9 Assigns an ID for the projector when you use multiple projectors Language Various languages available Selects the language for projector menu and message displays Note Yo...

Page 147: ... Network Settings Network Menu Settings on the Network menu let you view network information and set up the projector for monitoring and control over a network Setting Options Description Wireless LAN Power On Off Enables or disables wireless communication ...

Page 148: ...e Displays wireless network status and details Net Info Wired LAN Projector Name DHCP IP Address Subnet Mask Gateway Address MAC Address Displays wired network status and details Display the QR Code Displays the QR code for quick connection to a mobile device Network Configuration Accesses additional network menus Configures your network settings Parent topic Adjusting the Menu Settings ...

Page 149: ...ource Mode Brightness Level Selects the brightness mode of the projector laser Light Source Mode sets the brightness for the laser the following settings are available Normal sets maximum brightness level Quiet reduces laser brightness to 70 with reduced fan noise Extended reduces laser brightness to 70 and saves power and laser life Custom allows you to select a custom brightness level Brightness...

Page 150: ...olled over a network when the projector is in standby mode enable this setting to allow the following operations to occur when the projector is in standby mode Monitor and control the projector over a network Output audio and video to an external device A V Output must be set to Always On Port selects the Wired LAN or Wireless LAN port to use while the Standby Mode setting is set to Communication ...

Page 151: ...r of hours H the projector has been used since it was turned on Source Displays the name of the port to which the current input source is connected Input Signal Displays the input signal setting of the current input source Resolution Displays the resolution of the current input source Video Signal Displays the video signal format of the current input source Refresh Rate Displays the refresh rate o...

Page 152: ...able network communication Check the network communication status wait a few moments and try connecting to the network again 0481 0482 0485 0484 Communication with computer was disconnected Restart the network software 0483 The network software quit unexpectedly Check the network communication status then turn the projector off and then on again 04FE 0479 A projector system error has occurred Turn...

Page 153: ...ommunication error has occurred Try restarting the network software and restarting your projector If that does not solve the problem contact Epson for help Parent topic Projector Information Display Info Menu Projector Reset Options Reset Menu You can reset most of the projector settings to their default values using the Reset All Config option on the Reset menu You cannot reset the following sett...

Page 154: ...154 Network menu items Wireless LAN Power Password Operation Hours Light Source Info Parent topic Adjusting the Menu Settings ...

Page 155: ...Epson servicer This projector uses a sealed laser light source which does not need servicing and cannot be replaced Warning Before cleaning any part of the projector turn it off and unplug the power cord Never open any cover on the projector except as specifically explained in this manual Dangerous electrical voltages in the projector can injure you severely Warning Do not try to service this prod...

Page 156: ... Turning Off the Projector Cleaning the Obstacle Sensor Clean the projector s obstacle sensor glass circled in red periodically or if you see a message telling you to remove any obstacles that are interfering with the projection area To remove dust or smudges gently wipe the obstacle sensor glass with lens cleaning paper To remove stubborn smudges moisten a soft lint free cloth with lens cleaner a...

Page 157: ...urning Off the Projector Air Filter and Vent Maintenance Regular filter maintenance is important to maintaining your projector Your Epson projector is designed with an easily accessible user replaceable filter to protect your projector and make regular maintenance simple Filter maintenance intervals will depend on the environment If regular maintenance is not performed your Epson projector will no...

Page 158: ...y or if you see a message telling you to clean them Caution Do not use water or any detergent to clean the air filter Do not use canned air or the gases may leave a flammable residue 1 Turn off the projector and unplug the power cord 2 Slide the air filter cover latch and open the air filter cover ...

Page 159: ...o 5 times to shake off any excess dust Do this outside the room or away from the projector Caution Do not use excessive force when tapping the air filter or it may crack and become unusable Do not rinse the air filter in water or use any detergent or solvent to clean it Do not use ...

Page 160: ...nto the projector s optics or other sensitive areas 5 Vacuum the front of the air filter the side with the tabs to remove any remaining dust Note If dust is difficult to remove or the air filter is damaged replace the air filter 6 Place the air filter back in the projector as shown ...

Page 161: ...the Air Filter You need to replace the air filter in the following situations After cleaning the air filter you see a message telling you to clean or replace it The air filter is torn or damaged You can replace the air filter while the projector is mounted on the wall or ceiling 1 Turn off the projector and unplug the power cord ...

Page 162: ...162 2 Slide the air filter cover latch and open the air filter cover ...

Page 163: ...163 3 Pull the air filter out of the projector Note Air filters contain polypropylene Dispose of used air filters according to local regulations 4 Place the new air filter in the projector as shown ...

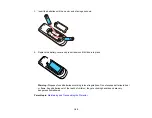
Page 164: ...Replace the batteries as soon as they run out Caution Use only the type of batteries specified in this manual Do not install batteries of different types or mix new and old batteries 1 Remove the battery cover as shown 2 Remove the old batteries Warning If the battery fluid has leaked wipe it away with a soft cloth and avoid getting the fluid on your hands If it gets on your hands wash them immedi...

Page 165: ...it down until it clicks into place Warning Dispose of used batteries according to local regulations Do not expose batteries to heat or flame Keep batteries out of the reach of children they are choking hazards and are very dangerous if swallowed Parent topic Maintaining and Transporting the Projector ...

Page 166: ...transporting the projector a long distance or as checked luggage pack it in a firm box with cushioning around it and mark the box Fragile When shipping the projector for repairs place it in its original packing materials if possible or use equivalent materials with cushioning around the projector Mark the box Fragile Note Epson shall not be liable for any damages incurred during transportation Par...

Page 167: ...it Then plug it back in and turn it on If this does not solve the problem check the following The lights on the projector may indicate what the problem is The Help option on the Home screen can display information about common problems if the projector is operating The solutions in this manual can help you solve many problems If none of these solutions help you can contact Epson for technical supp...

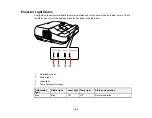
Page 168: ...you know when a problem occurs Check the status and color of the lights and look for a solution in the table here 1 On Standby light 2 Status light 3 Laser light 4 Temp temperature light On Standby light Status light Laser light Temp light Status and solution Blue Blue Off Off Normal operation ...

Page 169: ...are not clogged with dust or obstructed by nearby objects Clean or replace the air filter Make sure the environmental temperature is not too hot Off Flashing blue Off Orange Projector has overheated and turned off Leave it turned off to cool down After about five minutes do the following Make sure that the vents and air filter are not clogged with dust or obstructed by nearby objects Clean or repl...

Page 170: ...projector error Turn the projector off unplug it and contact Epson for help Flashing blue Varies Flashing orange Flashing orange Obstacle detection warning A beep sounds and you see an obstacle warning The projector turns off automatically if you take no action Remove any obstacles interfering with the projection window Clean the obstacle sensor If the problem persists turn the projector off unplu...

Page 171: ... To select another problem to solve press Esc To exit the help system press Home Parent topic Solving Problems Solving Image or Sound Problems Check the solutions in these sections if you have any problems with projected images or sound Solutions When No Image Appears Solutions When Image is Incorrect Using the USB Display Function Solutions When No Signal Message Appears Solutions When Not Suppor...

Page 172: ...Image menu Adjust the Brightness Settings on the Eco menu Check the Display setting to make sure Messages is set to On If the projector does not respond when you press the control panel buttons the buttons may be locked Unlock the buttons If the projector does not respond when you press buttons on the remote control make sure the remote receivers are turned on For images projected with Windows Med...

Page 173: ...ter smooth in the Epson USB Display Settings program on your computer Turn off the Transfer layered window setting in the Epson USB Display Settings program on your computer If you are projecting using the WUXGA 1920 1200 video format and change the computer resolution during projection the video quality and performance may decline Make sure you are using the most recent version of the USB Display...

Page 174: ...rce Related topics Connecting to Computer Sources Displaying From a PC Laptop If you see the No Signal message when you display from a PC laptop you need to set up the laptop to display on an external monitor 1 Hold down the laptop s Fn key and press the key labeled with a monitor icon or CRT LCD See your laptop manual for details Wait a few seconds for an image to appear To display on both the la...

Page 175: ...r details As a test try setting the computer s display resolution to the lowest possible setting and then gradually increase it as necessary Parent topic Solving Image or Sound Problems Related references Input Signal Settings Signal Menu Solutions When Only a Partial Image Appears If only a partial computer image appears try the following solutions For VGA connections press the Auto button on the...

Page 176: ...evenly rectangular try the following solutions If the projector is not mounted on the wall or ceiling place it directly in front of the center of the screen facing it squarely if possible Use the Image Shift setting to adjust the image position rather than moving the projector Press the keystone buttons on the projector to adjust the image shape Adjust the image shape using the Geometry Correction...

Page 177: ...ontrols try decreasing the Sharpness setting to improve image quality If you connected an extension power cable try projecting without it to see if it caused interference in the signal If you are using the USB Display function turn off the Transfer layered window setting in the Epson USB Display Settings program on your computer Parent topic Solving Image or Sound Problems Related references Input...

Page 178: ...rect If the projected image is too dark or light or the colors are incorrect try the following solutions Press the Color Mode button on the remote control to try different color modes for the image and environment Check your video source settings Adjust the available settings on the Image menu for the current input source such as Brightness Contrast Tint White Balance and or Color Saturation Make ...

Page 179: ...connected device to PCM output Make sure any connected audio cables are labeled No Resistance If you are using the USB Display function turn on the Output audio from the projector setting in the Epson USB Display Settings program on your computer If you are using a Mac and you do not hear sound from an HDMI source make sure your Mac supports audio through the HDMI port If not you need to connect a...

Page 180: ...ons may be locked for security Unlock the buttons or use the remote control to turn on the projector If the projector s laser shuts off unexpectedly it may have entered standby mode after a period of inactivity Press the power button to wake the projector and adjust the Sleep Mode Timer setting to change the sleep interval Check the solutions for this light status If the power button on the remote...

Page 181: ...tor away from the sun or interfering equipment If available turn on one of the remote receivers in the projector s menu system or check if all the remote receivers were turned off If the remote receiver setting is off press and hold the Menu button on the remote for at least 15 seconds to restore the default setting If you assigned an ID number to the remote control to operate multiple projectors ...

Page 182: ...atic During Network Projection Solutions When Using HDMI Link Parent topic Solving Problems Solutions When Network Alert E Mails are Not Received If you do not receive an e mail alerting you to problems with a projector over the network try the following solutions Make sure the projector is turned on and connected to the network correctly If an error shut down the projector it cannot send an e mai...

Page 183: ... control an HDMI device using the HDMI Link buttons try the following solutions Make sure all necessary cables are securely connected and the power is on for the projector and connected video sources Make sure the cables meet the HDMI standards Make sure the connected device supports the CEC standards If you connected a new device or changed any connections you may need to restart the device Conne...

Page 184: ...wing information ready Product name Product serial number located on the bottom or rear of the projector or in the menu system Proof of purchase such as a store receipt and date of purchase Computer or video configuration Description of the problem Purchase Supplies and Accessories You can purchase screens other optional accessories and replacement parts from an Epson authorized reseller To find t...

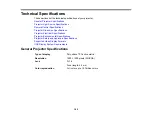
Page 185: ...imension Specifications Projector Electrical Specifications Projector Environmental Specifications Projector Safety and Approvals Specifications Supported Video Display Formats USB Display System Requirements General Projector Specifications Type of display Poly silicon TFT active matrix Resolution 1920 1200 pixels WUXGA Lens F 1 6 Focal length 4 2 mm Color reproduction Full color up to 1 07 billi...

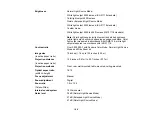
Page 186: ...4 white light output measured in accordance with ISO 21118 Contrast ratio Over 2 500 000 1 with Dynamic Color Mode Normal Light Source Mode and Wide Zoom on Image size in native aspect ratio 70 inches 1 78 m to 130 inches 3 30 m Projection distance in native aspect ratio 15 9 inches 0 41 m to 30 7 inches 0 77 m Projection methods Front rear wall mounted table mounted ceiling mounted Optical aspect...

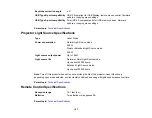
Page 187: ...ight Source mode 448 W Quiet or Extended Light Source mode 348 W Light source output power Up to 108 W Light source life Normal or Quiet Light Source mode Up to about 20000 hours Extended Light Source mode Up to about 30000 hours Note Turn off this product when not in use to prolong the life of the projector Laser life will vary depending upon mode selected environmental conditions and usage Brigh...

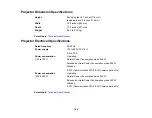
Page 188: ...ted frequency 50 60 Hz Power supply 100 to 240 VAC 10 4 6 to 2 0 A Power consumption 100 to 120 V Operating Normal Power Consumption mode 448 W Extended or Quiet Power Consumption mode 348 W Standby 0 3 W Communication Off 2 0 W Communication On Power consumption 220 to 240 V Operating Normal Power Consumption mode 423 W Extended or Quiet Power Consumption mode 332 W Standby 0 3 W Communication Of...

Page 189: ...UVus Mark Canada ICES 003 Class B CSA C22 2 No 60950 1 07 cTUVus Mark Parent topic Technical Specifications Supported Video Display Formats For best results your computer s monitor port or video card resolution should be set to display in the projector s native resolution However your projector includes Epson s SizeWise chip that supports other computer display resolutions so your image will be re...

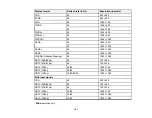
Page 190: ... WXGA 60 75 85 1440 900 WXGA 60 1600 900 SXGA 70 75 85 1152 864 60 75 85 1280 960 60 75 85 1280 1024 SXGA 60 75 1400 1050 WSXGA 60 1680 1050 UXGA 60 1600 1200 WUXGA Reduced Blanking 60 1920 1200 Composite video TV NTSC 60 720 480 TV SECAM 50 720 576 TV PAL 50 60 720 576 Component video SDTV 480i 480p 60 720 480 SDTV 576i 576p 50 720 576 HDTV 720p 50 60 1280 720 HDTV 1080i 50 60 1920 1080 HDMI inpu...

Page 191: ...60 1280 1024 SXGA 60 1400 1050 UXGA 60 1600 1200 WUXGA Reduced Blanking 60 1920 1080 SDTV 480i 480p 60 720 480 SDTV 576i 576p 50 720 576 HDTV 720p 50 60 1280 720 HDTV 1080i 50 60 1920 1080 HDTV 1080p 24 30 50 60 1920 1080 MHL input signals VGA 60 640 480 SDTV 480i 480p 60 720 480 SDTV 576i 576p 50 720 576 HDTV 720p 50 60 1280 720 HDTV 1080i 50 60 1920 1080 HDTV 1080p 24 30 1920 1080 Wide resolutio...

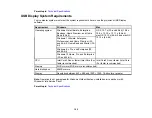
Page 192: ...timate Enterprise Professional and Home Premium 32 and 64 bit Home Basic and Starter 32 bit Windows 8 x Pro and Enterprise 32 and 64 bit Windows 10 Home Pro and Enterprise 32 and 64 bit CPU Intel Core2 Duo or faster Intel Core i3 or faster recommended Intel Core2 Duo or faster Intel Core i5 or faster recommended Memory 2GB or more 4GB or more recommended Hard disk space 20MB or more Display Resolu...

Page 193: ...l Parent topic Notices Important Safety Information Caution Never look into the projector lens when the laser is turned on the bright light can damage your eyes Never let children look into the lens when it is on Never open any cover on the projector except the filter covers Dangerous electrical voltages inside the projector can severely injure you Except as specifically explained in this User s G...

Page 194: ...into the lens using optical devices such as a magnifying glass or telescope This could cause visual impairment When turning on the projector at a distance using the remote control make sure no one is looking into the lens Do not allow small children to operate the projector Children must be accompanied by an adult Do not apply optical devices such as a magnifying glass or reflector to the projecte...

Page 195: ...rojector Do not look into the lens when the projector is on The bright light can damage your eyes Avoid standing in front of the projector so the bright light does not shine into your eyes Do not place your hand or any object near the projection window The high temperature of this area could cause burns fire or other damage ...

Page 196: ...when disconnecting the plug always be sure to hold the plug when disconnecting it Do not overload wall outlets extension cords or power strips Failure to comply with these precautions could result in fire or electric shock Do not place the projector where the cord can be walked on This may result in fraying or damage to the plug Unplug the projector from the wall outlet and allow to cool before cl...

Page 197: ...id or foreign objects get inside the projector or if it has been exposed to rain or water if it has been dropped or the housing has been damaged Do not touch the plug during an electrical storm Otherwise you may receive an electric shock Unplug the projector when it will not be used for extended periods Do not use the projector where it may be exposed to rain water or excessive humidity Do not use...

Page 198: ...ectrical appliances Always lower the volume before turning off the projector Turning on the projector with the volume too high can damage your ears Restriction of Use Parent topic Notices Restriction of Use When this product is used for applications requiring high reliability safety such as transportation devices related to aviation rail marine automotive disaster prevention devices various safety...

Page 199: ...hed on in order to bring it into the stand by condition 4 ISO7000 No 0434B IEC3864 B3 1 Caution To identify general caution when using the product 5 IEC60417 No 5041 Caution hot surface To indicate that the marked item can be hot and should not be touched without taking care 6 IEC60417 No 6042 ISO3864 B3 6 Caution risk of electric shock To identify equipment that has risk of electric shock 7 IEC60...

Page 200: ...cover for the battery compartment or the connector terminals 11 IEC60417 No 5002 Positioning of cell To identify the battery holder itself and to identify the positioning of the cell s inside the battery holder 12 Positioning of cell To identify the battery holder itself and to identify the positioning of the cell s inside the battery holder 13 IEC60417 No 5019 Protective earth To identify any ter...

Page 201: ...7 No 5172 Class II equipment To identify equipment meeting the safety requirements specified for Class II equipment according to IEC 61140 18 ISO 3864 General prohibition To identify actions or operations that are prohibited 19 ISO 3864 Contact prohibition To indicate injury that could occur due to touching a specific part of the equipment 20 Never look into the optical lens while the projector is...

Page 202: ... can radiate radio frequency energy and if not installed and used in accordance with the instructions may cause harmful interference to radio communications However there is no guarantee that interference will not occur in a particular installation If this equipment does cause interference to radio and television reception which can be determined by turning the equipment off and on the user is enc...

Page 203: ...sappropriation an IP Claim You and Epson also agree notwithstanding Section 1 6 that a court not an arbitrator may decide if a claim or cause of action is for an IP Claim 1 2 Binding Arbitration You and Epson agree that all Disputes shall be resolved by binding arbitration according to this Agreement ARBITRATION MEANS THAT YOU WAIVE YOUR RIGHT TO A JUDGE OR JURY IN A COURT PROCEEDING AND YOUR GROU...

Page 204: ... the arbitration shall be governed by the rules of JAMS that are in effect when the arbitration is filed excluding any rules that permit arbitration on a class or representative basis the JAMS Rules available at http www jamsadr com or by calling 1 800 352 5267 and under the rules set forth in this Agreement All Disputes shall be resolved by a single neutral arbitrator and both parties shall have ...

Page 205: ...h you or Epson seeks 75 000 or less in damages exclusive of attorney s fees and costs if the arbitrator s decision results in an award to you in an amount greater than Epson s last written offer if any to settle the Dispute Epson will i pay you 1 000 or the amount of the award whichever is greater ii pay you twice the amount of your reasonable attorney s fees if any and iii reimburse you for any e...

Page 206: ...ection 1 is found to be unenforceable that provision shall be severed with the remainder of this Agreement remaining in full force and effect The foregoing shall not apply to the prohibition against class or representative actions as provided in Section 1 5 This means that if Section 1 5 is found to be unenforceable the entire Section 1 but only Section 1 shall be null and void Parent topic Notice...

Page 207: ...ly comply with Seiko Epson Corporation s operating and maintenance instructions Seiko Epson Corporation shall not be liable for any damages or problems arising from the use of any options or any consumable products other than those designated as Original Epson Products or Epson Approved Products by Seiko Epson Corporation This information is subject to change without notice A Note Concerning Respo...

Reviews: