


82
Network Scanning
If you’re installing EPSON TWAIN Pro Network in order to use a scanner
attached to another computer, you’ll see a window that asks for the
Network Scanner Address (the scanner server’s IP address). Enter the IP
address for the scanner server you want to connect to. See page 88 for
instructions. Then continue with step 5 below.
5. Click
Test
to check scanner operation. If the scanner is communicating with your
computer, you see
Status: Device Reader
under Scanner Information. Click
OK
to close the window.
6. Follow the instructions on the screen to install
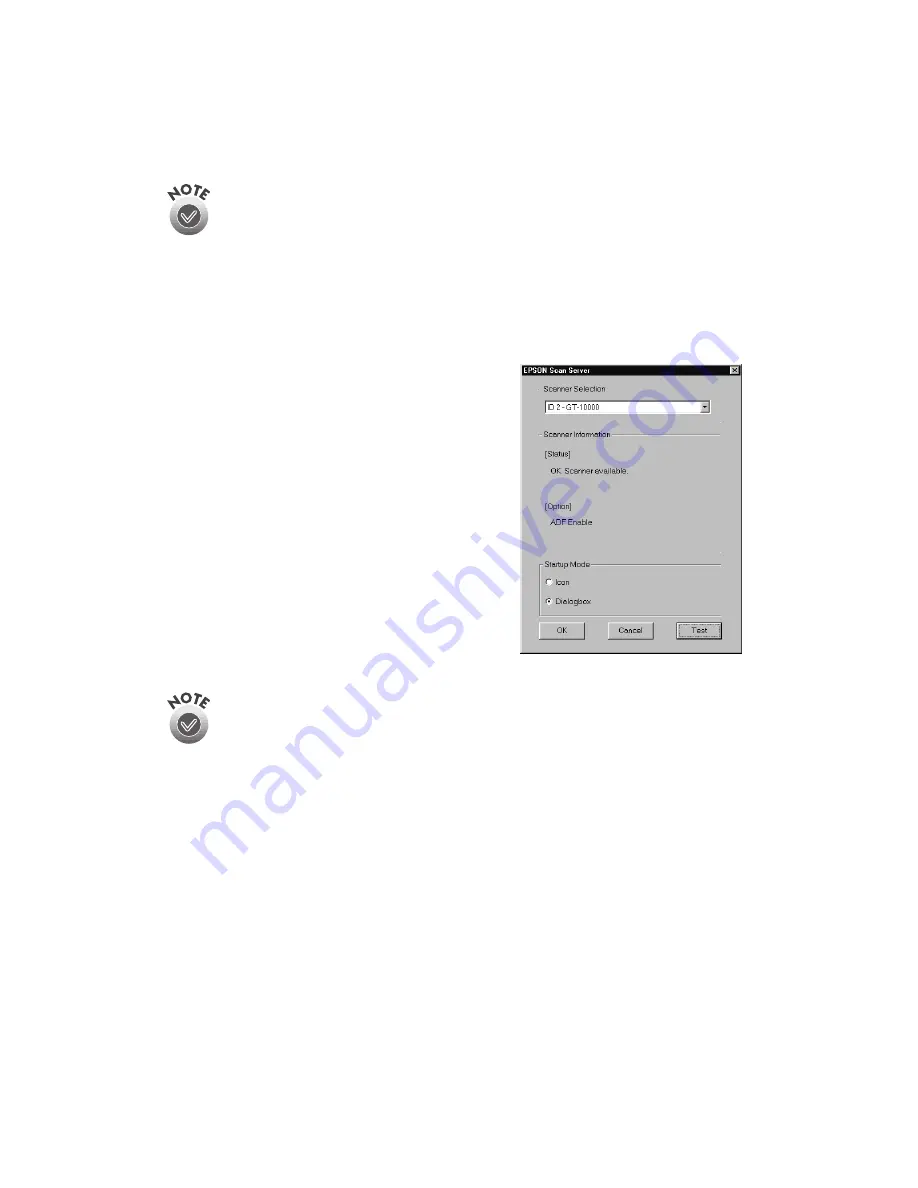
EPSON Scan Server. When you see the
window on the right, make sure
GT-10000
is
selected under Scanner Selection.
Select either
Icon
or
Dialogbox
as the
scanner server start up mode. (See “Changing
the Scanner Server Start Up Mode” on
page 85 for details about the start up mode.)
7. Click
Test
to test scanner operation.
OK. Scanner available
appears under Status
if the scanner is communicating with the
scanner server. Then click
OK
.
If you want to share a different network scanner with the client
computers, you can access the EPSON Scan Server window at any time
by double-clicking the EPSON Scan Server icon in the Windows Control
Panel. Then select the scanner you want in the Scanner Selection list.
8. Follow the instructions on the screen to complete installation of additional
software you selected in the software selection window.
9. If you want to install PhotoDeluxe, see page 45 for instructions. When you’re
done installing software, restart your computer.
Summary of Contents for G650B
Page 1: ...Color Scanner User s Guide ...
Page 8: ...viii Contents ...
Page 85: ...Scanning With the ISIS Driver 77 ...


