background image

Display settings

You can adjust the following display settings:

Backlight:

 Turns the backlight of the display on or off.

Contrast:

 Adjusts the density of the fonts on the 

display. (Value: -5 to +5)

Language:

 Changes the language of the settings and 

messages on the display.

inch:cm:

 Selects the unit of measurement for length.

To adjust display settings, follow the steps below:
1. Press   to turn on the product.
2. Press


 + 


.

3.  Press 


 or 

 to highlight a setting, then 

press 

 to select it.

4.  Press 


 or 

 to select setting options, then 

press 

 .

Setup

This product operates with batteries (not included) or 
with an AC adapter (not included).

Inserting batteries

1. Remove the rear cover.

2. Insert 6 AA alkaline batteries. 

Note:

 If you need to install a tape cartridge, see “Inserting 

a tape cartridge” below.

3. Replace the cover and snap it into place.

Optional AC adapter (APT0615Z1-1)

Warning: 

Make sure to use AC adapter APT0615Z1-1 or 

damage may occur.

1.  Plug one end of the AC adapter into the product. 
2.  Plug the the other end of the AC adapter into the wall 

outlet.

Inserting a tape cartridge

1.  Remove any slack from the ink ribbon.

 2. Remove the rear cover, if necessary.

3.  Insert the tape cartridge and press it down firmly until 

it snaps into place. If there is excess tape, feed the end 
of the tape through the tape guide slot.

4. Replace the cover and snap it into place.

Preparing the tape

After inserting a tape cartridge, make sure to feed 
some tape through the tape guide slot to position it 
for printing.
1. Press   to turn on the product.
2. Press


 .

 .


 .


+


 .

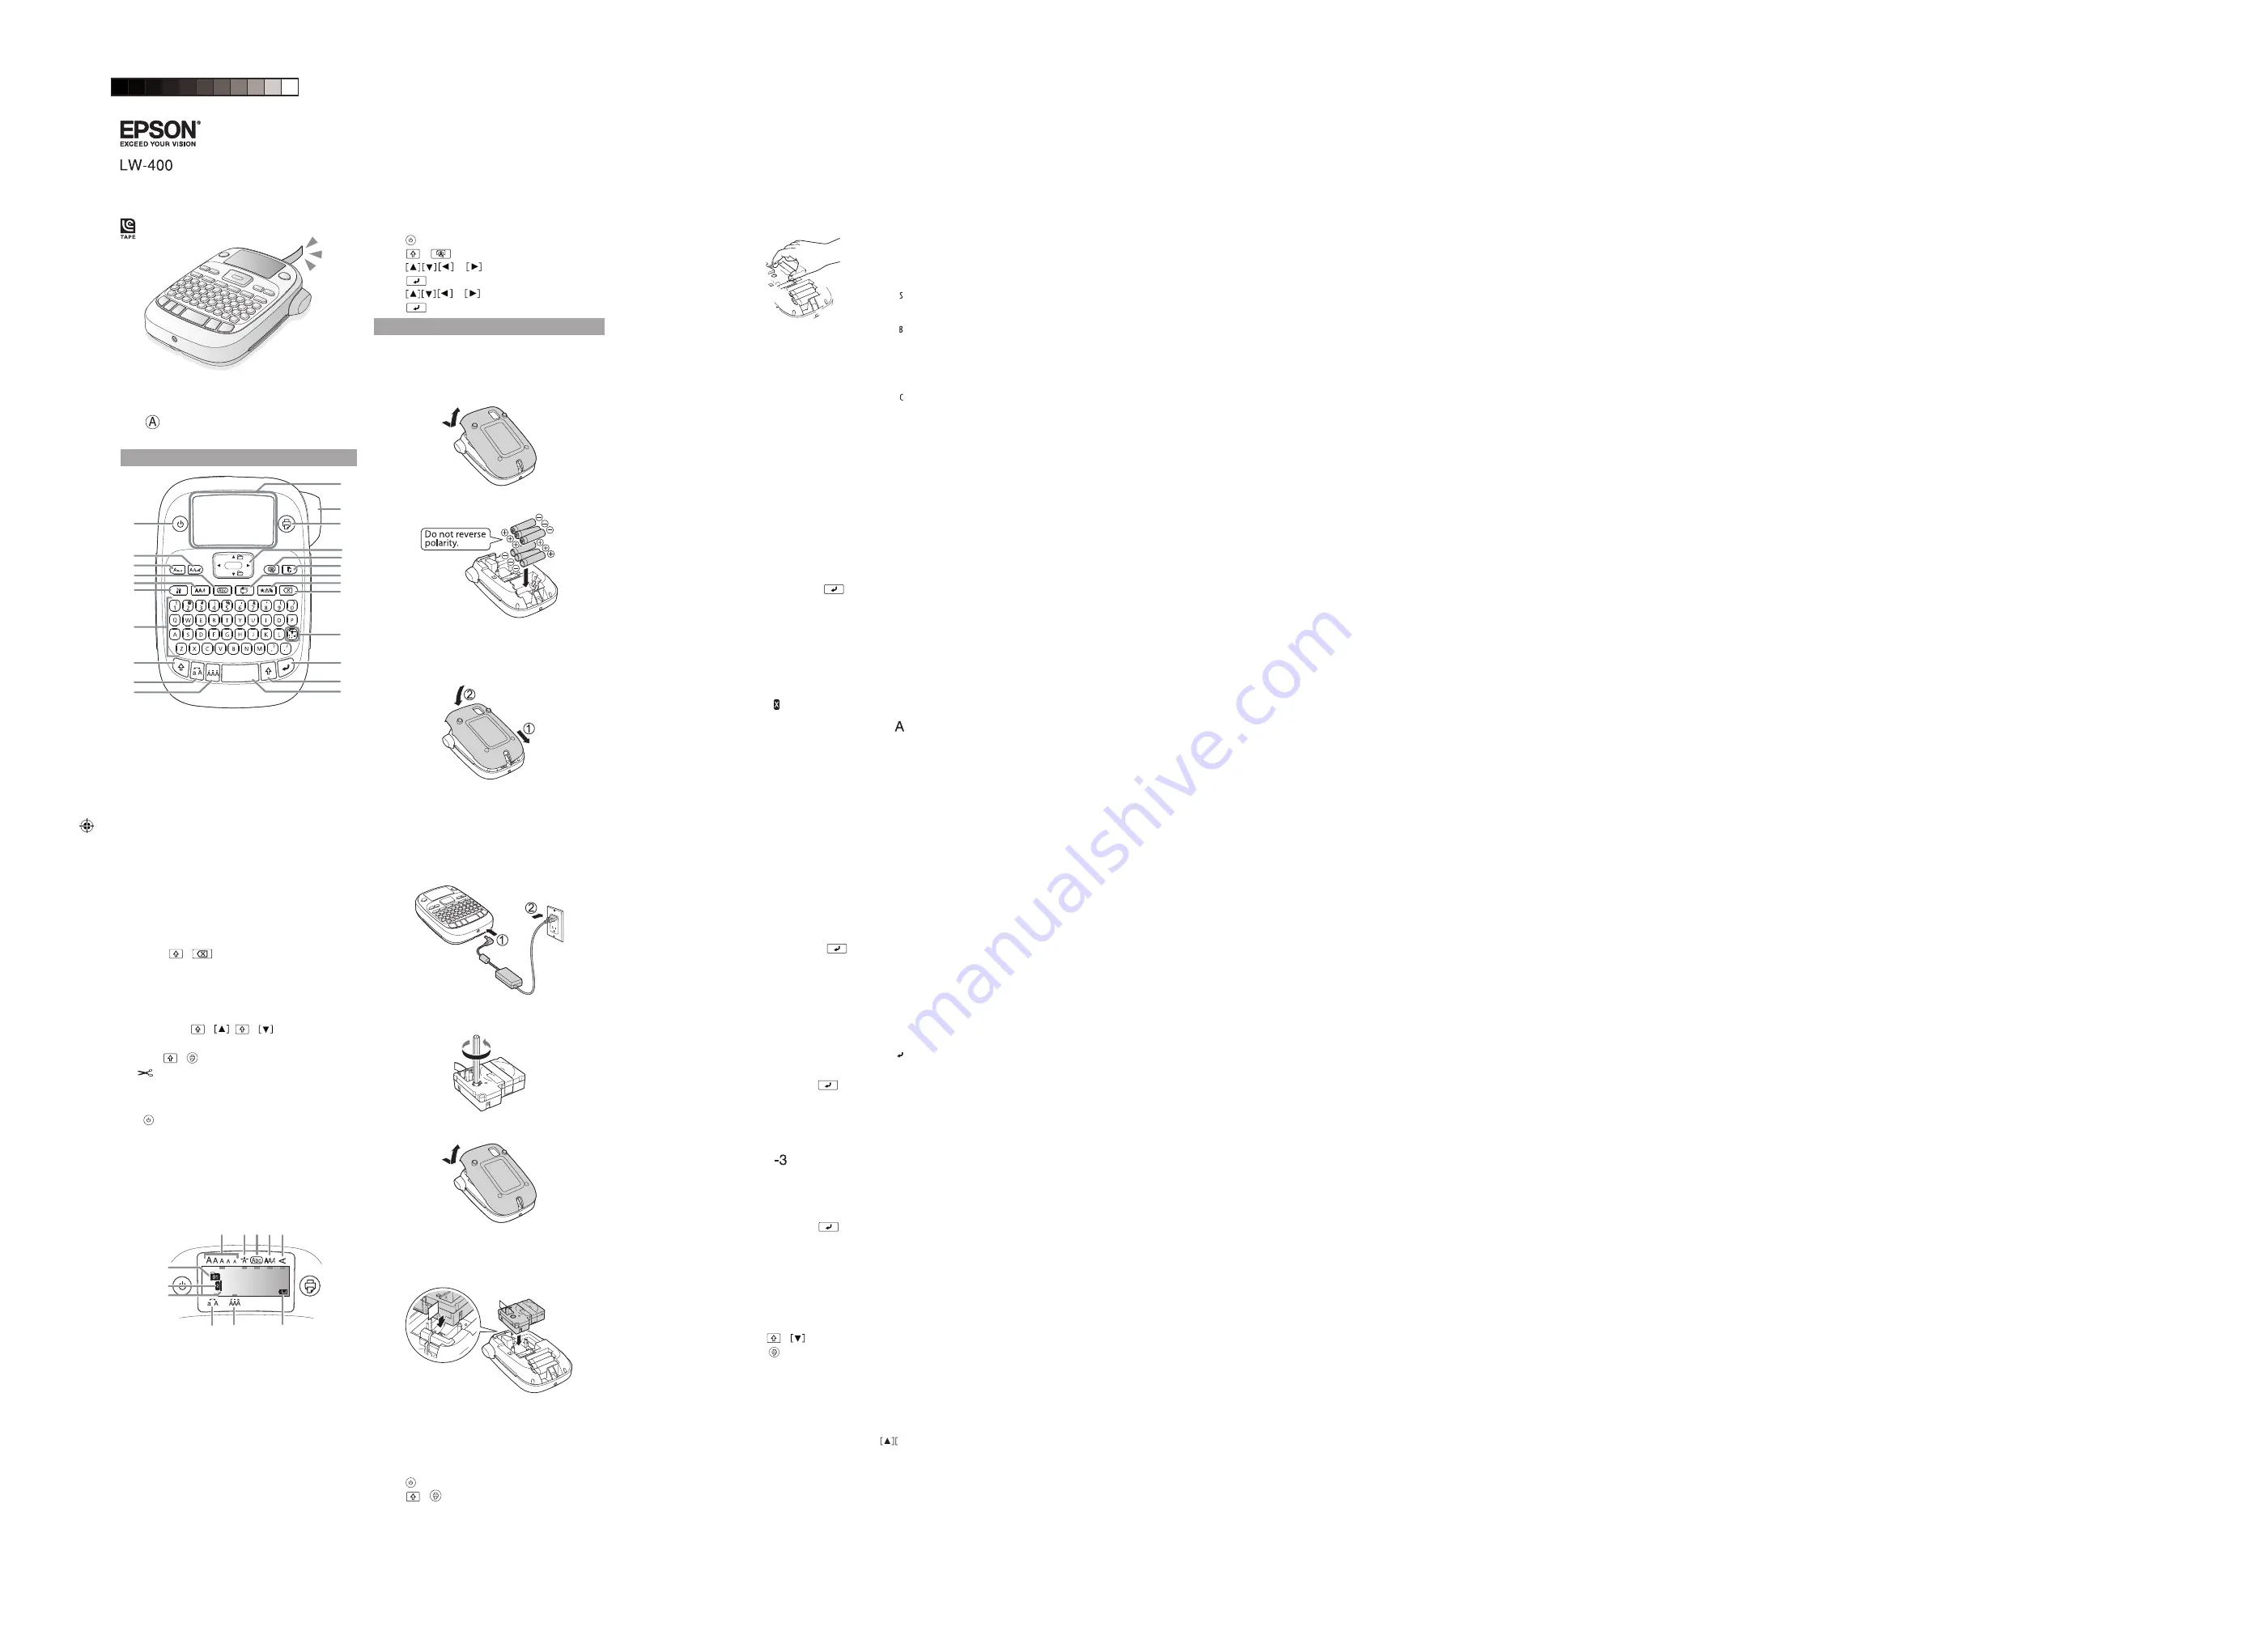
Button names and functions

1

2

3

4

5

6

7

8

9

11

12

13

14

15

16

17

18

19

20

21

22

23

10

1.  Power
2.  Font
3.  Font size
4.  Frame
5.  Font style
6.  Settings
7.  Character keys
8.  Shift key 
9.  Caps lock
10.  Accent
11.  Space
12.  Shift key
13.  Select/Enter 
14.  Punctuation
15.  Delete (

 + 

 deletes all text)

16.  Symbols
17.  Special formats
18.  Print copies
19.   Preview
20.  Cursor keys ( 

 +


,


 goes to  


previous or next label)

21.  Print ( 

 + 

 feeds the tape)

22. 

 Cut button

23.  Display

Turning the power off

 Press   to turn off the power. If using an AC adapter,  
disconnect it from the wall outlet and the product. 
If batteries are inserted, remove them only if the product 
will not be used for a long period of time.

Display indicators

Indicators on the display show whether or not settings 
are enabled.

1

2 3 4 5

6

7

8

9

10

11

1.  Font size
2.  Font width
3.  Frame
4.  Font style
5.  Vertical text
6.  Battery level
7.  Accent mark options
8.  Upper/lower case
9.  Cursor (blinks to indicate current position)
10.  Line number (appears when multiple lines exist)


Note:

 You can print up to four lines of text.

11.   Label number (you can save up to 50 labels)

3.  


Read these instructions before using your product.

User’s Guide

*41209250*

*412092500*

Summary of Contents for Epson LW-400

Page 1: ... feed the end of the tape through the tape guide slot 4 Replace the cover and snap it into place Preparing the tape After inserting a tape cartridge make sure to feed some tape through the tape guide slot to position it for printing 1 Press to turn on the product 2 Press Button names and functions 1 2 3 4 5 6 7 8 9 11 12 13 14 15 16 17 18 19 20 21 22 23 10 1 Power 2 Font 3 Font size 4 Frame 5 Font...

Page 2: ... your text then press or to move to the next label the label number appears to the left of the text To print a label press or to select the label you want to print then press Useful functions Below are some common functions that will help you customize your labels Changing the font size 1 Press 2 Press or to select a line layout then press Note You can select a maximum of four lines of text Equal ...

Page 3: ...per 2 Place the label on the desired surface and press it down firmly Cleaning Exterior Use a dry soft cloth or for stubborn stains a moist cloth that has been wrung dry Caution Never use chemicals or solvents such as benzine thinner or alcohol or use a chemical duster This could damage your product Cleaning the print head If the print becomes faint or distorted the print head may need cleaning Re...

Page 4: ...inches 110 mm Depth 6 70 inches 170 mm Height 2 20 inches 56 mm Weight approximate 14 oz 400 g excluding batteries tape cartridge Operating temperature 50 to 95 ºF 10 to 35 ºC Storage temperature 14 to 131 ºF 10 to 55 ºC Power supply optional AC adapter Model APT0615Z1 1 Manufacturer Seiko Epson Corp Input AC100 240 V 0 3 A 50 60 Hz Output DC6 5 V 1 5 A Total output power 10 W Power supply batteri...

Page 5: ...place le couvercle et enclenchez le Préparation du ruban Après avoir inséré la cartouche de ruban veillez à alimenter une partie du ruban à travers la fente de guide de ruban pour le positionner pour l impression 1 Appuyez sur pour mettre sous tension l appareil 2 Appuyez sur Appuyez sur Appuyez sur Appuyez sur Appuyez sur Appuyez sur Appuyez sur Appuyez sur Appuyez sur Appuyez sur Appuyez sur app...

Page 6: ...ez ajouter un numéro de série puis appuyez sur 2 Entrez un numéro pour la première étiquette puis appuyez sur Le numéro augmente de un lorsque vous imprimez des copies multiples Enregistrement des étiquettes Vous pouvez créer et enregistrer jusqu à 50 étiquettes à la fois Pour créer des étiquettes multiples tapez votre texte puis appuyez sur ou pour passer à la prochaine étiquette le numéro d étiq...

Page 7: ... fois l impression terminée appuyez sur le bouton Couper Avertissement Appuyez sur le bouton Couper seulement quand le ruban est à l arrêt sinon vous risquez d endommager la cartouche de ruban Impression de copies multiples 1 Appuyez sur 2 Au prochain écran appuyez sur les touches numérotées ou les boutons ou pour saisir le nombre de copies 2 9 3 Appuyez sur Pendant l impression des étiquettes la ...

Page 8: ...lle cartouche de ruban Remplacez les piles par de nouvelles ou utilisez l adaptateur CA optionnel APT0615Z1 1 Des étiquettes enregistrées sont manquantes Il se peut que vous ayez supprimé accidentellement le texte en appuyant sur Si le produit est réinitialisé tout le texte saisi antérieurement sera supprimé Si l adaptateur CA est débranché ou si les piles sont retirées en cours de fonctionnement ...

Reviews: