


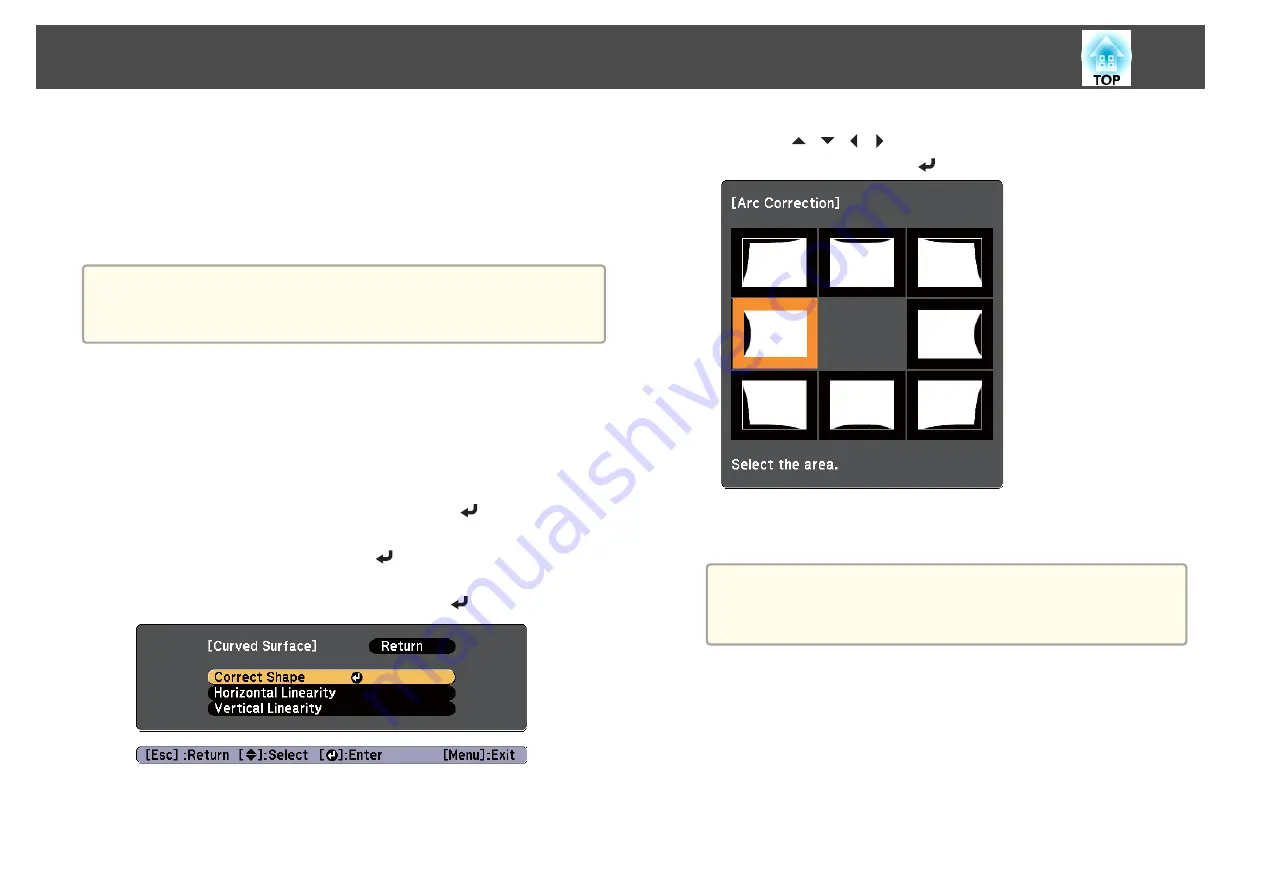
Curved Surface
Manually correct distortion that occurs when projecting on a curved
surface, and adjust the amount of expansion and contraction.
Project from the front with the horizontal lens shift in the center.
s
"Adjusting the Position of the Projected Image (Lens shift)"
a
•
Project onto an arc surface with the same radius.
•
If a large amount of adjustment is performed, the focus may not be
uniform even after making adjustments.
Correction method
a
Press the [Menu] button while projecting.
b
Select
Geometric Correction
from
Settings
.
c
Select
Curved Surface
, and then press the [
] button.
When the message "If this setting is changed, the image may be
distorted." is displayed, press the [
] button.
d
Select
Correct Shape
, and then press the [
] button.
e
Press the [
][
][
][
] buttons to select the area you want to
adjust, and then press the [
] button.
When selecting a corner, you can adjust the two sides next to the
corner.
a
If the [Esc] button is pressed for approximately two seconds,
the confirm default reset screen is displayed.
Select
Yes
to reset the result of Curved Surface.
Adjusting Projected Images
63
Summary of Contents for EB-Z10000U
Page 1: ...User s Guide ...
Page 13: ...Introduction This chapter explains the names for each part ...
Page 24: ...Remote control operating range Part Names and Functions 24 ...
Page 57: ...Basic Usage This chapter explains how to project and adjust images ...
Page 113: ...Configuration Menu This chapter explains how to use the Configuration menu and its functions ...
Page 185: ...Appendix ...
Page 233: ...Z Zoom 19 37 Index 233 ...


