


You can project an even, rectangular image by placing the projector directly
in front of the center of the screen and keeping it level. If you place the
projector at an angle to the screen, or tilt it up or down, or off to the side,
you may need to correct the image shape.
Related Links
•
"Using Basic Projector Features"
•
•
"Automatically Correcting the Image Shape with Screen Fit"
•
"Correcting the Image Shape with the Keystone Buttons"
•
"Correcting the Image Shape with Quick Corner"
Auto H/V-Keystone
When the projector is moved or tilted, Auto H/V-Keystone automatically
corrects any vertical and horizontal keystone distortion.
When the projector is moved, it displays an adjustment screen and then
automatically corrects the projected image.
Auto H/V-Keystone can correct the projected image distortion in these
conditions:
•
Projection distance is about 1.5 to 3.0 m (EB-1985WU/EB-1980WU)
•
Projection distance is about 0.9 to 3.0 m (EB-1975W/EB-1970W)
•
Projection angle is about 20º right or left, or 30º up or down
•
The
Projection
setting is set to
Front
in the projector's
Extended
menu
a
If you do not want to use the Auto H/V-Keystone function, set
Auto
H/V-Keystone
to
Off
in the projector's
Settings
menu.
s
Settings
>
Keystone
>
H/V-Keystone
>
Auto H/V-Keystone
Related Links
•
•
•
"Projector Setup Settings - Extended Menu"
•
"Projector Feature Settings - Settings Menu"
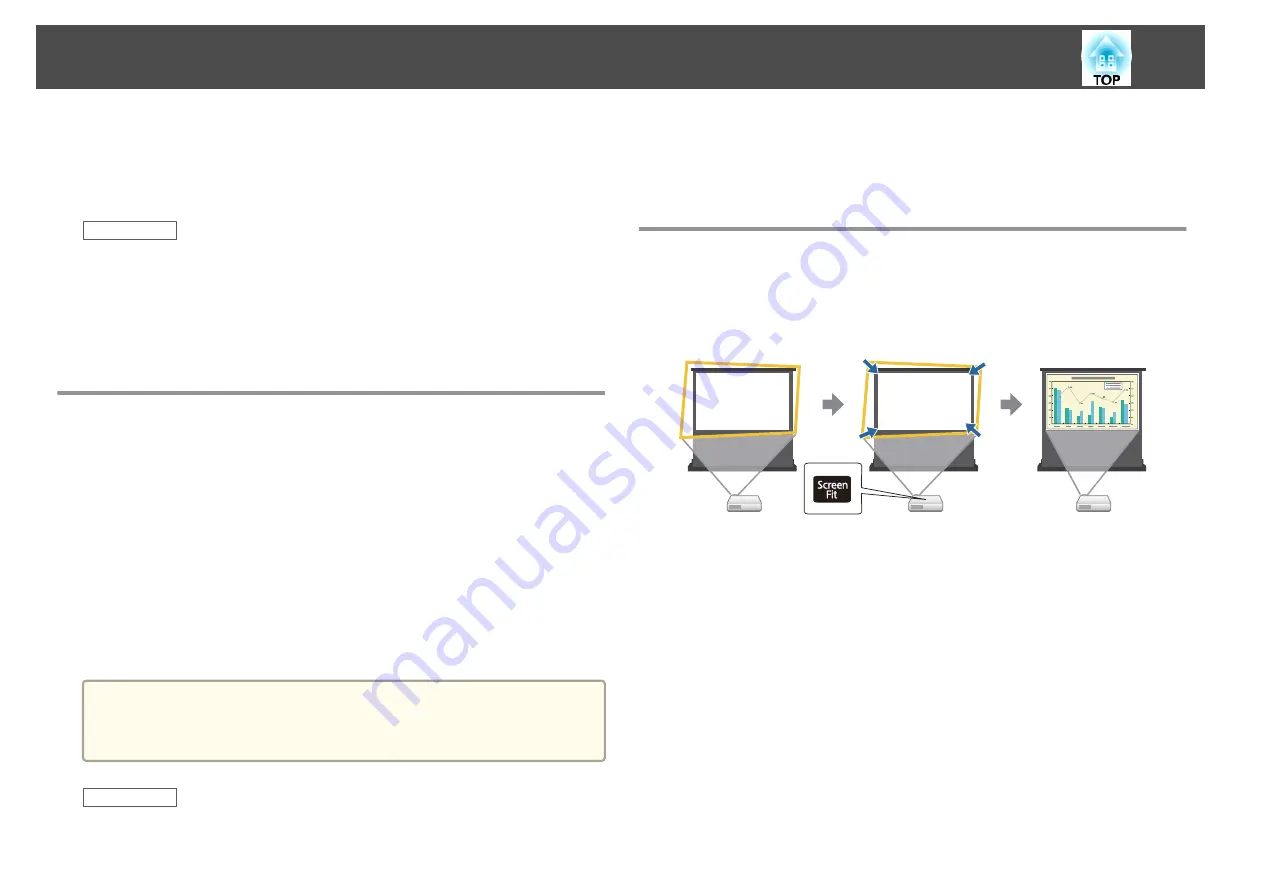
Automatically Correcting the Image Shape with
Screen Fit
You can use the projector's Screen Fit feature to automatically correct the
shape and position of images to fit on your screen.
The projector's sensor can detect the screen size and shape in these
conditions:
•
Projector is not suspended from the ceiling
•
Screen size is 100 inches or less
•
Projection distance is about 1.5 to 3.0 m (EB-1985WU/EB-1980WU)
•
Projection distance is about 1.2 to 3.0 m (EB-1975W/EB-1970W)
•
Projection angle is about 20º right or left, or 30º up or down
•
The room is not too dark
•
The projection surface is not patterned and does not deflect the sensor
in some way
a
Turn on the projector and display an image.
b
Press the [Screen Fit] button on the control panel or remote
control.
Image Shape
44
Summary of Contents for EB-1970W
Page 1: ...User s Guide ...
Page 6: ...Trademarks 199 Copyright Notice 199 Copyright Attribution 200 Contents 6 ...
Page 49: ...Related Links Image Shape p 44 Projector Feature Settings Settings Menu p 137 Image Shape 49 ...
Page 52: ...Related Links Using Basic Projector Features p 34 Focusing the Image Using the Focus Ring 52 ...
Page 63: ...Related Links Color Mode p 61 Color Mode 63 ...
Page 109: ... Network Menu Security Menu p 145 Wireless Network Projection 109 ...
Page 172: ... Replacing the Lamp p 162 Projector Light Status 172 ...


