background image

Installing for the First Time

31

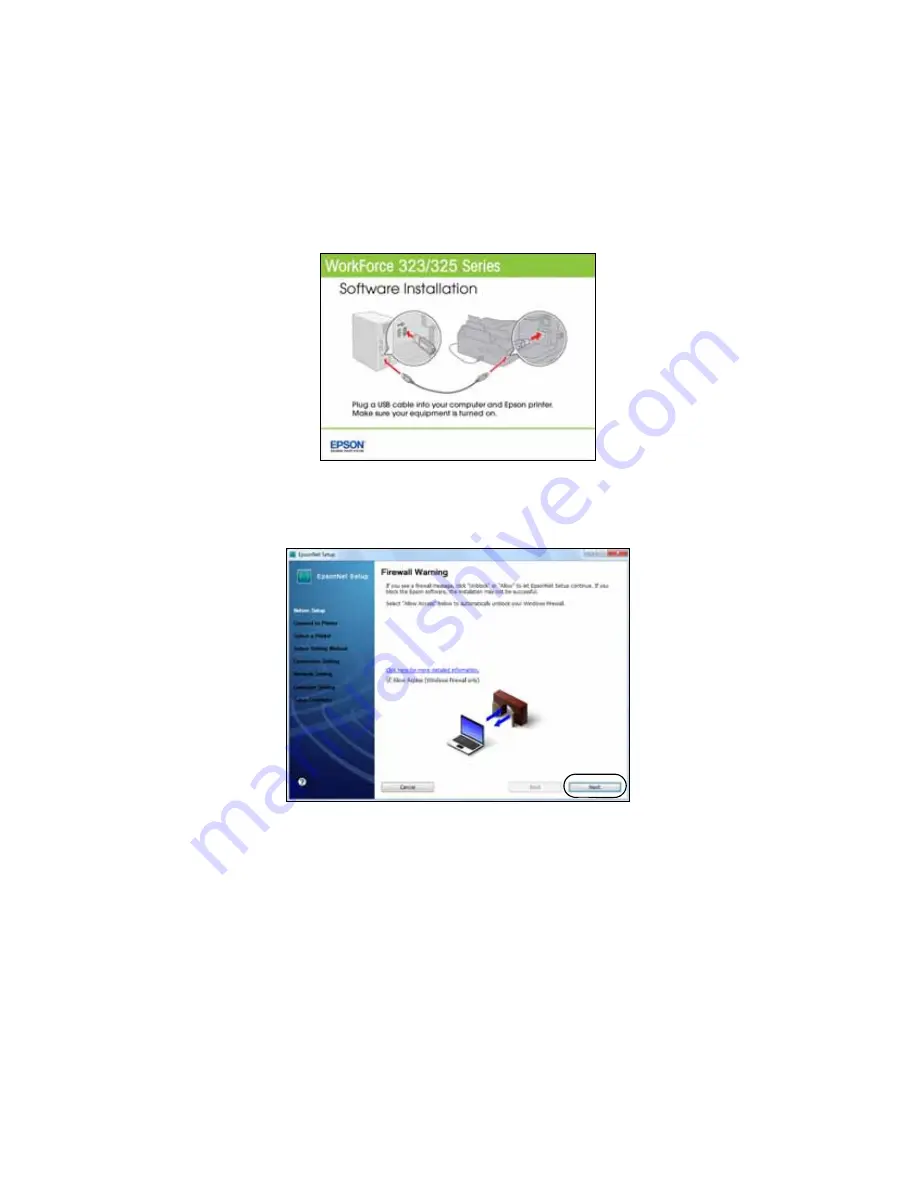
2. When you see this screen, connect the product to your computer with a USB 

cable.

3. Follow the on-screen instructions to continue installing the software.

4. When you see the Firewall Warning screen, click 

Next

.

Note: 

If you see a firewall alert message, click 

Unblock

 or 

Allow

 to let EpsonNet Setup 

continue. Do not select 

Ask Me Later

Keep Blocking

, or 

Block

.

Summary of Contents for C11CA79201

Page 1: ...WorkForce 320 323 325 Series Quick Guide Basic Printing Copying Scanning and Faxing Maintaining Your Product Network Setup WorkForce 323 325 only Solving Problems ...

Page 2: ...in Windows 11 Printing With a Macintosh 12 Selecting the Correct Paper Type 14 Faxing a Document 15 Connecting a Phone or Answering Machine 15 Setting Up Fax Features 16 Sending a Fax From the Control Panel 18 Receiving Faxes 19 Scanning a Document or Photo 20 Scanning With Epson Scan Software 20 Scanning With Mac OS X 10 6 21 Maintaining Your Product 22 Checking the Print Head Nozzles 22 Cleaning...

Page 3: ...dges 25 Wireless Network Setup 27 Installing for the First Time 28 Setting Up Additional Computers 37 Solving Problems 41 Checking for Software Updates 41 Error Indicators 41 Problems and Solutions 42 Where to Get Help 46 Notices 47 ...

Page 4: ...tput tray extensions and flip up the paper stopper Note If you are using legal size paper do not raise the paper stopper 2 Squeeze the edge guide as you slide it all the way to the left If the feeder guard is in the way flip it forward 3 Load paper against the right edge and behind the tab with the glossy or printable side face up Load letterhead or pre printed paper top edge first Feeder guard Ed...

Page 5: ...rray of high quality papers making it easy to maximize the impact of your documents photos presentations and other projects You can purchase genuine Epson ink and paper at Epson Supplies CentralSM at www epson com ink3 U S sales or www epson ca Canadian sales You can also purchase supplies from an Epson authorized reseller To find the nearest one call 800 GO EPSON 800 463 7766 Paper name Size Part...

Page 6: ... mm S041331 20 Epson Premium Photo Paper Glossy Borderless 4 6 inches 102 152 mm S041808 S041727 40 100 Borderless 5 7 inches 127 178 mm S041464 20 Borderless 8 10 inches 203 254 mm S041465 20 Letter 8 5 11 inches 216 279 mm S042183 S041667 25 50 Epson Photo Paper Glossy Borderless 4 6 inches 102 152 mm S041809 S042038 50 100 Letter 8 5 11 inches 216 279 mm S041141 S041649 S041271 20 50 100 Epson ...

Page 7: ...ss You can place a photo or a document up to letter size or A4 size on the scanner glass 1 Open the document cover 2 Place your original face down on the scanner glass with the top against the back left corner 3 Close the cover gently to keep your original in place Using the Automatic Document Feeder You can place up to 30 letter or A4 size sheets or 10 legal size sheets in the Automatic Document ...

Page 8: ...cument Feeder 2 Slide the edge guide outward 3 Fan the originals then tap them on a flat surface to even the edges 4 Insert the originals face up top edge first 5 Slide the edge guide against the originals but not too tightly ...

Page 9: ...e onto letter or A4 size plain paper You can copy a photo onto 4 6 inch 5 7 inch letter size or A4 size Epson photo paper various types available for instant photo reprints 1 Load paper in the sheet feeder see page 4 2 Place your original document or photo on the scanner glass or load your documents in the Automatic Document Feeder see page 7 Note When you use the Copy function with originals load...

Page 10: ...u cannot print borderless on plain paper 6 To change paper type paper size or any other print settings press u or d to select the setting then press OK Press u or d to select an option then press OK Note Not all Paper Type Paper Size Layout and Quality settings may be available depending on the options you choose See the online User s Guide for details 7 After you finish selecting settings press x...

Page 11: ...ogram and select the print option 2 Select your product then click the Preferences or Properties button 3 On the Main tab select basic print settings Make sure you choose the correct paper Type setting for your paper see page 14 Tip For more information about print settings click Help 4 To resize your printout or print double sided click the Page Layout tab Select the type of document you re print...

Page 12: ...nting With a Macintosh Follow the steps below to print from Mac OS X 10 5 to 10 6 Note If you re printing from Mac OS X 10 4 see your online User s Guide for instructions 1 Open a photo or document in a printing program open the File menu and select Print 2 Select your product as the Printer setting 3 Click the arrow to expand the Print window if necessary Cancel printing Click to expand Select yo...

Page 13: ...ion before printing or check for it at the bottom of this window 5 Choose Print Settings from the pop up menu and select these print settings 6 Choose any other printing options you may need from the pop up menu See the online User s Guide for details Copy and page settings Application settings Choose Print Settings Select your Media Type see page 14 Select higher quality or faster printing if ava...

Page 14: ...etting Plain paper Epson Bright White Paper Epson Presentation Paper Matte Epson Iron on Cool Peel Transfer paper Epson Photo Quality Self adhesive Sheets Plain Paper Bright White Paper Epson Ultra Premium Photo Paper Glossy Ultra Premium Photo Paper Glossy Epson Premium Photo Paper Glossy Premium Photo Paper Glossy Epson Photo Paper Glossy Photo Paper Glossy Epson Premium Photo Paper Semi gloss P...

Page 15: ...te listed on page 46 Connecting a Phone or Answering Machine 1 Connect the phone cable from the wall jack to the LINE port on the back of the product Note If you re connecting the product to a DSL phone line you must plug a DSL filter into the wall jack or you won t be able to use the fax or telephone equipment Contact your DSL provider for the necessary filter 2 To use a telephone or answering ma...

Page 16: ...y see the online User s Guide Entering Fax Header Information You should enter your name and phone number in the fax header before sending faxes so that recipients can identify the origin of the fax Note If you leave the product unplugged for a long period of time the date and time settings may get lost See the Start Here sheet or online User s Guide for instructions on resetting them Entering You...

Page 17: ...space or delete a character l or r Move the cursor to the left or right Auto Answer Inserts a space and moves the cursor right Speed Dial Group Dial Deletes a character and moves the cursor left To enter characters press a keypad button repeatedly to switch between uppercase lowercase or numbers Press 1 to enter special characters Selecting the Number of Rings to Answer If you connected an answeri...

Page 18: ...ly sent in black and white even if you select color If you are scanning with the Automatic Document Feeder your document is automatically scanned and faxed If you placed your document on the scanner glass you see this screen after the first page is scanned If you need to fax additional pages place your original on the scanner glass or in the Automatic Document Feeder Then press 1 to continue If yo...

Page 19: ...e fax size is reduced to fit or printed on multiple pages depending on the Auto Reduction setting you select See your online User s Guide for instructions To receive faxes automatically make sure the Auto Answer light is turned on To turn it on press the Auto Answer button then press OK Note To change the number of rings before the product answers see page 17 If you run out of paper during printin...

Page 20: ...ur original face down on the glass in the back left corner as shown on page 7 2 Close the cover gently so you don t move the original 3 Do one of the following to start Epson Scan Windows Double click the EPSON Scan icon on your desktop Macintosh 10 4 and 10 5 Double click EPSON Scan in the Epson Software folder in the Applications folder To scan from an application start your application Then ope...

Page 21: ... your computer 1 Open an image editing application such as Preview and select Import From Scanner from the File menu then select your product 2 If you would like to select scan settings such as Color Restoration and file save settings click Show Details 3 Click the Scan button to begin scanning Your image is saved to the folder selected in the Scan To pop up menu Note For details on scanning click...

Page 22: ...em some of the nozzles in the print head may be clogged or ink may be running low in one or more of the ink cartridges Follow the steps below to check the print head nozzles 1 Load a few sheets of plain paper in the sheet feeder 2 Press x Menu 3 Press u or d to select Maintenance then press OK 4 Press u or d to select Nozzle Check then press the x Color button 5 Check the nozzle check pattern that...

Page 23: ...heck and confirm that the print head is clean Note If you don t see any improvement after cleaning the print head four times turn off your product and wait at least six hours to let any dried ink soften Then try cleaning the print head again If quality does not improve one of the ink cartridges may need to be replaced If that doesn t help contact Epson as described on page 46 If you do not use you...

Page 24: ...structions in your online User s Guide Purchasing Epson Ink Cartridges You can purchase genuine Epson ink and paper at Epson Supplies Central at www epson com ink3 U S sales or www epson ca Canadian sales You can also purchase supplies from an Epson authorized reseller To find the nearest one call 800 GO EPSON 800 463 7766 Use the following list when you order or purchase new ink cartridges Note W...

Page 25: ...t open ink cartridge packages until you are ready to install the ink Cartridges are vacuum packed to maintain reliability Leave the expended cartridge installed until you have obtained a replacement or the ink remaining in the print head nozzles may dry out 1 Turn on the product 2 If an ink cartridge is low or expended you see a message on the LCD screen indicating which color to replace Press OK ...

Page 26: ...down until it clicks into place 8 Once you replace all the cartridges that need replacing close the cartridge cover and push it down until it clicks into place 9 Close the scanner 10 Press OK to begin charging the ink This takes about 2 1 2 minutes When you see a completion message on the LCD screen ink charging is finished Caution Never turn off the product while ink is charging or you ll waste i...

Page 27: ...ll print to your product Temporary use of a USB cable not included is recommended for the first installation only After the printer is connected to the network you will be prompted to remove the USB cable If you are using Mac OS X 10 6 or don t have a USB cable you need to use the buttons on the printer to select wireless settings Note If you have trouble setting up your product see Network Proble...

Page 28: ... ABC or lowercase abc letters be sure to note them correctly If you don t know your network name SSID or network password contact the person who set up your wireless network 1 Make sure your product is turned on 2 Insert the product software CD 3 Windows 7 and Windows Vista If you see the AutoPlay window click Run Setup exe When you see the User Account Control screen click Yes or Continue Windows...

Page 29: ...connection and click Next 6 When you see this screen select Set up printer for the first time then click Next 7 Mac OS X 10 6 At the next screen click Next Then skip to Setting Up With the Product Buttons on page 33 to set up the product without using a temporary USB connection ...

Page 30: ... At the next screen click Next 10 Do one of the following If you selected Temporarily connect USB cable continue with Setting Up With a Temporary USB Cable below If you selected Select settings using printer buttons continue with Setting Up With the Product Buttons on page 33 Setting Up With a Temporary USB Cable Do not connect the USB cable to your product until instructed to do so in the on scre...

Page 31: ...puter with a USB cable 3 Follow the on screen instructions to continue installing the software 4 When you see the Firewall Warning screen click Next Note If you see a firewall alert message click Unblock or Allow to let EpsonNet Setup continue Do not select Ask Me Later Keep Blocking or Block ...

Page 32: ... If your network name isn t in the list select Enter Manually If your network name contains uppercase ABC or lowercase abc letters enter them correctly 6 If you see a screen like the following enter your security key or passphrase then click Next Note If your security key contains uppercase ABC or lowercase abc letters enter them correctly ...

Page 33: ...structions to install the rest of your software When installation is complete remove the CD and restart your computer To set up additional computers to print to the product see Setting Up Additional Computers on page 37 Setting Up With the Product Buttons If you are using Mac OS X 10 6 or you did not connect a USB cable to set up the product on your wireless network follow these steps to set it up...

Page 34: ... previous screen press OK to select Setup Wizard then repeat step 2 If you still can t find the network name in the list your router or access point is not broadcasting its network name Press u or d to select Other SSIDs then press OK Continue with the steps in Entering Your SSID Manually on page 36 3 When you see this screen do one of the following If your wireless network has security enabled us...

Page 35: ...e been entered incorrectly If your password has uppercase or lowercase letters or numbers be sure to enter them correctly Note If the product still doesn t connect to your wireless network see The product cannot find or connect to the wireless router or access point on page 42 5 Mac OS X 10 6 Skip to step 10 on page 36 6 Wait while the software is installed 7 When you see the Firewall Warning scre...

Page 36: ...ally If your network doesn t broadcast its name SSID follow these steps to enter it 1 From the Select SSID screen on the product control panel press u or d to select Other SSIDs then press OK 2 Use the numeric keypad on the control panel to enter your network name Important Network names are case sensitive Be sure to enter uppercase letters ABC or lowercase letters abc correctly Press the buttons ...

Page 37: ...puters 1 Make sure your product is turned on 2 Insert the product software CD 3 Windows 7 and Windows Vista If you see the AutoPlay window click Run Setup exe When you see the User Account Control screen click Yes or Continue Windows XP When you see the Software Installation screen continue with step 4 Mac OS X Double click the Epson icon 4 When you see this screen click Install ...

Page 38: ...n you see this screen select Wireless connection and click Next 6 When you see this screen select The printer is already on my wireless network then click Next 7 Wait while the software is installed 8 Mac OS X 10 6 Skip to step 13 on page 40 ...

Page 39: ...u see a firewall alert message click Unblock or Allow to let EpsonNet Setup continue Do not select Ask Me Later Keep Blocking or Block 10 If you see a screen like this one select the product you would like to set up then click Next 11 Wait while EpsonNet Setup configures your product for the network ...

Page 40: ...onal Computers 12 When you see the Installation Complete screen print a test page then click Finish 13 Follow the instructions on the screen to install the rest of your software When installation is complete remove the CD ...

Page 41: ... tab in the printer settings window You can also click Start or select Programs or All Programs select EPSON select your product and click Driver Update Error Indicators Follow the instructions on the LCD screen to solve most common problems If you see one of the error messages below follow the steps here to proceed LCD screen messages Problem and solution Printer error Scanner error A fax error h...

Page 42: ...r wireless router or access point doesn t broadcast its network name SSID see page 36 for instructions on manually entering your wireless network name If your wireless router or access point has wireless security enabled you will also need to know what kind of security it is using If the product doesn t connect to your wireless network the WEP key or WPA passphrase may have been entered incorrectl...

Page 43: ...t Avoid placing the product next to a microwave oven 2 4 GHz cordless phone or large metal objects such as a filing cabinet Cannot find the scanner or start Epson Scan Epson Scan is not available in Mac OS X 10 6 see page 21 for scanning instructions If network communication was interrupted while starting Epson Scan exit Epson Scan and restart it after a few seconds If Epson Scan cannot restart tu...

Page 44: ...e to continue printing temporarily with black ink see the online User s Guide for more information If the black cartridge is expended you must replace it to continue printing Paper Feeding Problems If paper doesn t feed correctly remove the paper and fan the sheets then reload them as shown on page 4 Do not load too many sheets at once If paper has jammed follow these steps 1 Gently pull out jamme...

Page 45: ... off the V 34 and ECM settings If the product is connected to a DSL phone line you must have a DSL filter connected to the phone jack Contact your DSL provider for the filter If you connected a telephone or answering machine make sure it is connected to the EXT port Print Quality Problems For the best print quality use Epson papers see page 5 and genuine Epson ink cartridges see page 25 If you not...

Page 46: ...purchase such as a store receipt and date of purchase Computer configuration and description of the problem Then call U S 562 276 4382 6 AM 6 PM Pacific Time Monday through Friday Canada 905 709 3839 6 AM 6 PM Pacific Time Monday through Friday Days and hours of support are subject to change without notice Toll or long distance charges may apply Purchase Supplies and Accessories You can purchase g...

Page 47: ... wall switch or timer Do not let the power cord become damaged or frayed If you use an extension cord with the product make sure the total ampere rating of the devices plugged into the extension cord does not exceed the cord s ampere rating Also make sure the total ampere rating of all devices plugged into the wall outlet does not exceed the wall outlet s ampere rating Place the product on a flat ...

Page 48: ...ly a dry soft cloth to clean the LCD screen Do not use liquid or chemical cleansers If the LCD screen is damaged contact Epson If the liquid crystal solution gets on your hands wash them thoroughly with soap and water If the liquid crystal solution gets into your eyes flush them immediately with water If discomfort or vision problems remain after a thorough flushing see a doctor immediately Ink Ca...

Page 49: ...er telecommunication line cord Declaration of Conformity According to 47CFR Part 2 and 15 for Class B Personal Computers and Peripherals and or CPU Boards and Power Supplies used with Class B Personal Computers We Epson America Inc Located at MS 3 13 3840 Kilroy Airport Way Long Beach CA 90806 Telephone 562 290 5254 Declare under sole responsibility that the product identified herein complies with...

Page 50: ...WF323 325 The digits represented by 00 are the REN without a decimal point e g 00 is a REN of 0 0 For earlier products the REN is separately shown on the label This equipment may not be used on coin service provided by the telephone company Connection to party lines is subject to state tariffs Should this equipment cause harm to the telephone network the telephone company may discontinue your serv...

Page 51: ... are very destructive to customer terminal equipment connected to AC power sources and that this is a major nationwide problem If your home has specially wired alarm equipment connected to the telephone line ensure the installation of this equipment Model C364A or C364B does not disable your alarm equipment If you have questions about what will disable alarm equipment consult your telephone compan...

Page 52: ...rface téléphonique La terminaison d une interface peut consister en une combinaison quelconque de dispositifs à la seule condition que la somme d indices d équivalence de la sonnerie de tous les dispositifs n excède pas 5 This Class B digital apparatus complies with Canadian ICES 003 Cet appareil numérique de la classe B est conforme à la norme NMB 003 du Canada Epson America Inc Limited Warranty ...

Page 53: ...ing of prints or reimbursement of materials or services required for reprinting This warranty does not cover damage to the Epson product caused by parts or supplies not manufactured distributed or certified by Epson This warranty does not cover ribbons ink cartridges or third party parts components or peripheral devices added to the Epson product after its shipment from Epson e g dealer or user ad...

Page 54: ...some jurisdictions do not allow the exclusion or limitation of incidental or consequential damages so the above limitations and exclusions may not apply to you This warranty gives you specific legal rights and you may have other rights which vary from jurisdiction to jurisdiction To find the Epson Authorized Reseller nearest you visit our website at http www epson com To find the Epson Customer Ca...

Page 55: ...gnated as Original Epson Products or Epson Approved Products by Seiko Epson Corporation In addition to software program rights owned by Seiko Epson Corporation this product also includes open source software Refer to OSS pdf on your product software CD ROM for a list of open source software and software license terms applied to this printer Responsible Use of Copyrighted Materials Epson encourages...

Page 56: ...CPD 27943 Printed in XXXXXX ...

Reviews: