200
FOR X=1 TO 9
210 LPRINT CHR$(F(X));:NEXT X
220 LPRINT CHR$(0)CHR$(0);
230
LPRINT "YOUR CHARACTER IN PICA: < < <"
240 LPRINT "IN DOUBLE-WIDE EMPHASIZED PICA: ";
250 LPRINT CHR$(27)"!*< < <("
260 LPRINT CHR$(27)"!"CHR$(0) "YOUR DATA NUMBERS:"
270 FOR K=1 TO
9:
LPRINT F(K);: NEXT K
300
LPRINT: END
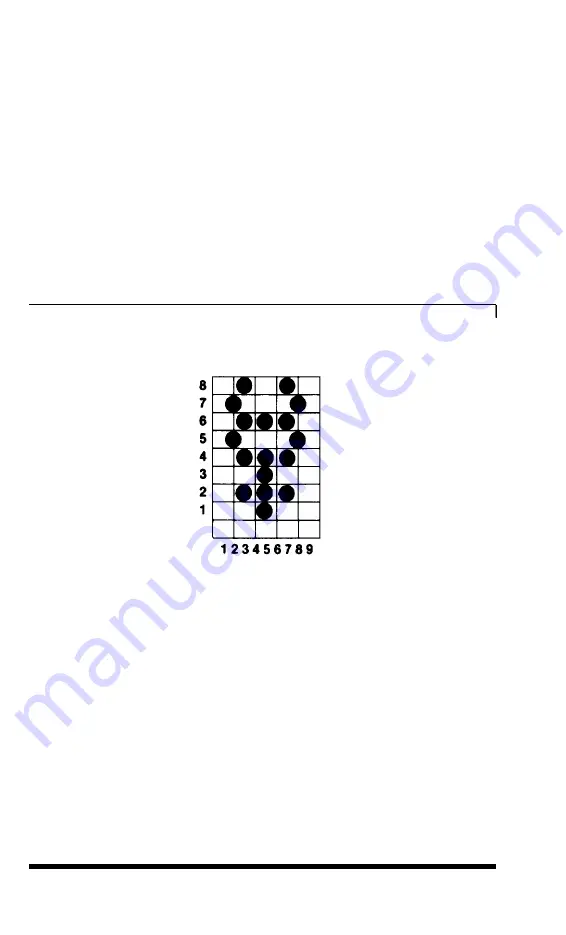
The next few sections explain the steps used to create the symbol for
Mercury. First, Figure 5-3 shows the grid used to design the character.
Figure 5-3.
Design for
character
Running the program
Now run the program. For each of the nine columns, the program
asks for the numbers of the rows in which you want dots to appear.
Enter the row numbers one at a time, pressing the
Enter
key after
each one. When you have entered all the numbers for a column or
when you want no dots in a column, press
Enter
without a number.
Remember that the vertical lines in the grid are the even-numbered
columns.
5-4
User-defined Characters


