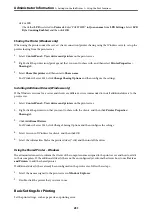
Starting on Windows
❏
Windows 10/Windows Server 2019/Windows Server 2016
Click the start button, and then select
EpsonNet
>
EpsonNet Config
.
❏
Windows 8.1/Windows 8/Windows Server 2012 R2/Windows Server 2012
Enter the application name in the search charm, and then select the displayed icon.
❏
Windows 7/Windows Vista/Windows XP/Windows Server 2008 R2/Windows Server 2008/Windows Server
2003 R2/Windows Server 2003
Click the start button, and select
All Programs
or
Programs
>
EpsonNet
>
EpsonNet Config SE
>
EpsonNet
Config
.
Starting on Mac OS
Go
>
Applications
>
Epson Software
>
EpsonNet
>
EpsonNet Config SE
>
EpsonNet Config
.
Related Information
&
“Installing the Applications Separately” on page 96
Software for Managing Devices on the Network (Epson Device
Admin)
Epson Device Admin is a multifunctional application software that manages the device on the network.
The following functions are available.
❏
Monitor or manage up to 2,000 printers over the segment
❏
Make a detailed report, such as for the consumable or product status
❏
Update the firmware of the product
❏
Introduce the device to the network
❏
Apply the unified settings to multiple devices.
You can download Epson Device Admin from Epson support website. For more information, see the
documentation or help of Epson Device Admin.
Connecting the Printer to the Network
You can connect the printer to the network in several ways.
❏
Connect by using advanced settings on the control panel.
❏
Connect by using the installer on the website or on the software disc.
This section explains the procedure to connect the printer to the network using the printer's control panel.
Before Making Network Connection
To connect to the network, check the connection method and setting information for connection in advance.
>
Connecting the Printer to the Network
>
Before Making Network Connection
223

