EPSON Stylus PHOTO 2100/2200
Revision B
DISASSEMBLY AND ASSEMBLY
Disassembly
171
4.2.14 Removing the DE Unit and ASF/Pump Motor
1.
Remove the PE Sensor Unit. (Refer to Steps 1 to 5 in 4.2.12.7.)
2.
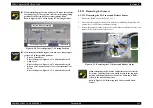
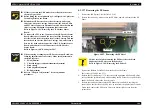
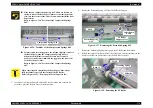
Using tweezers, remove the Extension Spring 0.618 that engages the DE Lock
Lever and DE Unit.
Figure 4-114. Removing the Extension Spring 0.618
"
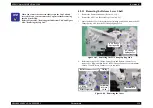
When reinstalling the PF Motor, face the label of the PF Motor
frontward as seen from the printer front.
Refer to Figure 4-112, "Installing the PF Motor".
Figure 4-112. Installing the PF Motor
"
When changing the PF Motor, make sure that the Ferrite Core is
fitted to the Cable securely.
Refer to Figure 4-113, "Checking the Ferrite Core".
Figure 4-113. Checking the Ferrite Core
Label
Bottom front right side
Ferrite Core
Bottom front right side
Extension Spring 0.618
DE Unit
Summary of Contents for 2200 - Stylus Photo Color Inkjet Printer
Page 1: ...EPSONStylusPHOTO2100 2200 Color Inkjet Printer SEIJ01 016 SERVICE MANUAL ...
Page 8: ...C H A P T E R 1 PRODUCTIONDESCRIPTION ...
Page 39: ...C H A P T E R 2 OPERATINGPRINCIPLES ...
Page 69: ...C H A P T E R 3 TROUBLESHOOTING ...
Page 115: ...C H A P T E R 4 DISASSEMBLYANDASSEMBLY ...
Page 187: ...C H A P T E R 5 ADJUSTMENT ...
Page 214: ...C H A P T E R 6 MAINTENANCE ...
Page 226: ...C H A P T E R 7 APPENDIX ...
Page 254: ......
Page 255: ......
Page 256: ......
Page 257: ......
Page 258: ......


