3
GB
Kräuterschale
Glass tube
Nut
Fig. 4
In some cases, it might be necessary to re-
tighten nuts afterwards.
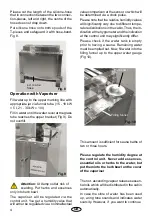
The upper clamp (Fig 5) is used as upper
water gauge (with manual fi lling), the lower
clamp marks the minimal water level (except
for fi xed water connection).
Max water level
Min water level
Fig. 5
Bi-O-Star 21 - 30 kW with 2 Vapo-
risers at 2 kW
In the case that 2 vaporisers are being
operated at the same time, it is necessary
to note that both vaporisers are laterally shif-
ted, in order to guarantee that no vaporiser
bag runs dry.
Thus, the installation will be carried out on
the left side with a T-piece 1/2“, in this case
the square plug shows forwards whereas
the hose clip shows to the middle of the
oven. See Fig 6
Fig. 6
T-piece
Hose connec-
tion part
vaporiser power 4 kW
Mount the second T-piece on the right side.
Then, mount drain plug below at the T-piece.
The hose clip shows to the middle of the
oven. See Fig 7
Fig. 7
T-piece
Drain plug
Hose connec-
tion part


