


Fitting the Housing Cover
2-2
Mounting the Enterasys Wireless Outdoor APs
To remove the housing cover:
1.
Remove
the
sealing
caps
from
the
housing
cover
(Position
A
in
2.
Loosen
the
screws
in
the
cover
(Position
B
in
).
3.
Remove
the
housing
cover
with
the
captive
screws
(Position
C
in
).
Fitting the Housing Cover
Fitting
the
housing
cover
is
carried
out
in
the
reverse
order
of
the
sequential
steps
of
removing
the
housing
cover.
The
tightening
torque
for
the
cover
screws
is
1.8
Nm.
Attaching Cables
Attaching Cables Prior to Mounting
Before
you
screw
the
Enterasys
Wireless
Outdoor
AP
to
a
wall
or
to
the
optional
mounting
plate,
you
must
connect
the
power
supply
cables,
Ethernet
cable,
or
external
antenna
cables
to
the
Enterasys
Wireless
Outdoor
AP.
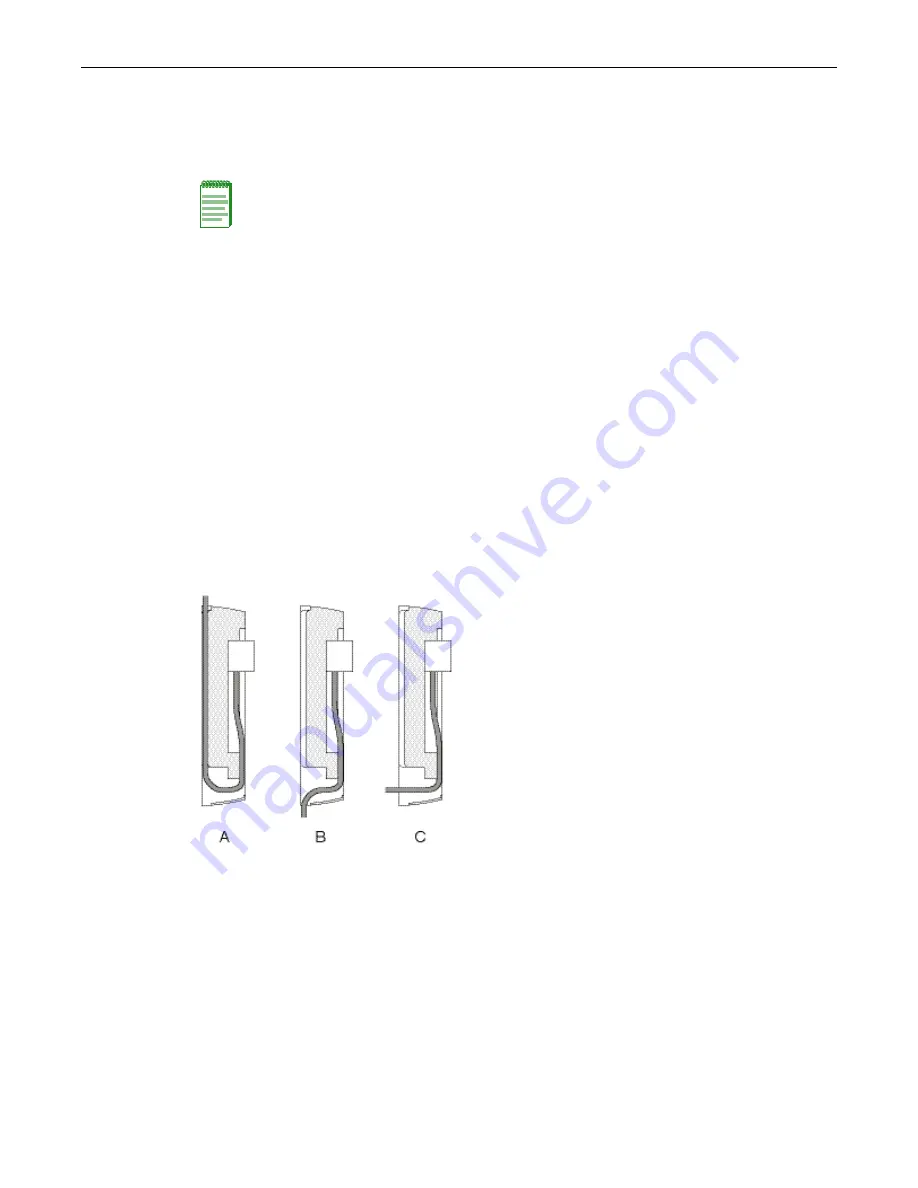
Figure 2-2
Side View of Outdoor AP with Cables Entering from Different Directions
The
available
options
are
as
follows:
•
The
cables
are
inserted
from
above
(Position
A
in
The
housing
of
the
Enterasys
Wireless
Outdoor
AP
has
an
opening
at
the
top
for
this
purpose.
•
The
cables
are
inserted
from
below
(Position
B
in
).
There
is
an
opening
at
the
bottom
for
this
purpose.
•
Cables
inserted
through
a
wall
behind
the
Enterasys
Wireless
Outdoor
AP
(Position
C
in
You
will
need
to
mount
the
Enterasys
Wireless
Outdoor
AP
so
that
the
opening
in
the
wall
is
located
above
the
lower
edge
of
the
device.
Note:
These screws remain in the cover after they have been loosened (this design element
prevents them from being lost). Never attempt to remove these screws from the housing cover
using force, otherwise the housing cover will be damaged.
Summary of Contents for AP2650
Page 1: ...P N 9034543 01 Enterasys Wireless Outdoor Access Points Installation Guide AP2650 AP2660 ...
Page 2: ......
Page 10: ...viii ...
Page 14: ...Safety Information xii About This Guide ...
Page 46: ...Optional Third party External Antennas 4 6 Technical Specifications ...
Page 54: ...Index 2 ...
Page 56: ...7 2 ...
Page 58: ...1 2 ...