background image


Copyright   2011 Enphase Energy 

141-00014 Rev 01


36


Device Scan Control 

The Controlled device scan differs from other Envoy device scans in that it allows 
control over scan period, scanning method, and number of devices. When first 
installed, the Envoy initiates a seven-day scan. This initial seven-day scan is the 
only scan needed for most systems.  
 

NOTE

: At sites with more than 100 microinverters, we recommend specifying 

the total number of devices to be discovered in order to speed up the 
discovery process. See the following procedure for details. 

 
A controlled scan should only be run as needed to detect new or previously 
undetected microinverters. You may want to use this feature in instances where you 
need to run a controlled device scan for a large site or for a site with 
communications issues.  


To run a controlled scan: 


1.


From the Admin menu, choose 

Device Scan Control


2.


Enter a 

Scan Duration

 in days:hours:minutes (e.g., 0:00:60 to indicate zero 

days, zero hours, and 60 minutes). The scan duration will depend on many 
factors, such as number of devices to be detected and quality of power line 
communication. You may want to start with a one-hour scan and increase the 
duration as needed. 


3.


Although optional, it is 

best practice

 to enter a value for 

Total Devices

. Enter 

a value in this field. The Envoy will stop scanning once it has detected the given 
number of devices.  


NOTE

: The Total Devices option can be used in conjunction with the Priority 

Duration option to help discover any last few microinverters at a large site. 


4.


Enter a 

Priority Duration

 (optional) in days:hours:minutes (e.g., 0:00:20 to 

indicate zero days, zero hours, and 20 minutes). If you enter a value in this field, 
the Envoy will make scanning its sole activity for the period specified.  

Summary of Contents for Envoy Communications Gateway

Page 1: ...Installation and Operations Manual Envoy Communications Gateway Manuel d installation et d utilisation Passerelle de communication Envoy Manuale di installazione e uso Gateway di comunicazione Envoy ...

Page 2: ...to www enphase com licenses Product information is subject to change without notice All trademarks are recognized as the property of their respective owners Copyright 2011 Enphase Energy All rights reserved Autres informations Pour des informations relatives aux licences tierces référez vous à www enphase com licenses Les informations sur le produit peuvent être modifiées sans préavis Toutes les m...

Page 3: ...tributor for maintenance Tampering with or opening the Envoy will void the warranty Before installing or using the Envoy please read all instructions and cautionary markings in the technical description and on the Enphase Envoy Informations importantes concernant la sécurité À lire préalablement à l installation ou l utilisation Suivez les instructions fournies dans ce manuel Elles sont essentiell...

Page 4: ...to di Envoy i seguenti simboli di sicurezza appaiono nel presente documento per indicare condizioni di pericolo e istruzioni di sicurezza importanti AVVISO Indica una situazione in cui la mancata osservanza delle istruzioni può costituire un pericolo per la sicurezza o determinare il malfunzionamento delle apparecchiature Usare la massima cautela e seguire attentamente le istruzioni NOTA Indica in...

Page 5: ...Installation and Operations Manual Envoy Communications Gateway ...

Page 6: ...84 TOLL FREE 877 797 4743 Fax 707 763 0784 http www enphase com info enphaseenergy com Other Information For third party license information refer to www enphase com licenses Product information is subject to change without notice All trademarks are recognized as the property of their respective owners Copyright 2011 Enphase Energy All rights reserved ...

Page 7: ...figure the Grid Profile 12 11 Build the Virtual Array 15 Envoy Operation 16 Initial Screen Displays 16 First Scan for Microinverters 17 Normal Operation 17 The Envoy LCD Menu 19 Performing a Communication Check 20 Viewing the Grid Configuration 22 Initiating a Scan for New Microinverters 23 Enabling a Connection to Enphase 24 Disabling a Connection to Enphase 24 Selecting a New Locale 24 How the E...

Page 8: ...to follow instructions may be a safety hazard or cause equipment malfunction Use extreme caution and follow instructions carefully NOTE This indicates information particularly important for optimal system operation Follow instructions closely Safety Instructions Perform all electrical installations in accordance with all local electrical codes Do not attempt to repair the Envoy it contains no user...

Page 9: ...ents of an Enphase system are the Enphase Microinverter the Enphase Envoy Communications Gateway the Enphase Enlighten web based monitoring and analysis This integrated system maximizes energy harvest increases system reliability and simplifies design installation and management The following diagram shows the Envoy in the system Other Elements in the Enphase System The Enphase Microinverter is a ...

Page 10: ...d and completes its initial scan it maintains an internal database of all known Enphase Microinverters at the site it manages The Envoy is used to configure the microinverters with the appropriate grid profile The microinverters must be configured with the appropriate grid profile as part of the commissioning process or they will not produce power At regular intervals the Envoy polls each microinv...

Page 11: ...to use Enlighten web based monitoring and analysis additional requirements include Always on broadband Internet connection Broadband router with spare Ethernet port Up to date web browser to view Enlighten Supported browsers are Internet Explorer 8 or higher Firefox 3 6 or higher Chrome 5 or higher and Safari 4 or higher Enlighten requires Adobe Flash Player 10 or higher Check the Envoy shipping b...

Page 12: ...own in the diagram b Attach the serial number label to the microinverter installation map This applies to new installations only and is not necessary for an Envoy replacement 2 Register the Envoy Register the Envoy at the beginning of the PV installation a Visit http enphase com products enlighten b If not already done register the site owner information in the online form c Register the Envoy ser...

Page 13: ...g components of a power strip may still interfere with communications if they are close to the Envoy 5 Connect Ethernet Cabling a Plug the Ethernet cable into the Ethernet port on the Envoy b Plug the other end of the cable into a spare port on the broadband router The Envoy needs to obtain a DHCP Dynamic Host Configuration Protocol IP address and have a path to the Internet The Envoy will request...

Page 14: ...will request that you set the Language a The Envoy LCD panel will scroll through the available language settings When you see the setting you need press the Menu button and hold for two seconds 8 Check the Envoy s Progress After installing your Envoy it will automatically perform a Communication Check as described on page 20 a Watch the LCD display for progress noting the number of bars shown in t...

Page 15: ...and it is has begun to detect devices you may want to mount the Envoy on a wall To do this a Select a cool dry indoor location for the Envoy b Use two drywall screws or wall anchors not included in kit to affix the Envoy to the wall mounted at the dimensions shown You will need two 8 4 166 mm or 0 164 inch diameter maximum screw head diameter is 8 9mm 0 35 inches A 8 screw is recommended c Slide t...

Page 16: ...s Gateway is installed and has detected all of the microinverters at the site In addition the grid profile must be configured and the Envoy must have propagated these settings to the microinverters a Open the Internet browser application on a computer that is connected to the same local network as the Envoy b In the browser address window enter the IP address displayed in the LCD screen of the Env...

Page 17: ...Configuration screen appears This screen allows a licensed solar professional to select and apply the appropriate Grid Profile for the site g Select a Country regulatory specification h Select a Grid profile Click here to select Device Grid Configuration Click here to select a Country regulatory specification Click here to select a Grid Profile Click Apply Grid Profile ...

Page 18: ...ears This screen allows you to generate a report to confirm that the microinverters have been set with the updated grid profile j Click View Device Profile Report The Grid Profile Report screen appears k Enter the site information in the window provided Enter site information here Click here to View Grid Profile Report ...

Page 19: ... you created Once the virtual array is built Enlighten displays a graphic representation of the PV system It also shows detailed current and historical performance information Please go to www enphase com for more information on the Enphase Enlighten web based monitoring and analysis software a Scan the paper installation map and upload it to the Activation form online b Log in to Enlighten and us...

Page 20: ... The Envoy normally displays Web for 2 to 3 minutes after the first start up It then sends the first report to Enlighten If Enlighten responds the Envoy displays Web Power production will show as 0W and 0kWh until the microinverters are discovered the grid profile is applied and power production begins e Enphase Energy Booting Starting R3 0 0 2011 06 06 16 21 20 x x x x Web 2407W 783kWh 25 Comm Ch...

Page 21: ...its unique serial number If a microinverter is ever added or replaced at your site you must initiate a new scan so that the Envoy can discover the new microinverter The steps for initiating a new device scan are described on page 22 of this manual After the Envoy has detected at least one new device it will automatically enter Priority Scan mode The LCD screen will display NOTE No power production...

Page 22: ...is address continues to display Web connection indication Web The web status indicates whether the Envoy is connected to Enlighten Indication of the present power production in watts n W where n is a number Indication of the life time kilowatt hours reported to this Envoy n kWh where n is a number Indication of the number of online microinverters producing power and reporting in to the Envoy n whe...

Page 23: ...ight side of the Envoy to access the Envoy LCD menu Press and hold this button after two seconds you will see the Envoy menu screens Continue holding the Menu button Menu items will appear in the following order Disable Communication Check Enable Communication Check Disable New Device Scan Enable New Device Scan Exit Menu Menu Button ...

Page 24: ...r through the administration page when connected to the Envoy local interface with a computer or via Enlighten See Using Enlighten to Check Envoy Status on page 26 NOTE If a Priority Scan is active the Communication Check will not occur until the Priority Scan has expired If you need to run a Communication Check you can unplug the Envoy and then plug it in again or wait until priority scanning has...

Page 25: ...s are displayed and all devices are accounted for A number of 1 2 may not be effective for consistent communication 3 If fewer than three bars are displayed refer to Power Line Communication Troubleshooting on page 27 Remaining minutes and seconds in Comm Check are displayed mm ss in the example The Devices counter displays the number of microinverters detected and will increase until all microinv...

Page 26: ...n is displayed This indicates that the microinverters are not yet configured with a grid profile and cannot produce power until they are set Configure these settings as described on page 12 You can press the menu button exit this process If a grid profile has been applied the following screens are displayed You can press the menu button at any time to exit this process Number of microinverters det...

Page 27: ...New Device Scan release the Menu button The LCD screen then reads The Envoy begins a 30 minute scan if a longer scan is not already in progress to identify all of the microinverters deployed at the site 3 Use your previously issued username and password to check for the new microinverter in Enlighten If you do not have a link to Enlighten go to www enphase com and click Enlighten Login From here y...

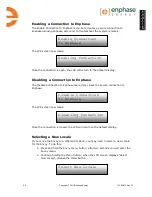
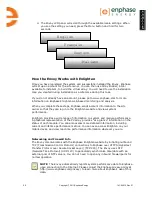
Page 28: ...o Enphase menu item closes the secure connection to Enphase The LCD screen now reads Once the connection is closed the LCD will return to the default display Selecting a New Locale If you move the Envoy to a different location you may need to select a new Locale for the Envoy To do this 1 Press and hold the Envoy Menu button after two seconds you will enter the Envoy menu 2 Continue holding the Me...

Page 29: ...en provides a wide range of information on system and module performance A graphical representation of the PV array provides at a glance information on the status of each module You can also access more detailed information including current and lifetime performance metrics You can even access Enlighten on your mobile device and view real time performance information wherever you are Networking an...

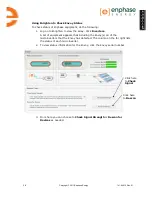
Page 30: ... Click Inverters A list of equipment appears that including the Envoy s all of the microinverters that the Envoy has detected The column on the far right lists the status of each microinverter 2 To view status information for the Envoy click the Envoy serial number 3 From here you can choose to Check Signal Strength or Rescan for Devices as needed Click here to Check Signal Click here to Rescan ...

Page 31: ...e Envoy is having difficulty communicating over the power lines It could also be a result of low light levels and the PV module voltage being too low for the microinverter to power up Make sure that the Envoy is plugged directly into the wall and not into a power strip or surge protector Relocate your Envoy as close to the load center as possible This ensures that the Envoy receives the strongest ...

Page 32: ...ce Provider or refer to your router documentation for assistance Check that you are using a network router and not a switch or a hub Many hubs and switches cannot provide a DHCP lease and may not allow the Envoy to connect to the web Use the Envoy menu button to Get New IP Address See page 19 for more information Unplug all units in the chain applying power again in this order Modem Router and Env...

Page 33: ... Envoy 2 Connect the other end of the Ethernet cable to the Ethernet port of the computer 3 Open the Internet browser application on the computer 4 In the browser address window enter the IP address displayed in the LCD screen of the Envoy NOTE If you fail to make a connection at this point you can manually configure your subnet to 169 254 120 2 and subnet mask to 255 255 0 0 If this does not corr...

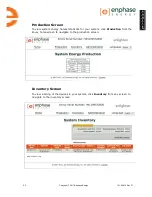
Page 34: ...Screen To view system energy harvest statistics for your system click Production from the Envoy home screen to navigate to the production screen Inventory Screen To view a listing of the devices in your system click Inventory from any screen to navigate to the inventory screen ...

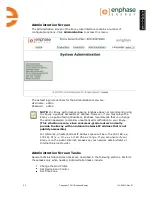
Page 35: ...ds that you change the admin password to disallow unauthorized modification to your Envoy This situation is rare since consumer grade routers normally provide the Envoy with an internal network IP address that is not publicly accessible For reference private internal IP address space will be in the 192 168 x x 172 16 31 x x 10 x x x or 169 254 x x range If you are unsure if your Envoy is on the pu...

Page 36: ...lect Device Grid Configuration The Grid Configuration screen appears This screen allows a licensed solar professional to select and change the appropriate Grid Profile for the site Click here to select Device Grid Configuration Click here to select a Country regulatory specification Click here to select a Grid Profile Make note of these numbers Click the link to Enlighten ...

Page 37: ...te the Grid Profile Change Token widget If you don t see this widget add it now Click Add a widget Select Grid Profile Change Token g Enter the Envoy serial number h Enter the authorization number from the Envoy Interface i Click Get Token j Copy the token k Paste or enter the token in the Grid Profile screen l Click Apply Grid Profile The Apply Profile screen appears This screen allows you to gen...

Page 38: ...gy 141 00014 Rev 01 e n g l i s h 34 m Click View Device Profile Report The Grid Profile Report screen appears n Enter the site information in the window provided Click here to View Grid Profile Report Enter site information here ...

Page 39: ...35 o Use your browser to send this report to your printer or to save it to a file After printing or saving the file you can send it to the local regulatory agency to confirm the grid profile and trip point settings The report will look like the following example ...

Page 40: ... site with communications issues To run a controlled scan 1 From the Admin menu choose Device Scan Control 2 Enter a Scan Duration in days hours minutes e g 0 00 60 to indicate zero days zero hours and 60 minutes The scan duration will depend on many factors such as number of devices to be detected and quality of power line communication You may want to start with a one hour scan and increase the ...

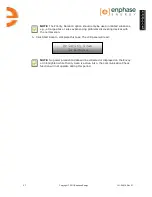
Page 41: ...es or sites experiencing problems discovering devices with the normal scan 5 Click Start Scan to complete this task The LCD panel will read NOTE No power production data will be collected or displayed on the Envoy or in Enlighten while Priority Scan is active Also the Communication Check function will not operate during this period Priority Scan Is Active ...

Page 42: ...n Internet connection to the Envoy you may want to set the local time zone on your Envoy To set the Envoy time zone 1 From the Admin menu choose Date Time Time Zone 2 Under Time Zone Setting select a time zone from the Select Time Zone drop down menu 3 Click Update timezone setting to complete this task ...

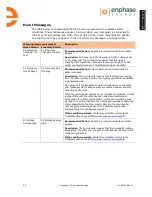
Page 43: ... frequency coming from the utility is either too low or too high as specified by applicable regional standards AC frequency is the frequency at which voltage varies on the utility grid Frequency Out of Range events are usually transient and self correcting by the utility When the microinverter detects an out of frequency condition it must remain offline until the utility has been within acceptable...

Page 44: ...ay take a few minutes No action is required xx grid profile name yy Regional specification name Bad Flash Image Bad Flash Image Description The microinverter is not producing power due to a software problem For assistance contact Enphase Energy customer support Commanded Reset Commanded Reset Recommended Action No action is required it will automatically resume normal operation momentarily Descrip...

Page 45: ...mpatible and the condition persists contact your installer or refer to the Troubleshooting Guide at http www enphase com support DC Voltage Too Low DC Voltage Too Low Recommended action This is usually a normal condition during hours of low light and at dawn and dusk Description The microinverter reports that DC input voltage from the PV module is too low If this condition does not clear during ho...

Page 46: ... power to your area Verify that the circuit breaker s for the PV array are ON at the load center If all breaker s are on the condition should clear itself Description The microinverter detects no power coming from the local Utility Enphase microinverters are utility interactive and require a connection to the utility If the condition persists If Grid Gone events persist contact your installer or r...

Page 47: ...receptacle with the Envoy remove those devices to improve communication signal strength If the Enphase Envoy was recently relocated or if new devices or appliances were added to the circuit it is possible that the new situation is not suitable for power line communication The Envoy may need to be relocated to improve signal strength and reduce interfering noise on the power lines To determine the ...

Page 48: ...ut intervention No action is required unless the condition persists If it persists contact Enphase Energy customer support Power generation off by command Power generation off by command Description The microinverter is not producing power by user command This uncommon condition will occur only during isolated troubleshooting procedures by Enphase personnel No action is required Power On Reset Pow...

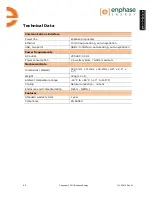
Page 49: ...ace auto sensing auto negotiation Power Requirements AC outlet 230 VAC 50 Hz Power consumption 2 5 watts typical 7 watts maximum Mechanical Data Dimensions WxHxD 222 5 mm x 112mm x 43 2mm 8 8 x 4 4 x 1 7 Weight 340g 12 oz Ambient temperature range 40 C to 65 C 40 to 149 F Cooling Natural convection no fans Enclosure environmental rating Indoor NEMA 1 Features Standard warranty term 1 year Complian...

Page 50: ...Copyright 2011 Enphase Energy 141 00014 Rev 01 e n g l i s h 46 ...

Page 51: ...Copyright 2011 Enphase Energy 141 00014 Rev 01 e n g l i s h 47 ...

Page 52: ...ergy com Contact Enphase Energy SAS Route de Thil ZI Ouest 01700 Saint Maurice de Beynost France Tél 33 0 4 37 98 29 56 Fax 33 0 4 37 98 38 15 Adresse électronique sas enphaseenergy com http www enphase com Informazioni di contatto Enphase Energy Srl Via Volta 98 20832 Desio MB Italia 33 0 4 37 98 29 56 33 0 4 37 98 38 15 e mail informazioni enphaseenergy com http www enphase com ...

Page 53: ...Manuel d installation et d utilisation Passerelle de communication Envoy ...

Page 54: ...x 33 0 4 37 98 38 15 Adresse électronique sas enphaseenergy com http www enphase com Autres informations Pour des informations relatives aux licences tierces référez vous à www enphase com licenses Les informations sur le produit peuvent être modifiées sans préavis Toutes les marques sont la propriété de leurs détenteurs respectifs Copyright 2011 Enphase Energy Tous droits réservés ...

Page 55: ... déconnexion du réseau 12 11 Éditeur de champ PV 15 Fonctionnement d Envoy 16 Affichages de l écran initial 16 Première recherche de micro onduleurs 17 Fonctionnement normal 17 Menu de l écran LCD d Envoy 19 Exécution d un contrôle de communication 20 Affichage de la configuration du réseau public 22 Lancement d une recherche de nouveaux micro onduleurs 23 Activation d une connexion à Enphase 24 D...

Page 56: ...tituer un danger pour la sécurité ou entraîner un dysfonctionnement de l équipement Soyez extrêmement prudent et suivez attentivement les instructions REMARQUE Ce symbole indique une information particulièrement importante pour un fonctionnement optimal du système Suivez soigneusement les instructions Instructions relatives à la sécurité Effectuez toutes les installations électriques conformément ...

Page 57: ...iques Le système Enphase se compose des trois éléments principaux suivants le micro onduleur Enphase la passerelle de communication Enphase Envoy la surveillance et l analyse sur Internet Enphase Enlighten Ce système intégré maximise la production d énergie augmente la fiabilité du système et simplifie la conception l installation et la gestion Le schéma suivant montre l Envoy dans le système Autr...

Page 58: ...nvoy et la fin de la recherche initiale il maintient une base de données interne de tous les micro onduleurs Enphase connus sur le site qu il gère Le système Envoy est utilisé pour configurer les micro onduleurs avec le profil de réseau requis Les micro onduleurs doivent être configurés avec le profil de réseau Cela fait partie intégrante du processus de mise en service faute de quoi ils ne produi...

Page 59: ...les conditions supplémentaires suivantes sont nécessaires Une connexion Internet permanente à haut débit Un routeur à bande large avec port Ethernet libre Un navigateur Internet à jour pour l affichage d Enlighten Navigateurs compatibles Internet Explorer 8 ou supérieur Firefox 3 6 ou supérieur Chrome 5 ou supérieur et Safari 4 ou supérieur Enlighten nécessite Adobe Flash Player 10 ou supérieur Vé...

Page 60: ... numéro de série sur le plan d installation des micro onduleurs Ceci s applique aux nouvelles installations uniquement et n est pas nécessaire pour le remplacement d un Envoy 2 Enregistrer le système Envoy Enregistrez le système Envoy au début de l installation du système photovoltaïque a Rendez vous sur http enphase com products enlighten b Si ce n est pas déjà fait enregistrez les informations c...

Page 61: ...ière substantielle les performances de la communication Si possible ne pas brancher un cordon d alimentation de multiprise dans la même prise que l Envoy La suppression de surtension ou les composants de filtrage d une multiprise peuvent encore interférer avec les communications si elles sont proches de l Envoy 5 Connecter la liaison Ethernet a Branchez le câble Ethernet sur le port Ethernet de l ...

Page 62: ...marrage de l Envoy vous devez choisir la langue que vous souhaitez utiliser a Le panneau LCD Envoy permet de faire défiler les paramètres de langue disponibles Lorsque vous avez repéré le réglage dont vous avez besoin appuyez sur le bouton Menu et maintenez le enfoncé pendant deux secondes 8 Contrôler la progression d Envoy Après son installation votre Envoy effectue automatiquement un contrôle de...

Page 63: ... a commencé à détecter les éléments vous pouvez le monter sur un mur Pour ce faire a Sélectionnez un emplacement frais et sec à l intérieur b Utilisez deux vis à cloisons sèches ou des chevilles non inclus dans le kit pour fixer l Envoy au mur monté selon les dimensions indiquées Vous aurez besoin deux vis n 8 diamètre de 4 166 mm le diamètre maximum de la tête de la vis est 8 9 mm Il est conseill...

Page 64: ...énergie qu après l installation de la passerelle de communication Envoy et une fois que tous les micro onduleurs du site ont été détectés En outre les valeurs de découplage doivent être configurées et le système Envoy doit avoir propagé ces paramètres aux micro onduleurs a Ouvrez le navigateur Internet depuis un ordinateur connecté au même routeur à large bande que l Envoy b Dans la fenêtre d adre...

Page 65: ...nel agréé en système photovoltaïque de sélectionner et d appliquer les points de déclenchement approprié pour l installation solaire g Sélectionnez des Spécifications réglementaires propres au pays h Sélectionnez un profil réseau Cliquez ici pour sélectionner les Spécifications réglementaires propres au pays Cliquez ici pour sélectionner un profil réseau Cliquez sur Appliquer le profil réseau Cliq...

Page 66: ...e générer un rapport pour confirmer que les micro onduleurs ont été définis avec un profil réseau j Cliquez sur Voir le rapport du profil réseau L écran Rapport sur les paramètres réseau s affiche k Entrez les informations sur le site dans la fenêtre prévue à cet effet Entrez les informations relatives au site ici Cliquez ici pour Afficher le rapport sur le profil réseau ...

Page 67: ...ghten affiche une représentation graphique du système PV Il affiche également des informations détaillées sur les performances actuelles et l historique Rendez vous sur www enphase com pour de plus amples informations concernant la surveillance et l analyse sur Internet à l aide d Enphase Enlighten a Numérisez le plan de calepinage papier et téléchargez le dans le formulaire d activation en ligne ...

Page 68: ...tème Envoy affiche WEB pendant 2 à 3 minutes après la première mise sous tension Il envoie ensuite le premier rapport à Enlighten Si Enlighten répond Envoy affiche Web La production d énergie s affiche comme 0 W et 0 kWh jusqu à ce que les micro onduleurs soient détectés les valeurs de déclenchement appliquées et la production d énergie ait commencé e Démarr Enphase Energy Démarrage R3 0 0 2011 06...

Page 69: ... éléments sont décrites à la page 22 de ce manuel L Envoy identifie chaque élément par son numéro de série unique Si un micro onduleur est éventuellement ajouté ou remplacé sur votre site vous devez lancer une nouvelle recherche pour qu Envoy le détecte Les étapes de lancement d une recherche de nouveaux éléments sont décrites à la page 22 de ce manuel Dès que le système Envoy détecte au moins un ...

Page 70: ...254 120 1 indique qu Envoy n a pas encore obtenu une adresse IP dynamique Reportez vous à la section Dépannage à la page 27 si cette adresse continue de s afficher Indication de connexion à Internet Web Ce statut indique si l Envoy est connecté à Enlighten Indication de la production d énergie actuelle n W où n représente un nombre Indication de la production totale en kilowatts heures rapportée à...

Page 71: ...droit de l appareil pour accéder au menu du panneau LCD d Envoy Appuyez sur ce bouton pendant deux secondes pour accéder aux écrans de menu Envoy Maintenez le enfoncé pour faire apparaître les éléments de menu dans l ordre suivant Désactiver contrôle comm Activer contrôle comm Désactiver rech nouv élém Activer rech nouv élém Sortir du menu Bouton Menu ...

Page 72: ...nvoy avec un ordinateur o via Enlighten Voir Utiliser Enlighten pour contrôler l état d Envoy à la page 26 REMARQUE Si une recherche prioritaire est active le contrôle de communication ne s effectue qu à la fin de la recherche Si vous souhaitez exécuter un contrôle de communication vous pouvez effectuer un cycle de mise hors sous tension de l Envoy ou attendre la fin de la recherche prioritaire po...

Page 73: ... les éléments sont pris en compte La présence d une ou deux barres ne peut pas garantir une communication constante 3 Si l affichage comporte moins de trois barres reportez vous à Dépannage de la transmission par courant porteur en ligne la page 27 Les minutes et les secondes restantes dans Contrôle comm s affichent mm ss dans l exemple Le compteur d Éléments affiche le nombre de micro onduleurs d...

Page 74: ...Cela indique que les micro onduleurs ne sont pas encore configurés avec un profil de valeurs de découplage et ne peuvent pas produire d énergie tant qu ils ne le seront pas Configurez ces paramètres tels que décrits à la page 12 Vous pouvez appuyer sur le bouton de menu pour sortir de ce processus Si un profil de valeurs de découplage a été appliqué les écrans suivants s affichent Vous pouvez appu...

Page 75: ... nouv élém L écran LCD affiche ensuite L Envoy lance une recherche de 30 minutes si une recherche plus longue n est pas déjà en cours afin d identifier tous les micro onduleurs déployés sur le site 3 Utilisez votre nom d utilisateur et mot de passe précédemment émis pour vérifier le nouveau micro onduleur sur Enlighten Si vous n avez pas de lien vers Enlighten allez à l adresse www enphase com et ...

Page 76: ...connex à Enphase ferme la connexion sécurisée à Enphase L écran LCD affiche maintenant Une fois que la connexion est interrompue l affichage LCD retourne à l affichage par défaut Sélection de nouveaux paramètres régionaux Si vous déplacez l Envoy vers un autre emplacement vous devrez sélectionner de nouveaux paramètres régionaux pour l Envoy Pour ce faire 1 Appuyez sur le bouton Menu pendant deux ...

Page 77: ...au propriétaire du site afin qu il puisse se connecter au site d Enlighten et voir la performance du système Enlighten fournit une gamme variée d informations sur les performances du système et du module Une représentation graphique du groupement photovoltaïque fournit d un coup d œil des informations sur l état de chaque module Vous pouvez également accéder à des informations plus détaillées y co...

Page 78: ...Envoy Pour contrôler l état de l équipement Enphase procédez comme suit 1 Connectez vous sur Enlighten pour visualiser le système Cliquez sur Onduleurs Une liste d équipements apparaît qui comprend tous les micro onduleurs que l Envoy a détectés y compris le s Envoy s La colonne de droite décrit l état de chaque micro onduleur 2 Pour voir les informations d état concernant l Envoy cliquez sur le n...

Page 79: ...ela peut indiquer que l Envoy n a pas fini la recherche détection sur tout le groupement Il se peut également que l Envoy n arrive pas à communiquer à travers le courant porteur Il peut aussi s agir de faibles niveaux de lumière et d une tension de module trop faible pour que le micro onduleur démarre Assurez vous que l Envoy est branché directement à une prise murale et non à un bloc multiprise o...

Page 80: ... services Internet ou vous reporter à la documentation de votre routeur pour assistance Vérifiez que vous utilisez un routeur de réseau et non pas un commutateur ou un concentrateur Un grand nombre de commutateurs et de concentrateurs ne peuvent pas fournir un bail DHCP et ne permettent pas à l Envoy de se connecter à Internet Utilisez le bouton de menu Envoy pour Obtenir une nouvelle adresse IP V...

Page 81: ... 2 Branchez l autre extrémité du câble Ethernet au port réseau Ethernet de l ordinateur 3 Ouvrez le navigateur Internet sur l ordinateur 4 Dans la fenêtre d adresse du navigateur entrez l adresse IP qui s affiche dans la fenêtre LCD de l Envoy REMARQUE Si vous ne parvenez pas à établir une connexion à ce stade vous pouvez configurer manuellement votre sous réseau sur 169 254 120 2 et le masque de ...

Page 82: ...ques du système de production d énergie de votre système cliquez sur Production à partir de l écran d accueil Envoy pour accéder à l écran de production Écran d inventaire Pour afficher une liste des éléments de votre système cliquez sur Inventaire à partir de n importe quel écran pour accéder à l écran d inventaire ...

Page 83: ...e passe admin pour interdire toute modification non autorisée sur votre Envoy Cette situation est rare puisque les routeurs grand public attribuent normalement à Envoy une adresse IP avec un réseau interne qui n est pas accessible au public Pour référence un espace d adresse IP privé interne se situe dans la gamme 192 168 x x 172 16 31 x x 10 x x x ou 169 254 x x Si vous ne savez pas à quel type d...

Page 84: ...uration du réseau s affiche Cet écran permet à un professionnel du photovoltaïque de sélectionner et de changer le profil de réseau en accord avec la localisation du site Cliquez ici pour sélectionner les Spécifications réglementaires propres au pays Cliquez ici pour sélectionner un profil réseau Cliquez ici pour sélectionner l option Configuration du réseau de l élément Cliquez sur le lien qui di...

Page 85: ...z sur Connexion Enlighten pour vous enregistrer f Localisez la fenêtre d autorisation de changement du profil de réseau Si vous ne voyez pas ce composant ajoutez le maintenant Cliquez sur Ajouter un composant Sélectionnez Jeton de changement du profil réseau g Entrez le numéro de série Envoy h Entrez le numéro d autorisation de l interface Envoy i Cliquez sur Obtenir un jeton j Copiez le jeton k C...

Page 86: ...ur confirmer que les micro onduleurs ont été définis avec un profil réseau mis à jour m Cliquez sur Voir le rapport du profil réseau L écran Rapport sur le profil réseau s affiche n Entrez les informations sur le site dans la fenêtre prévue à cet effet Cliquez ici pour Afficher le rapport sur le profil réseau Entrez les informations relatives au site ici ...

Page 87: ...navigateur pour envoyer ce rapport vers votre imprimante ou pour l enregistrer dans un fichier Après l impression ou l enregistrement du fichier vous pouvez l envoyer à l organisme local de réglementation pour confirmer les valeurs de déclenchement Le rapport ressemble à l exemple suivant ...

Page 88: ...on Voir la procédure suivante pour en savoir plus Une recherche contrôlée doit être exécutée uniquement si cela est nécessaire pour détecter des micro onduleurs nouveaux ou non détectés auparavant Vous pouvez utiliser cette fonctionnalité dans les cas où vous devez exécuter une recherche contrôlée d éléments pour un grand site ou pour un site avec des problèmes de communication Pour lancer une rec...

Page 89: ...pour indiquer zéro jour zéro heure et 20 minutes Si vous entrez une valeur dans ce champ l Envoy n exécutera la recherche que pendant la période spécifiée REMARQUE L option Durée prioritaire doit être utilisée seulement dans des cas exceptionnels par exemple sur de grands sites ou des sites qui ont des problèmes pour détecter les éléments lors d une recherche normale 5 Cliquez sur Lancer recherche...

Page 90: ...et vous pouvez définir le fuseau horaire local sur votre Envoy Pour définir le fuseau horaire sur Envoy 1 À partir du menu Admin choisissez Date heure fuseau horaire 2 Sous Réglage du fuseau horaire sélectionnez un fuseau horaire dans la liste déroulante Sélectionner fuseau horaire 3 Cliquez sur Mettre à jour fuseau horaire pour valider ...

Page 91: ...escription e micro onduleur signale que la fréquence provenant du fournisseur d électricité est soit trop faible soit trop élevée selon les normes régionales applicables La fréquence AC est la fréquence à laquelle la tension varie sur le réseau électrique Les événements de la fréquence hors plage sont généralement passagers et corrigés automatiquement par le fournisseur d électricité Lorsque le mi...

Page 92: ...seau yy nom des spécifications nationales Image flash incorrecte Image flash incorrecte Description Le micro onduleur ne produit pas d énergie suite à un problème logiciel Pour toute assistance contactez le support client d Enphase Energy Réinitialisation commandée Réinitialisation commandée Action recommandée Aucune action n est requise le fonctionnement normal reprend d un moment à l autre Descr...

Page 93: ...ible et l état persiste contactez votre installateur ou consultez le Guide de dépannage à l adresse http www enphase com support Tension DC trop faible Tension DC trop faible Action recommandée Il s agit généralement d un état normal pendant les heures de faible luminosité à l aube et au crépuscule Description Le micro onduleur signale que la tension d entrée DC provenant du module photovoltaïque ...

Page 94: ...joncteurs du ou des circuits d injection sont fermés Description Le micro onduleur ne détecte pas de tension à partir du fournisseur local d électricité Les micro onduleurs Enphase sont interactifs avec le fournisseur d électricité et nécessitent une connexion à ce dernier Si l état persiste Si les événements Réseau absent persistent contactez votre installateur ou consultez le Guide de dépannage ...

Page 95: ...ent pas immédiatement assurez vous que l Envoy est branché très proche de votre tableau de distribution Aussi si d autres appareils utilisent la même prise qu Envoy retirez les pour améliorer la force du signal de communication Si le système Envoy Enphase a récemment été déplacé ou si de nouveaux éléments ou appareils ont été ajoutés au circuit il est possible que le nouvel emplacement ne soit pas...

Page 96: ...es micro onduleurs Les micro onduleurs doivent être configurés avec le profil de réseau approprié avant qu ils ne produisent de l énergie Surchauffe Surchauffe Description Le micro onduleur est trop chaud et ne produit pas de l électricité Cet état très rare est généralement résolu sans intervention Aucune action n est requise à moins que la condition ne persiste S il persiste contactez le support...

Page 97: ...aire Démarrage Description L Envoy a été remis sous tension rebranché au secteur Aucune action n est requise Profil de réseau passager Profil de réseau passager Action recommandée Aucune action n est requise Cette condition disparaît lorsque le test de profil de réseau est terminé Description Le système est actuellement en mode test ...

Page 98: ...ion automatique autonégociation Alimentation électrique Prise secteur 230 VCA 50 Hz Consommation électrique 2 5 watts habituellement 7 watts maximum Données mécaniques Dimensions L x H x P 222 5 mm x 112 mm x 43 2 mm Poids 340g Plage de température ambiante 40 à 65 C Refroidissement Convexion naturelle aucun ventilateur Classification environnementale du boîtier Intérieur Caractéristiques Conditio...

Page 99: ...Copyright 2011 Enphase Energy 141 00014 Version 01 f r a n ç a i s 47 ...

Page 100: ...nergy com Contact Enphase Energy SAS Route de Thil ZI Ouest 01700 Saint Maurice de Beynost France Tél 33 0 4 37 98 29 56 Fax 33 0 4 37 98 38 15 Adresse électronique sas enphaseenergy com http www enphase com Informazioni di contatto Enphase Energy Srl Via Volta 98 20832 Desio MB Italia 33 0 4 37 98 29 56 33 0 4 37 98 38 15 e mail informazioni enphaseenergy com http www enphase com ...

Reviews: