

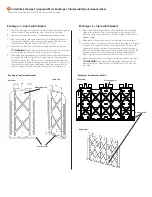

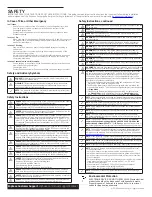

Encharge 3 wall mount bracket
Bracket shelf
Mounting holes
Front view
Angle view
Encharge 3 — single-width bracket
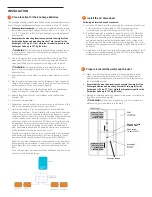
A ) Place the wall-mount bracket on the wall so that the mounting holes
in the middle of the bracket align with the center of the stud.
B ) Use a level to keep the bottom of the wall-mount bracket level.
C ) Use the screws (or masonry attachments if installing in masonry)
to attach the bracket using one screw and washer for each slot.
Tighten the top bracket screw to 2.0 Nm (17.7 lb-in).
D ) Verify that the wall-mount bracket is solidly attached to the wall.
*
WARNING!
Risk of injury and equipment damage. Do not mount
an Encharge 3 on a bracket that is not properly mounted.
E ) If installing additional batteries, install adjacent wall-mount brackets,
as needed. Be sure to align the mounting holes in the wall-mount
bracket to the center of the wall stud. You may install another row
of brackets above the one already installed. Maintain at least 15 cm
(six inches) vertical clearance between rows, and ensure that the
wall can support the structural load (weight) of the installation.
4
Install the Encharge 3 (single width) or Encharge 10 (triple width) wall mount bracket
Follow the instruction below for the bracket you are installing.
Encharge 10 — triple-width bracket
A ) Place the wall-mount bracket on the wall so that the mounting
holes in the middle of the bracket align with the center of the
stud, and the mounting holes on the left and right align with the
adjacent studs.
B ) Use a level to keep the bottom of the wall-mount bracket level.
C ) Use the screws (or masonry attachments if installing in masonry)
to attach the bracket using one screw and washer for each slot.
Use screws in each section of the mounting bracket to support
the three Encharge battery units. There is an array of slots so that
you can choose those that allow you to mount the bracket on
studs. Tighten the top bracket screw to 2.0 Nm (17.7 lb-in).
D ) Verify that the wall-mount bracket is solidly attached to the wall.
*
WARNING!
Risk of injury and equipment damage. Do not
mount Encharge 10 batteries on a bracket that is not properly
mounted.
Encharge 10 wall mount bracket
Bracket shelf
Mounting holes
Front view
Angle view


