background image


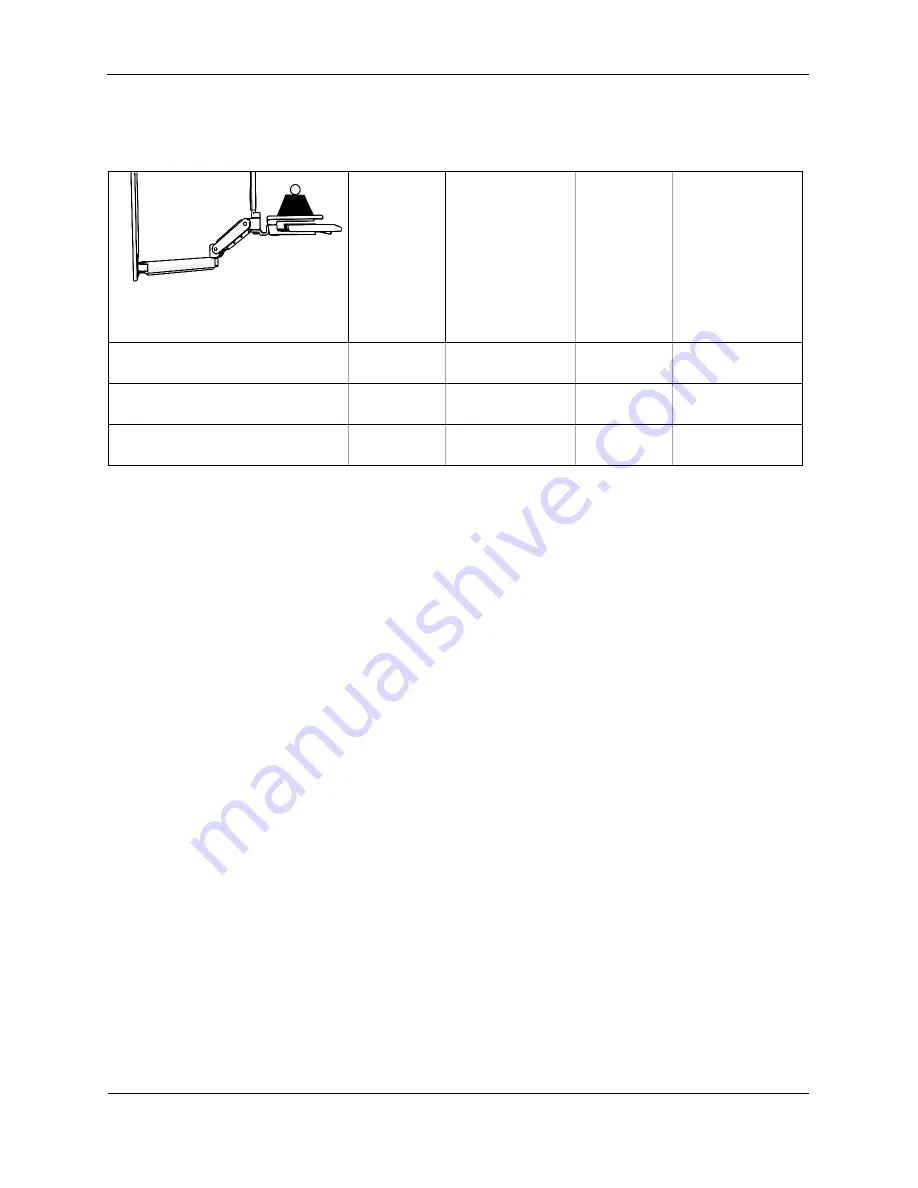
WEIGHT RESTRICTIONS 


SERVICE AND REPLACEMENT 

Warranty will be void if an attempt to service or replace any part of the Enovate Medical Wall Arm is 
made unless directed to do so through Enovate Medical approved documentation (i.e., this User Manual 
or other instructions). Only Enovate Medical or an Enovate-certified entity may service or replace the 
Enovate Medical Wall Arm components. If any component on the Enovate Medical Wall Arm is missing 
or damaged, the Wall Arm must not be used. Contact Enovate Medical immediately to request service. 

If the unit is not working properly, please contact Enovate Medical customer service via your computer 
or phone at the locations shown below.  
 

enovatemedical.com/support 
888.909.8930 toll free 


Riser Arm 
Part Number 

If desk type 
is: 

COMBINED 
WEIGHT* of 
equipment 
(monitor, AIO, 
printer, scanner, 
badge reader, 
etc.)  must not 
exceed: 

If Desk 
Type Is: 

COMBINED 
WEIGHT* of 
equipment 
(monitor, AIO, 
printer, scanner, 
badge reader, 
etc.)  must not 
exceed: 

AM0400163  
(700N light duty) 

Standard 

12 lbs. 

eDesk 

Not Available 

AM0400157  
(850N medium duty) 

Standard 

22 lbs. 

eDesk 

15 lbs. 

AM0400171  
(1050N heavy duty) 

Standard 

36 lbs. 

eDesk 

29 lbs. 

*Note: The weight of the monitor or AIO must NOT exceed 20 lbs. 

Summary of Contents for e997

Page 1: ...0 MANUAL 5 13 2019 IM004 04 Articulating Wall Arm e997 ...

Page 2: ... was designed to set a new standard in quality Enovate Medical s goal is to provide a wall arm that is ready for years of use and backed by a commitment of exemplary service and support Thank you for purchasing the Enovate Medical e997 Articulating Wall Arm ...

Page 3: ...3 TABLE OF CONTENTS WELCOME 2 TABLE OF CONTENTS 3 WARNINGS 4 COMPONENTS AND HARDWARE 6 MOUNTING 10 ASSEMBLY 14 CABLE MANAGEMENT 18 ADJUSTMENTS 23 ACCESSORIES 27 MOVEMENT 28 PARTS LIST 31 PARTS INDEX 32 ...

Page 4: ...ons could require specific anchorage and additional mounting screws Check with local authorities for codes in your area Other seismic states have similar regulations WARNING Because wall surfaces and construction methods and materials vary it is imperative that you consult with the appropriate engineering architectural or construction professional to ensure that your wall computing station is moun...

Page 5: ...e Medical immediately to request service If the unit is not working properly please contact Enovate Medical customer service via your computer or phone at the locations shown below enovatemedical com support 888 909 8930 toll free Riser Arm Part Number If desk type is COMBINED WEIGHT of equipment monitor AIO printer scanner badge reader etc must not exceed If Desk Type Is COMBINED WEIGHT of equipm...

Page 6: ...Cable Cover 32 AM0200092 42 AM0200110 48 AM0200109 Monitor Pole Assembly A0001216 Carriage and Knuckle Assembly AM0400012 Riser Arm and Cable Cover AM0400163 700N light duty AM0400157 850N medium duty AM0400171 1050N heavy duty AM0800006 cable cover Simple Keyboard Tray AM0400102 Mouse Holder Simple Tray HC0400305 Adhesive Mouse Pad AM0100050 Bottom of Wall Track VESA Mount ...

Page 7: ... cable cover Small CPU Bracket AM0400030 CPU Bracket Thumb Screw AM0100039 eDesk AM0400100 Large Locking CPU Enclosure Box HC0400392 Small Locking CPU Enclosure Box HC0400884 Note These optional CPU enclosures are mounted using the instructions for the small CPU bracket as shown on page 22 Cable Cover ...

Page 8: ...nolic Washer Part PH WSH 25 x 1 0 6 8x 1 4 x 1 Wide Flat Washer Part SWFW 1 4 x 1 00 TYPE A ZNC 1x 3 4 10 Nylock Jam Nut Part 9114772 4x 10 24 x 1 2 Button Head Screw Part BHSC 10 24 x 500 x 500 SS 4x M4 x 16mm PanHeadScrew Part CR PHMS M4 x 0 7 x 16 ZNC 4x 10x1 4 Standoff Part HC0100167 1x Pre installed on the riser arm Large Slotted Pan Head Screw Part AM0700047 1 length Cable Loom Part P0000119...

Page 9: ...EEDED Drill Level Pencil 1 2 Drive Torque Wrench 1 2 Drive 1 1 16 Socket Tape Measure Phillips Screwdriver Flat Head Screwdriver Stud Finder 1 8 Allen Wrench 4mm Allen Wrench 3 16 Allen Wrench 5 16 Allen Wrench ...

Page 10: ...m Part Number SNAPTOGGLE Quantity 48 Wall Track AM0200027 8 48 Wall Track Cable Cover AM0200109 42 Wall Track AM0200098 7 42 Wall Track Cable Cover AM0200110 32 Wall Track AM0200022 6 32 Wall Track Cable Cover AM0200092 X Y Z Max Keyboard Height Min Keyboard Height Mounting Height 46 32 36 5 42 28 32 5 38 24 28 5 Note Maximum vertical riser arm movement is 14 inches ...

Page 11: ...P 4 Using a level mark the hole locations for the appropriate track size using the dimensions to the left make note of the bottom of the track STEP 5 Place the track against the wall and secure with the Wide Flat Washer the Phenolic Washer and the Hex Head Self Tapping Metal Screw DO NOT DRILL PILOT HOLES STEP 6 Ensure track is level before fully tightening screws DO NOT OVER TIGHTEN SCREWS For st...

Page 12: ...t STEP 3 Locate the exact center line of the wall stud where the track will be mounted STEP 4 Drill a 3 16 pilot hole into each of the marked mounting locations Use the Wide Flat Washer Phenolic Washer and the Hex Head Wood Screw to secure the track to the wall STEP 5 Ensure walltrack islevel before fullytightening screws Description Part Number 1 4 14 x 4 Hex Head Wood Screw HX WLAG 25 x 4 0 ZNC ...

Page 13: ...ing Tighten with cross drive 1 4 20 x 2 1 2 screws SNAPTOGGLE STEP A Drill a 1 2 hole through center of metal stud Hold metal channel flat alongside plastic straps and slide channel through hole SNAPTOGGLE STEP B Hold ends of straps between thumb and forefinger and pull toward you until channel rests flush behind wall Slide plastic cap along straps with other hand until flange of cap is flush with...

Page 14: ...l track you may need to pull the carriage and knuckle assembly towards you while sliding level and secure screws tightly with 3 16 Allen wrench EXTENSION ARM Slide carriage and knuckle assembly with extension arm to bottom of wall track level and secure screws tightly with 3 16 Allen wrench ...

Page 15: ...rench with a 1 1 16 socket tighten until the eDesk has the appropriate amount of drag this will be approximately 23 foot pounds 1 2 foot pounds VERY IMPORTANT DO NOT EXCEED A TOTAL OF 25 FOOT POUNDS OVER TORQUING MAY RESULT IN DAMAGE TO THE MONITOR POLE STEM NOTE When tightening the 3 4 10 Nylock Jam Nut hold the monitor pole straight with the keyboard tray or eDesk This will ensure the monitor is...

Page 16: ...ser arm stem through plastic washer into carriage and knuckle assembly and secure with large slotted pan head screw EXTENSION ARM Insert riser arm stem through plastic washer into extension arm and secure with large slotted pan head screw ...

Page 17: ...screws with the quick mount slots in the monitor pole VESA plate Slide the monitor into place and tighten the screws STEP 3 Insert the additional two M4 x 16mm screws and standoffs into the bottom two holes of the monitor pole VESA plate to properly secure the monitor NOTE Use the 4 10 Standoffs if needed to compensate for the extra long monitor screws ADHESIVE MOUSE PAD Place the adhesive mouse p...

Page 18: ...lastic cover plate and the rubber cable management insert Run the mouse and keyboard cables through the keyboard notch letting them hang out of the bottom of the keyboard tray STEP 2 Replace the rubber cable management insert and plastic cover plate Keyboard Tray Table Notch ...

Page 19: ...yboard tray release tabs to the right and remove the keyboard tray STEP 3 Place adhesive pad with cable tie into place as shown STEP 4 Lay the mouse and keyboard cables into place and allow the ends of the cables to hang out of the bottom of the eDesk Cable Tie Adhesive Pad ...

Page 20: ...ded position 54 during the cable management installation This will allow adequate cable length to ensure that the keyboard functions correctly STEP 6 Replace the keyboard tray and place the mouse and keyboard into place STEP 7 Run the mouse and keyboard cables through the keyboard notch and replace the rubber keyboard cable management insert STEP 8 Replace the plastic cover plate Keyboard Tray Tab...

Page 21: ...able covers into place Install cable loom to the cables that are exposed between the riser and the extension arm STEP 2 Run cables along extension arm if applicable and up wall track Snap cable cover into place STEP 3 Install wall track cable cover place asinglesideintoplace then starting atone end flexcover inward until opposite side snaps into place ...

Page 22: ...PU housing options Insert CPU bracket into wall track Top of wall track install Bottom of wall track install Remove CPU bracket mount and replace as shown STEP 5 Place CPU into CPU Bracket adjust front plate until it securely holds the CPU then tighten thumb screws STEP 6 Secure top bottom plate The placement of this plate is determined by the location of the CPU bracket CPU ...

Page 23: ...NT Adjustments should be made only after all peripherals are installed STEP 1 Ensure riser arm is parallel to the floor STEP 2 Using 5 16 Allen wrench adjust screw clockwise or counterclockwise CLOCKWISE TIGHTEN TENSION COUNTERCLOCKWISE LOOSEN TENSION ...

Page 24: ...to access set screws STEP 2 Using a 1 8 Allen wrench loosen set screw 1 approximately 2 3 turns This will unlock the adjustment pin STEP 3 Using a 4mm Allen wrench turn set screw 2 to the right or left to level When level raise the riser arm to its highest position STEP 4 With the riser arm in its highest position tighten set screw 1 ...

Page 25: ...25 NOTE Do not over tighten set screws Set Screw 1 1 8 Set Screw 2 4mm Wall Keyboard Tray ...

Page 26: ... Standard Keyboard Tray eDesk to stored position STEP 2 Remove plastic cover plate STEP 3 Locate the set screw STEP 4 Using a 1 8 Allen wrench turn the set screw clockwise to the desired position STEP 5 Replace plastic cover plate ...

Page 27: ...CCESSORIES MOUNTING MOUSE HOLDER STANDARD TRAY STEP 1 Peel backing from two sided tape on back of mouse holder STEP 2 Raise the standard keyboard tray and attach the adhesive mouse holder see drawing below ...

Page 28: ...OARD TILT MONITOR TILT Note To maintain monitor tilt action the weight of the mounted monitor must not exceed 12 lbs Monitors weighing between 12 lbs and 20 lbs maximum weight must be mounted in a fixed position with no tilt option ...

Page 29: ...29 RANGE OF MOVEMENT WITH EXTENSION ARM ...

Page 30: ...30 RANGE OF MOVEMENT NO EXTENSION ARM ...

Page 31: ...d Knuckle Assembly AM0400012 Riser Arm 700N light duty AM0400163 850N medium duty AM0400157 1050N heavy duty AM0400171 Riser Arm Cable Cover AM0800006 Screws Button Head Screw 10 24 x 1 2 BHSC 10 24 x 500 x 500 SS CPU Bracket Thumb Screw AM0100039 Cross Drive Metal Screw 1 4 20 x 2 1 2 CR PHMS 1 4 20 x 2 5 x 2 5 ZNC Hex Head Self Tapping Metal Screw 1 4 14 x 2 1 2 HX WHDS 25 14 x 2 50 ZNC Hex Head...

Page 32: ...Pan Head Screw 8 16 Locking CPU Enclosure Box 7 Monitor Pole Assembly 6 15 17 21 24 28 Mouse Holder 6 27 Nylock Jam Nut 8 15 Pan Head Screw M4 x 16mm 8 17 Phenolic Washer 8 11 12 Carriage and Kuckle Assembly 6 14 16 Plastic Washer 8 15 16 Riser Arm 5 6 15 16 21 23 24 25 SNAPTOGGLE 8 10 13 Standoff 8 17 Thumb Screw 7 22 Wall Track 6 10 11 12 13 14 21 22 Wall Track Cable Cover 6 10 21 Wall Track End...

Reviews: