®
Engino Robotics philosophy
Five programming methods
Parallel programming
®
The Engino Robotics Platform (ERP) is specially designed for Primary and Secondary school children, taking into
account the latest technological trends and the most modern pedagogical principles of learning. Intellectual
development is approached in a spiral way, helping students to reconstruct their ideas formed based on their
existing knowledge merged with new information, acquiring higher order concepts and taking it to the next level.
The innovative ERP controller in conjunction with the patent pending ERP software are ideal for ICT teaching,
allowing various levels of robotic programming to be implemented in a fun and challenging way.
®
Two innovative ideas make the patent pending Engino Robotics Platform a unique teaching tool! Firstly, the ERP
allows
five interconnected ways of programming
, so the users can choose the method that suits them best
according to their age and experience. Each method is described briefly below and in more details with
programming examples in the following pages. Secondly,
parallel programming
(doing tasks simultaneously) has
never been easier with the introduction of the
After/With Previous
variable in every block of the ERP software.
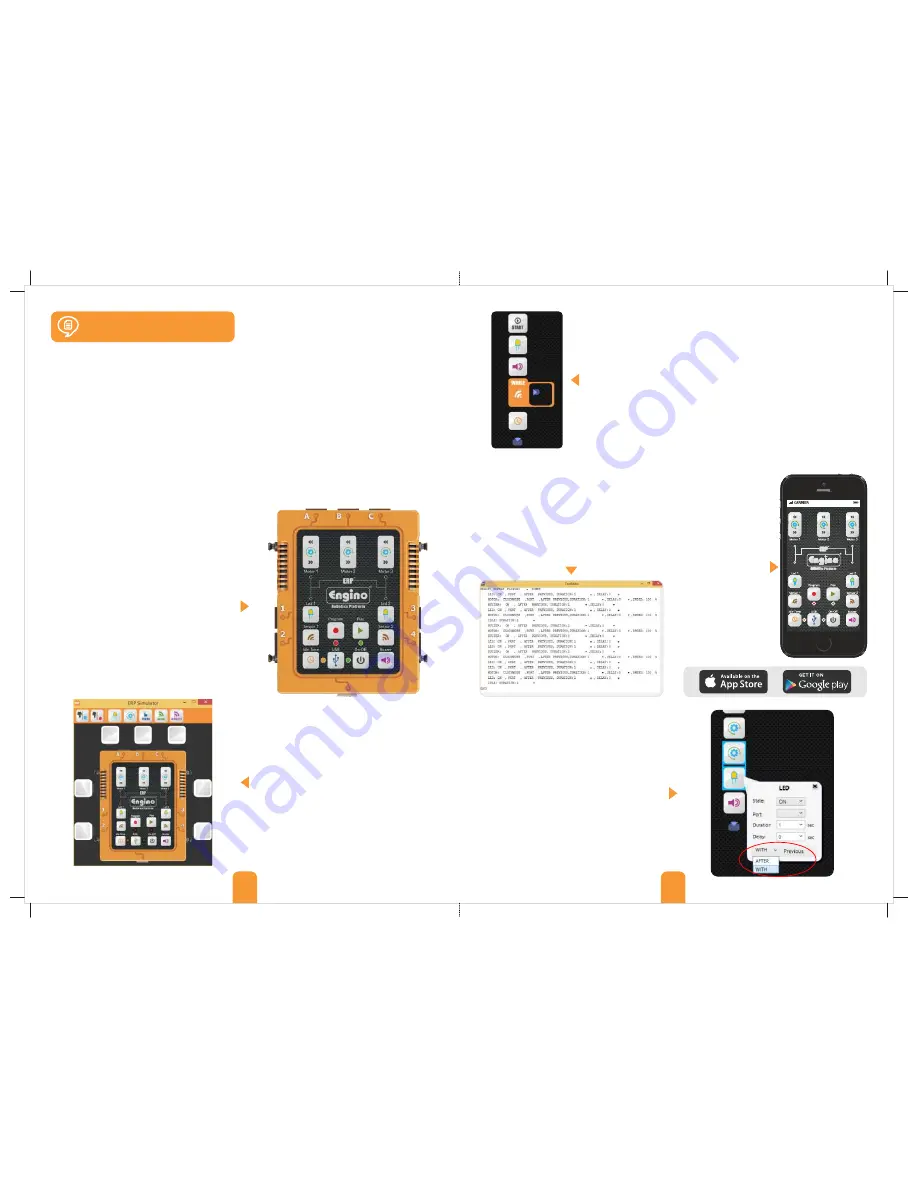
The ERP Simulator is a special window within the ERP
software that simulates the functions of the actual
controller, though the buttons in this case are digital
instead of physical. Once the computer is connected
with the ERP (through USB), the user may record a
program using the “Program” button and get a visible
feedback from the robot as before. The great
advantage of this method is that while the program is
being recorded, the commands are transferred into
the other two windows of the software: in the Flow
Diagram, as visual blocks and in the TextEditor, as lines
of text of a special pseudolanguage (not actual
programming language).
Most advanced programming languages based on text
and visual representation of commands may become
difficult as the program becomes bigger and more
complex. The Text Editor is using a “pseudolanguage”
created specifically for the ERP. It has many familiar
terms of programming languages (such as START, END,
IF etc). It is the ideal tool for introducing advanced
programming, as it allows the user to have a quick
review of the program and edit the variables easily.
Complying with modern
technological
advancements, the ERP
can also be controlled
with a smart device
(mobile or tablet) that
runs on either Android
or iOs operating system.
The user may download
the
EnginoRobot
BT
app,
free of charge,
available on Google Play
or Apple Store. The app
simulates the actual
controller and can be
used wirelessly, once
the ERP is connected
with the smart device
over Bluetooth.
15
16
Manual ERP programming
ERP Simulator
Flow diagram
Text Editor
Smart device application
The ERP device is designed in such a way that it allows
manual program recording through simple button
press. The user can easily push the “Program” button
in order to record any desired sequence of commands,
one by one or simultaneously, which is then saved on
the device and can be reviewed after by pushing the
“Play” button. This first level of programming is about
interacting physically with the learning material, using
a method (pushing buttons) that all children are
familiar with. The programming procedure provides
immediate visible feedback, enabling the user to
adjust the time and order of the commands through
unlimited number of attempts.
Once a program is created manually on the controller, it is impossible to edit
through the controller. The user must record it again in order to adjust the
commands. Also, there is no way to add advanced programming features like “If”
statements and “While” loops. This can only be done through the “Flow Diagram”,
the main programming feature of the ERP software. In this window, the user can
program complex commands and take full advantage of the robot’s capabilities and
®
sensors. The Engino robotics is designed for the gradual transition from physical
manual programming to abstract software control, by applying an innovative
reverse engineering method!
The “
receive
” button uploads the manual program
from the device into the PC in the form of pictorial flow diagram and text! This can
be edited and fine tuned as needed. Then, the user can click the “
send
” button in
order to import the program back to the device for testing.
The second main innovation of Engino in educational
robotics is the function of parallel programming. The
®
Engino Robotics Platform software uses
visual
programming
(blocks with symbols instead of text),
which contain an innovative
After/With Previous
variable that provides the parallel feature. The user
can choose between
after previous
if he/she wants
the command to be executed when the previous
command is finished or
with previous
if he/she wants
the command to be executed at the same time. The
blocks that work in parallel are joined together with a
coloured line. This reduces the complexity of
programming in a great extend, as the order of
commands become more clear and easy to formulate.
ERP Manual


