background image


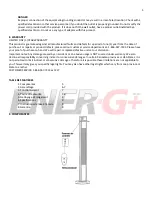
-Clean the battery contacts and also those of the remote prior to battery installation.  


-Make sure the batteries are installed correctly with regard to polarity (+ and -).  


-Remove the batteries from the remote if not used for an extended period of time.  


-Remove used batteries promptly. 

 
3. OPERATION


Should the Energ+ infrared heater fall, a hidden switch will automatically switch it off: correct operation of the switch is 
conditioned by the evenness of the surface the heater is placed on. Once the heater is back up on a plane surface it will 
be ready to work again. 
 
You can activate the unit by using the provided remote control or by pressing the activation button on the unit. 

 
Remote control 

Press the remote control On button once to operate the heater on low (500 W) heat.


Press the remote control On button twice to operate the heater on medium (1000 W) heat. 
Press the remote control On button thrice for maximum (1500 W) heat.  
Press the remote control Off button shut off the heat and put the heater on stand-by. 
 
Each press of the On button will cycle the heater onto the medium heat, high heat and then back to the low heat. 


IMPORTANT: To operate properly, the remote must be pointed toward the remote control sensor on top of  the 
heater.


Heater Activation from the Control Panel 

Press the heat button once to operate the heater on low (500 W) heat. 
Press the heat button twice to operate the heater on medium (1000 W) heat. 
Press the heat button thrice to operate the heater on maximum (1500 W) heat. 
Press on the Off button to shut off the heat and put the heater on stand-by. 
 

4. FOR YOUR SAFETY 
IMPORTANT INSTRUCTIONS


1. ONLY USE THE UNIT ON A SECURED AND SOLID FLAT SURFACE. 
2. This heater is not intended for use in bathrooms, laundry areas or similar indoor locations where there may be 
moisture. Never place heater where it may fall into a pool, bathtub or other water receptacle. 
3. This unit is intended for household use only. DO NOT use the unit in such areas as construction sites, greenhouses, 
barns or stables or any place that has flammable materials. 
4. DO NOT use the unit in an unventilated area. 
5. A heater has hot, arcing and sparking parts inside. DO NOT use it in areas where gasoline, paint or flammable liquids 
are used or stored. 
6. DO NOT move the unit when it is still connected to an electrical outlet, and always wait for the unit to cool down 
before moving, cleaning and storing it. 
7. DO NOT touch the heater when in use. Please wait at least 10 minutes after it has been turned off before touching it. 
8. Extreme caution is necessary when any heater is used near a child or someone physically disabled. 
9. DO NOT LEAVE THE UNIT UNATTENDED WHEN IN OPERATION. 
10. This heater is hot when in use. To avoid burns, do not let bare skin touch hot surfaces. Use handles (not provided) 
when moving this heater. Keep combustible materials such as furniture, pillows, bedding, papers, clothes and curtains at 
least 3’ (0.9 m) from the front of the heater. 
11. DO NOT cover the unit with any type of cloth while in operation or a short time after turning the unit off. 
12. DO NOT wrap the power cord around the unit. 
13. DO NOT insert or allow foreign objects to enter any ventilation or exhaust opening of the unit as this may cause 
electric shock, fire or damage to the heater. 

Summary of Contents for HEA-215110

Page 1: ...Instruction Manual Guide d utilisation ...

Page 2: ...ur safety 3 4 5 Cleaning and storage 4 6 Specifications 4 7 Grounding instructions 4 5 8 Warranty 5 Français 5 1 COMPONENTS 1 Please empty the packing box thoroughly and make sure that there are no missing parts 2 DO NOT PLUG THE UNIT IN UNTIL THE UNIT IS COMPLETELY ASSEMBLED MAKE SURE THERE IS NO DAMAGE TO THE UNIT AND POWER CORD IF THERE IS ANY DAMAGE OR IF THERE ARE MISSING PARTS PLEASE CONTACT...

Page 3: ...ht 3 Pull on the AC power cord and insert it into the grooves on the base 2 Put the square washer 5 on the base and then fix it with the two M4 35 screws 5 to secure the AC power cord onto the base 2 with a Phillips screwdriver 4 Turn the heater right side up REMEMBER Portable electric heaters are designed for spot heating or as a supplementary heat source They are not intended to be the main sour...

Page 4: ...the heat and put the heater on stand by 4 FOR YOUR SAFETY IMPORTANT INSTRUCTIONS 1 ONLY USE THE UNIT ON A SECURED AND SOLID FLAT SURFACE 2 This heater is not intended for use in bathrooms laundry areas or similar indoor locations where there may be moisture Never place heater where it may fall into a pool bathtub or other water receptacle 3 This unit is intended for household use only DO NOT use t...

Page 5: ...adio frequency energy and if not installed and used in accordance with the instructions may cause harmful interference to radio communications However there is no guarantee that interference will not occur in a particular installation If this equipment does cause harmful interference to radio or television reception which can be determined by turning the equipment off and on the user is encouraged...

Page 6: ...t 1 866 967 7333 Please have your proof of purchase on hand We will repair or replace defective units at our discretion Important notes Any damage caused by an accident or an abusive usage is NOT covered under warranty We also decline all responsibility concerning indirect or consecutive damages In certain Canadian provinces or USA States it is not permitted to limit indirect or consecutive damage...

Page 7: ...maintien Ayez un tournevis Phillips sous la main non fourni 1 Mettez le radiateur à l envers et placez le sur une surface non marquante Insérez le cordon d alimentation du radiateur à travers le couvercle de la base 3 et ensuite à travers la base 2 2 Insérez le couvercle de la base 3 sur le radiateur Insérez la base 2 dans le couvercle de la base Placez les deux rondelles rondes 6 sur la base 2 In...

Page 8: ...ettre en marche ce radiateur avec la télécommande fournie ou en appuyant sur le bouton de mise en marche situé sur le radiateur Télécommande Appuyez sur le bouton On mise en marche de la télécommande pour mettre en marche le radiateur à puissance faible 500 W Appuyez sur le bouton On mise en marche une deuxième fois de la télécommande pour mettre en marche le radiateur à puissance moyenne 1000 W A...

Page 9: ... COMME RADIATEUR POUR UNE PIÈCE 17 Ne placez pas le cordon d alimentation sous une moquette Ne le recouvrez pas de carpettes de chemins de table ou équivalent Éloignez le cordon des zones de circulation où il pourrait faire trébucher quelqu un 18 Pour débrancher le radiateur tournez l interrupteur en position d arrêt puis débranchez l appareil 19 Pour éviter tout risque d incendie NE BLOQUEZ en au...

Page 10: ...e la prise est bien mise à la terre Ne modifiez pas le cordon électrique fourni avec l appareil S il ne convient pas à la prise murale faites installer une prise appropriée par un électricien qualifié N utilisez pas n importe quel type d adaptateur avec cet appareil 8 GARANTIE GARANTIE LIMITÉE DE UN 1 AN Ce produit est garanti contre tout vice de matières et de fabrication pour une durée de un 1 a...

Reviews: