


Croma24 Getting Started for Macintosh
6
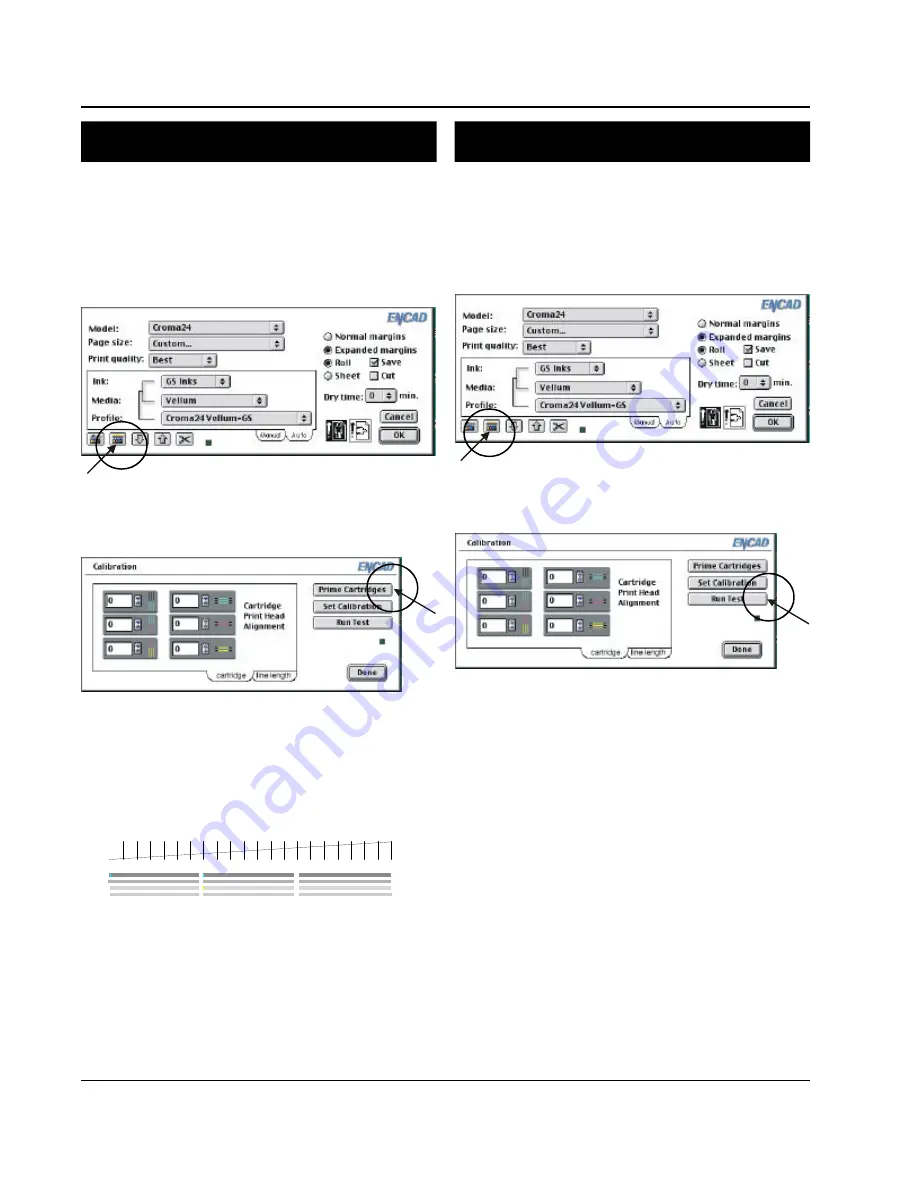
9. Aligning cartridges
9. Aligning cartridges
Cartridge alignment is necessary for best quality
output. Align the cartridges each time you install a
new cartridge.
1.
Select Page Setup from the File menu and click
the Calibration button.
2.
Click the Cartridge tab, then click the Run Test
button.
Three test patterns will print. The first two test
patterns are for horizontal calibration and vertical
calibration. Color Horizontal Head-To-Head
Calibration horizontally aligns the cartridges.
Color Vertical Head-To-Head Calibration verti-
cally aligns the cartridges.
The last test pattern shows how the cartridges
are currently aligned. Current Heads (Y, M, C)
shows yellow, magenta, and cyan "+"s which
represent the horizontal and vertical alignment
between the cartridges.
8. Priming
8. Priming
Next, you will want to prime the cartridges. Priming
cartridges clears the inkjets and helps to make sure
all jets are firing properly. Make sure there is paper
loaded in the printer.
1.
Select Page Setup from the File menu, click on
the Calibration button.
2.
Then select the Cartridge tab and click the Prime
Cartridges button.
3.
A test pattern prints with bands of black, cyan,
magenta, and yellow. The color bands should be
smooth, without dark streaks or white lines. The
sloping lines should not look fuzzy or contain
gaps. If this is not achieved, prime the cartridges
again by clicking the Prime Cartridges button.
4
3
2
1
4.
To cut, click the Cut button on the front of the
printer.


